Overview
Quick Start
This is a very quick, step-by-step tutorial of deployments with Gimlet.
You'll need a git repository in GitHub to be able to complete this quick start guide. Fork this repository if you don't have one available.
Step 1: Log In and Import Repositories
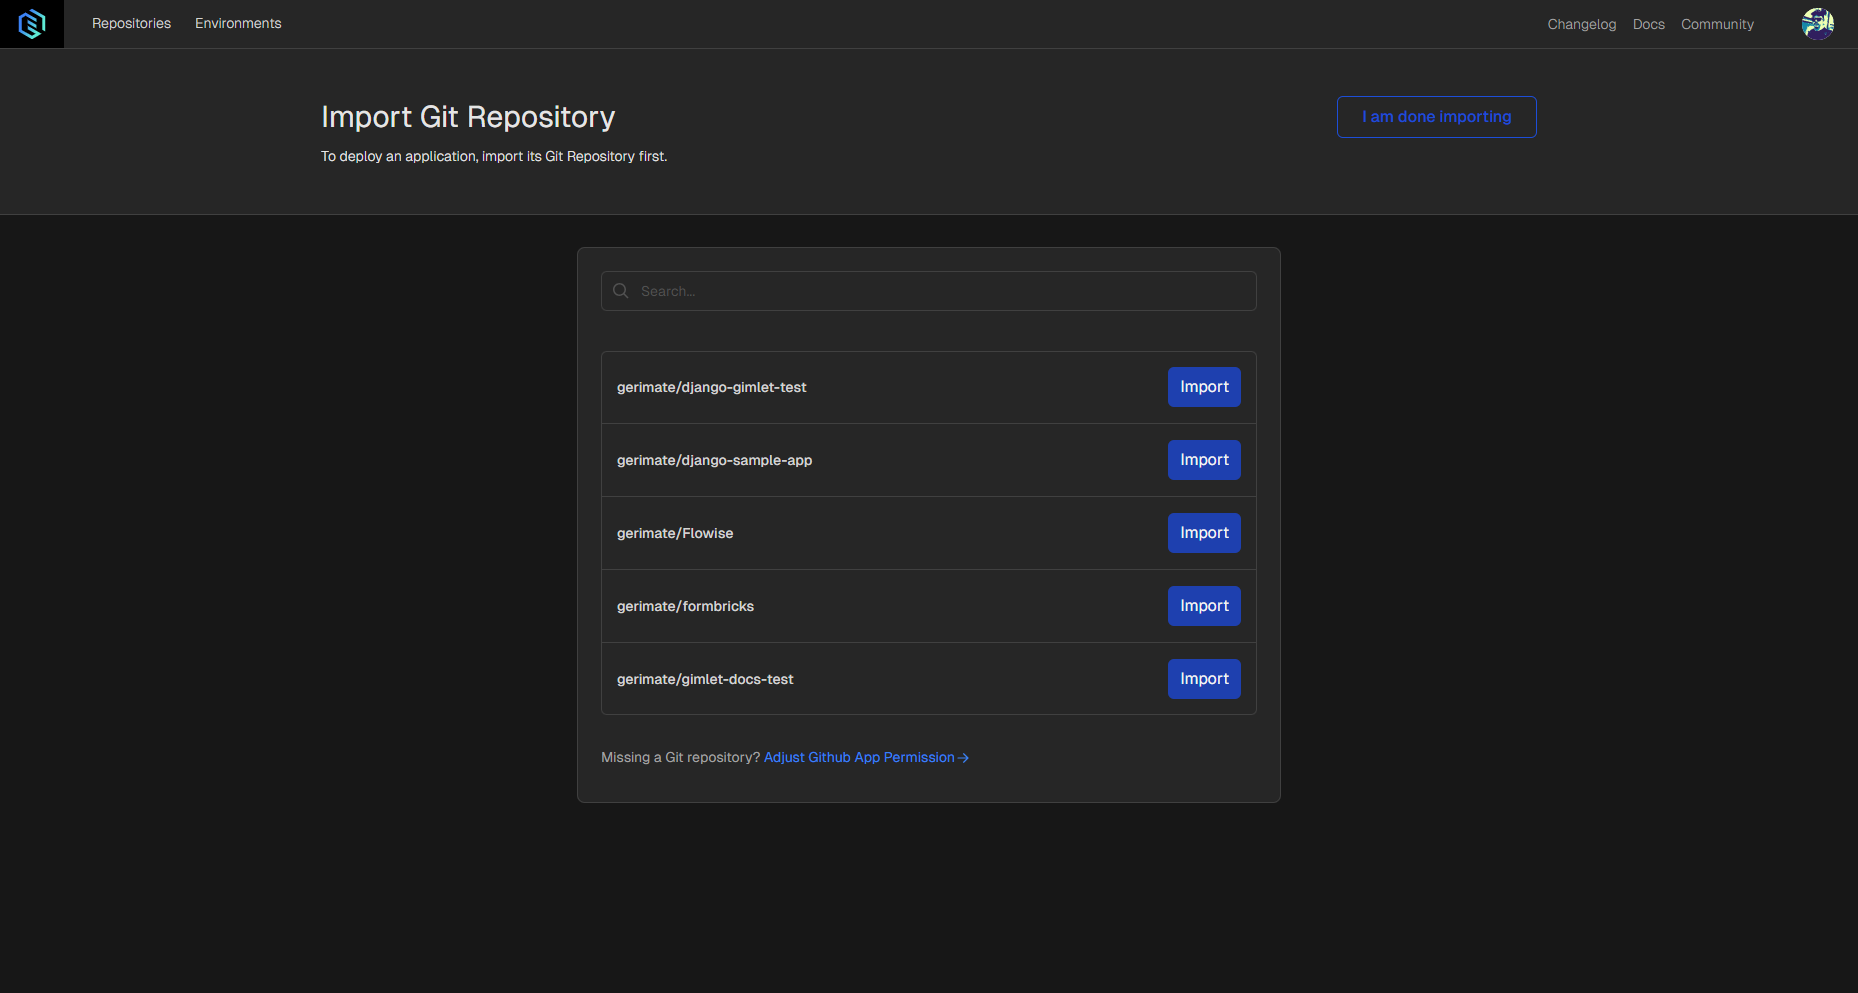
Sign in using your GitHub or GitLab account. After connecting your GitHub account to Gimlet, you'll see the repositories you have access to. If you don't find a certain repository on top of the list, use the search bar.
You can import repositories by clicking the Import button next to them. Save imported repos by clicking the I am done importing button.
Step 2: Select The Repo
Pick the repository you’d like to deploy. You can do this by clicking the repository's card. Click the New Deployment button to move forward.
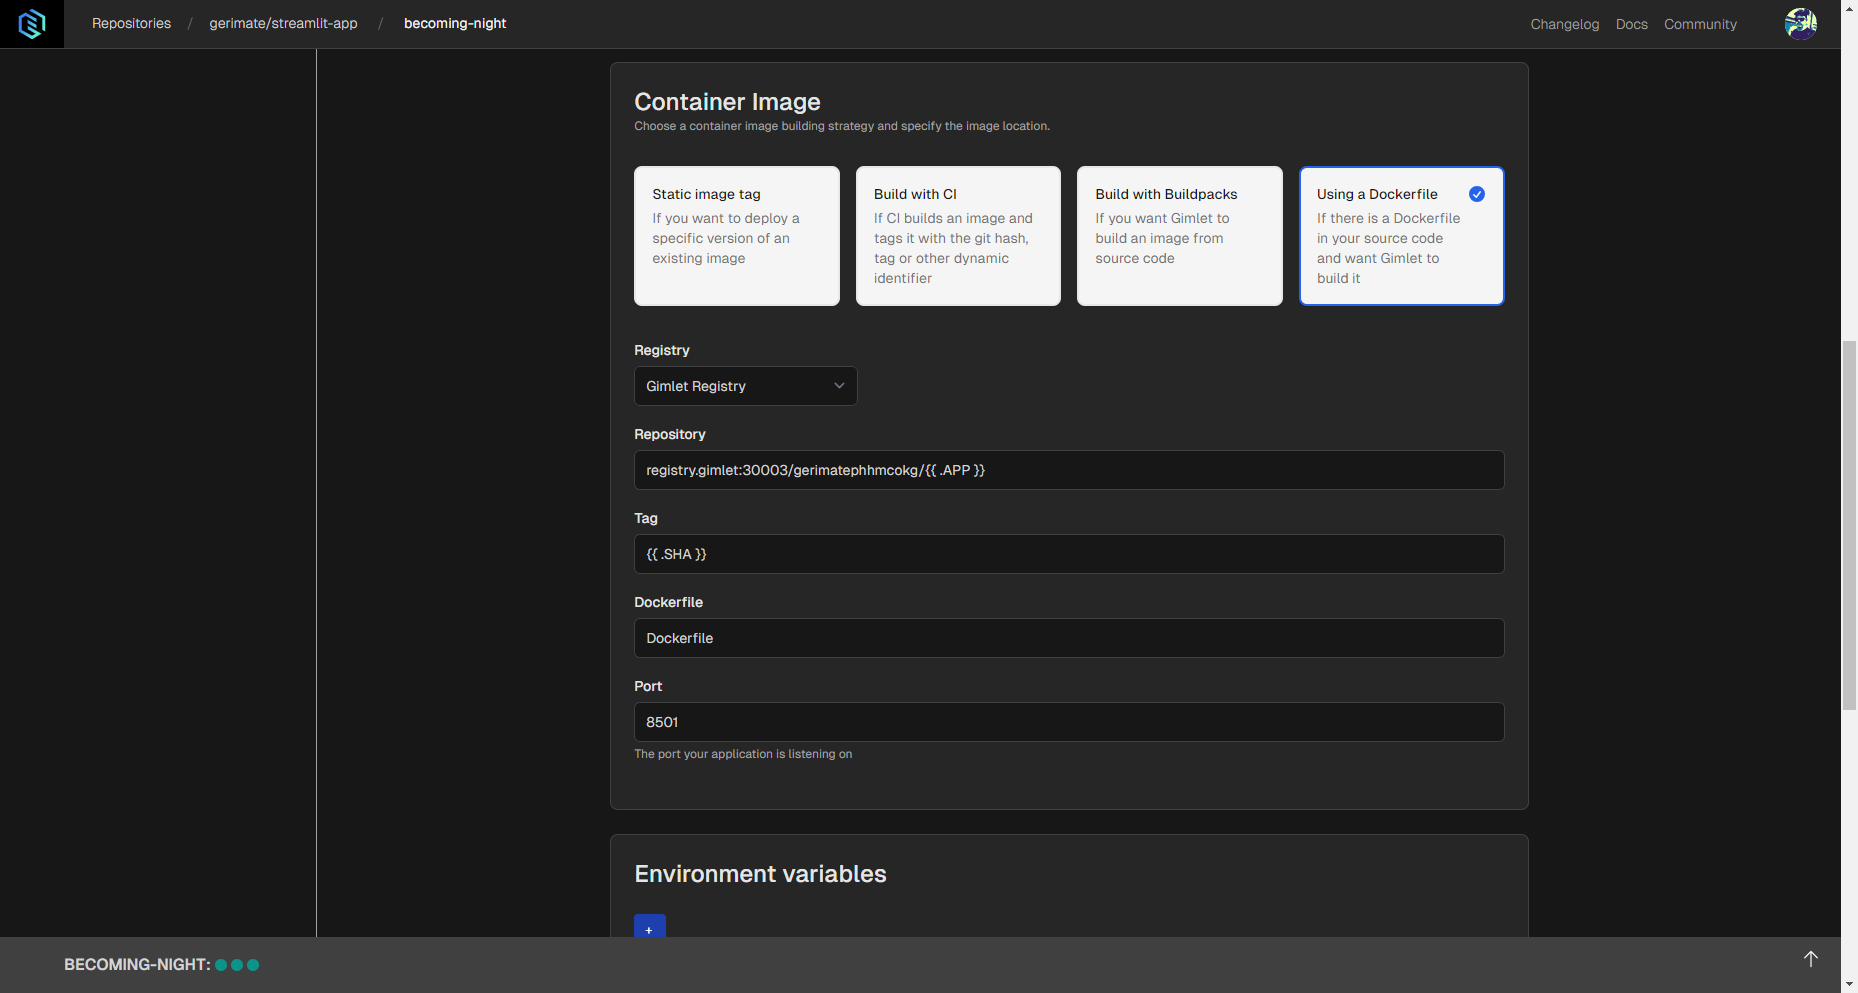
Step 3: Choose Deployment Method
There are 4 ways to build images. The easiest way is to use a Dockerfile to deploy the application. This requires a Dockerfile located in your root folder, otherwise you need to enter the path to the Dockerfile in your repository.
This tutorial demonstrates Dockerfile deployment.
Make sure that the image settings look similar the ones below. This is the screenshot of the Streamlit application linked above, so these settings apply to a Dockerfile suitable for deployments of Streamlit apps.
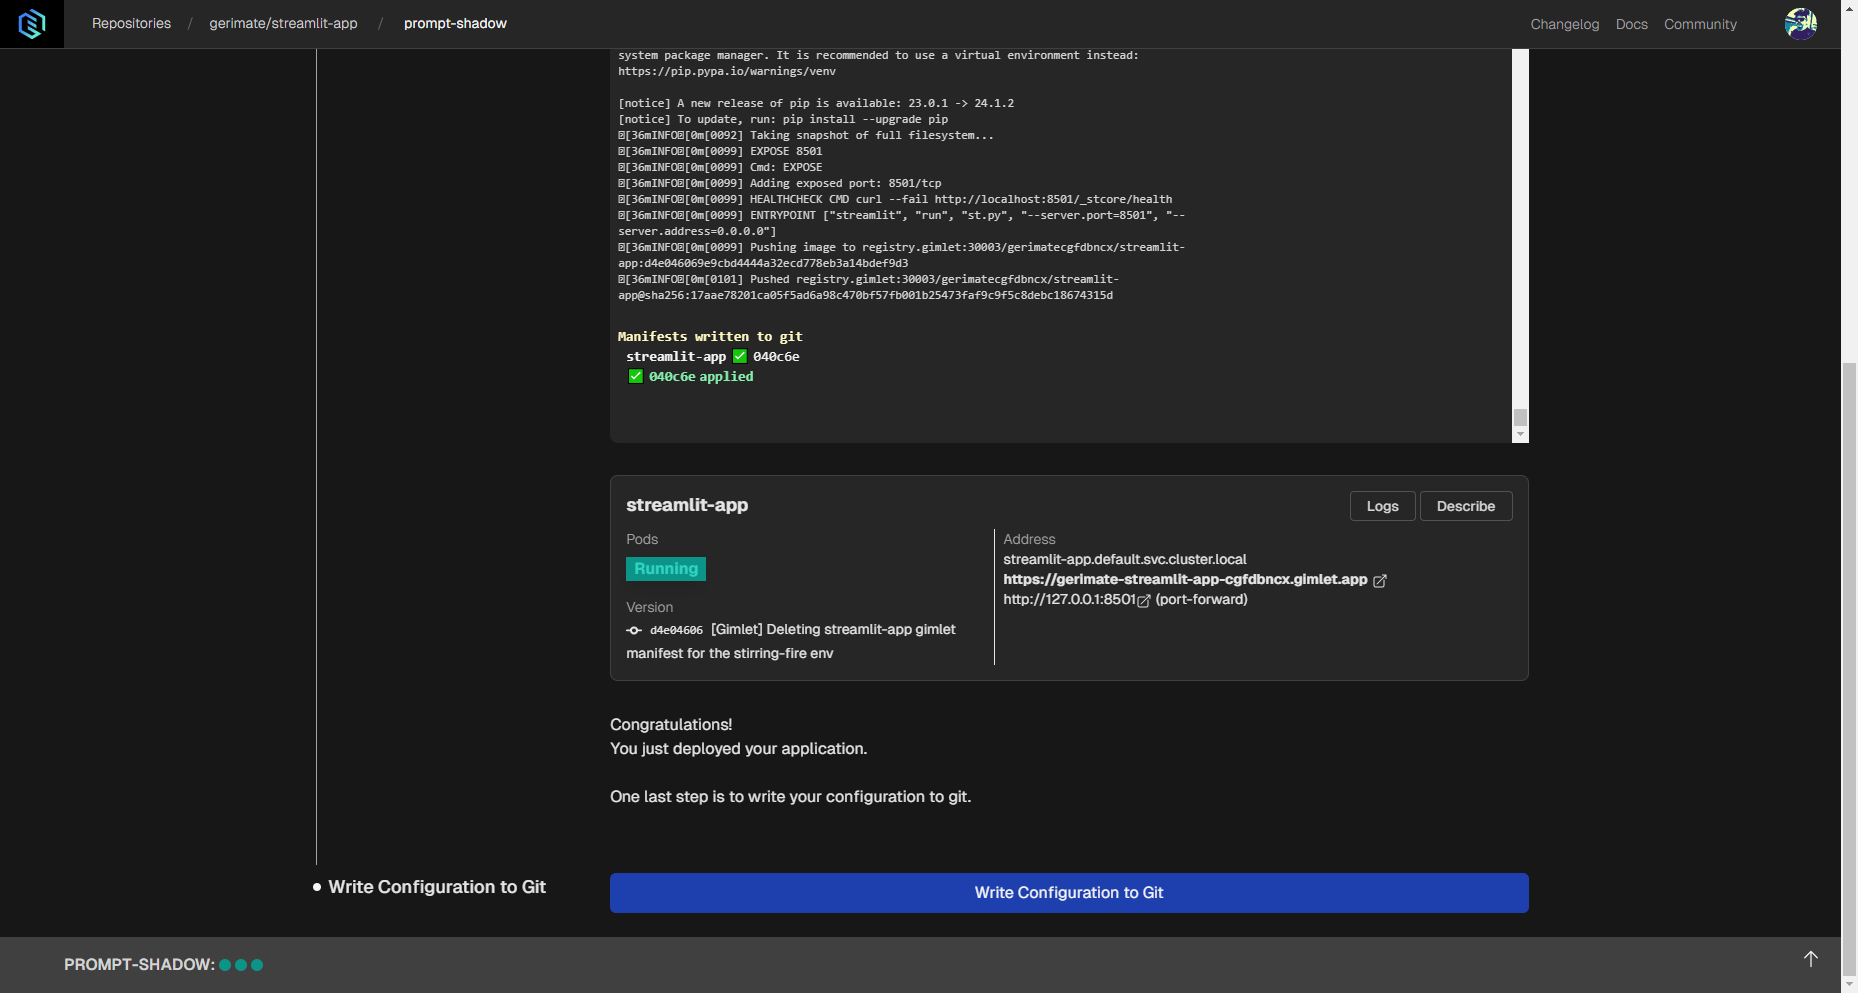
Step 4: Deploy The Application
A Deploy button will appear under the settings. Click and wait for deployment status to become Running. A link will appear next to the status.
Step 5: Check Your App in Browser
After successful deployment, you should be able to check out the deployed application in your browser.
If everything is working fine, click the Write Configuration in Git button.