AI Deployment Tutorials
Deployments of Streamlit Applications
You can learn from this tutorial how to deploy Streamlit applications with Gimlet.
Requirements
- A Streamlit app to deploy. If you don't have one, fork this repository to be able to try this tutorial.
Step 1: Getting Started with Gimlet
Log in to Gimlet with your GitHub or GitLab account. After successful log in, GitHub repositories available to you should be available. If you can't find the repository of your Streamlit application, you can use the search bar to find it.
To add the repository, click Import next to it, then save the repository by clicking I am done importing.
Step 2: Deployment Settings
Navigate to deployment settings by clicking the repository's card, then the New deployment button.
Select the Web Application Template, and then the Using a Dockerfile container image option. If you don't have a Dockerfile, you can use the example below. If you don't have a Streamlit repository, you can fork this one here, which also contains the Dockerfile you can take a look at below.
# app/Dockerfile
FROM python:3.9-slim

WORKDIR /app

RUN apt-get update && apt-get install -y \
    build-essential \
    curl \
    software-properties-common \
    git \
    && rm -rf /var/lib/apt/lists/*

COPY . .

RUN pip3 install -r requirements.txt

EXPOSE 8501

HEALTHCHECK CMD curl --fail http://localhost:8501/_stcore/health

ENTRYPOINT ["streamlit", "run", "st.py", "--server.port=8501", "--server.address=0.0.0.0"]
Back to the Gimlet tab, set Gimlet Registry for the Registry option, and enter 8501 for the Port value to expose it.
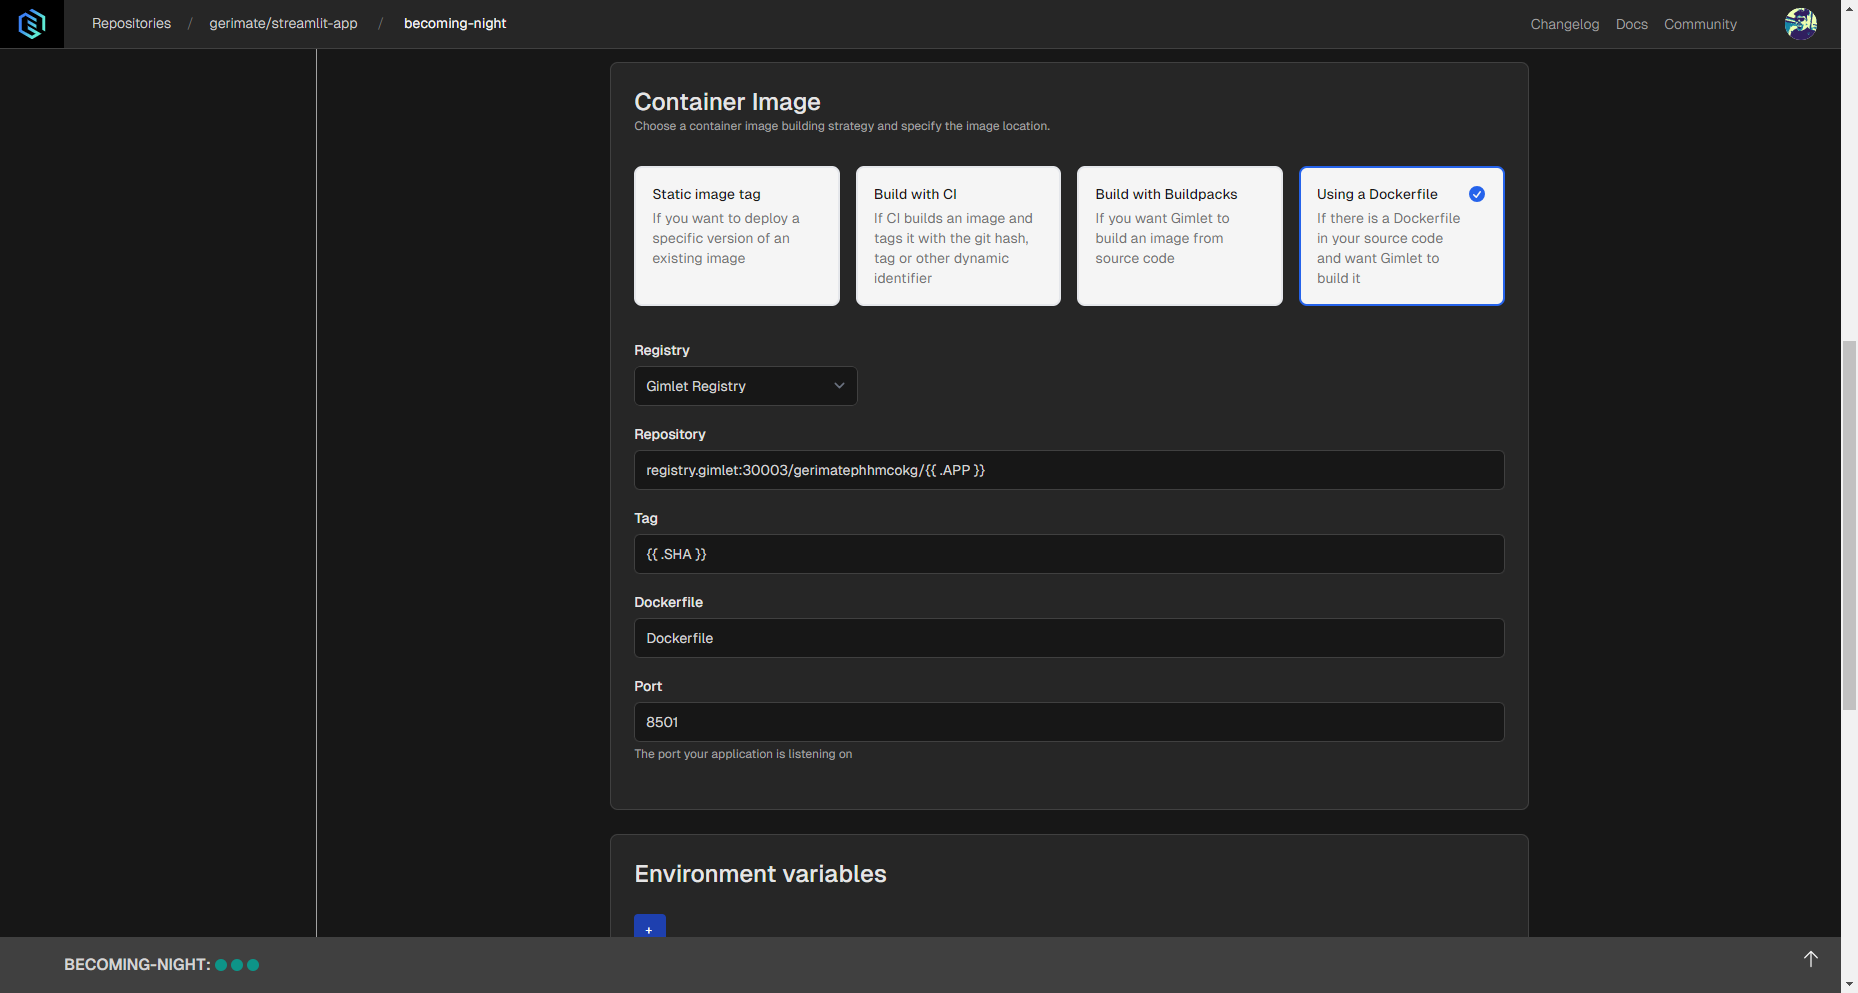
Before deployment, make sure you have the correct domain, but Gimlet generates one for you in case you don't have one set up.
Step 3: Deploy
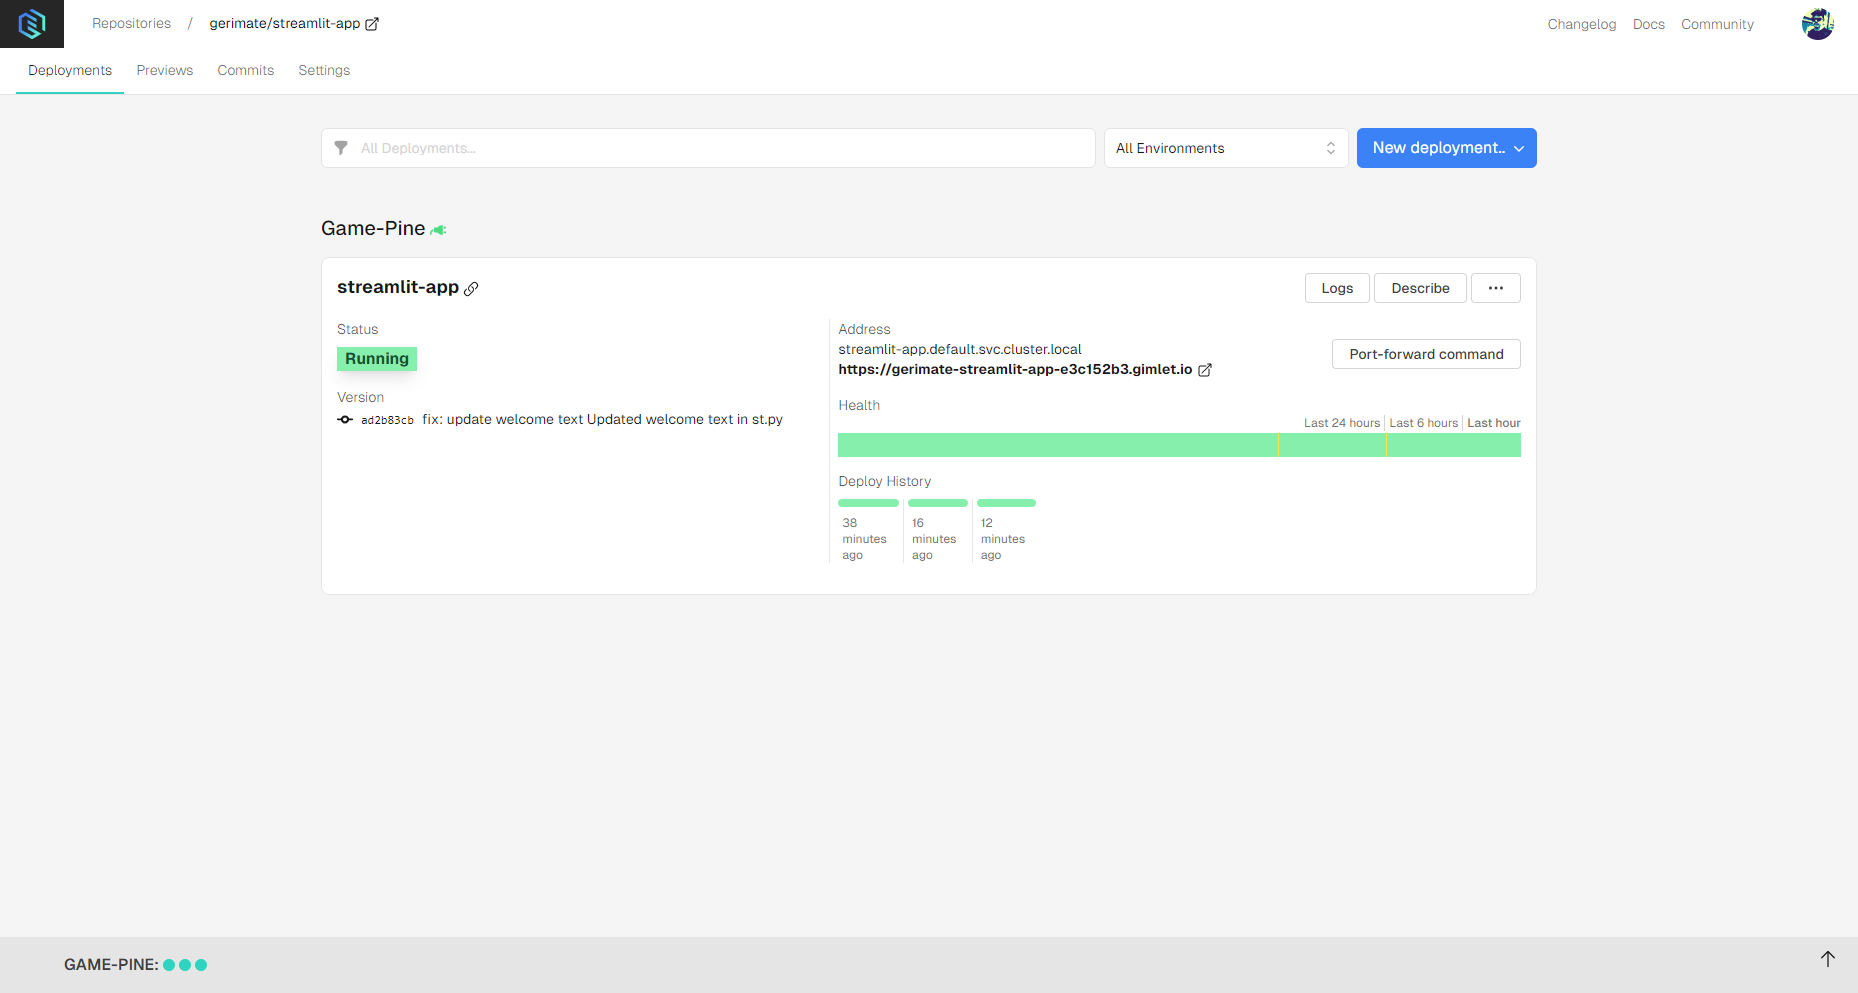
When you made all the changes to the settings, you can click the Deploy button. Deployment logs should appear right away, and when the process is done and container status turns Running, you should see confetti raining in your browser tab.
In the case of Streamlit, deployment should take a few minutes since it contains a lot of dependencies that are needed to be built.
Step 4: Check Out Your Streamlit App
You can take a look at the application in your browser by clicking the link that appears next to container status.
Use Cases
When you work with Streamlit, there are multiple advantages of using Gimlet:
- Remote GPU Access: Use Nvidia GPUs in the cloud from your local setup.
- File Syncing: Keep source code consistent across your team and developer environments.
- Deployment and Previewing: Easily share your Streamlit app with your teammates using social login and HTTPS connection.