Frontend Tutorials
Deployments of Next.js Frontends
You can learn from this tutorial how to deploy a Next.js application with Gimlet.
Requirements
- A Next.js app to deploy. If you don't have a Next.js application, fork this repository to be able to try this tutorial.
Step 1: Getting Started with Gimlet
Log in to Gimlet by connecting your GitHub or GitLab. The repositories available to you will be listed after successful connection.
If you can't find the repository having your Next.js application, you can use the search bar to find it.
Click the Import button next to it to add it to Gimlet, and click the I am done importing button to save the added repo. You can import multiple repositories.
Step 2: Deployment Settings of a Next.js Application
Navigate to deployment settings by clicking the card of the repository. Click New Deployment.
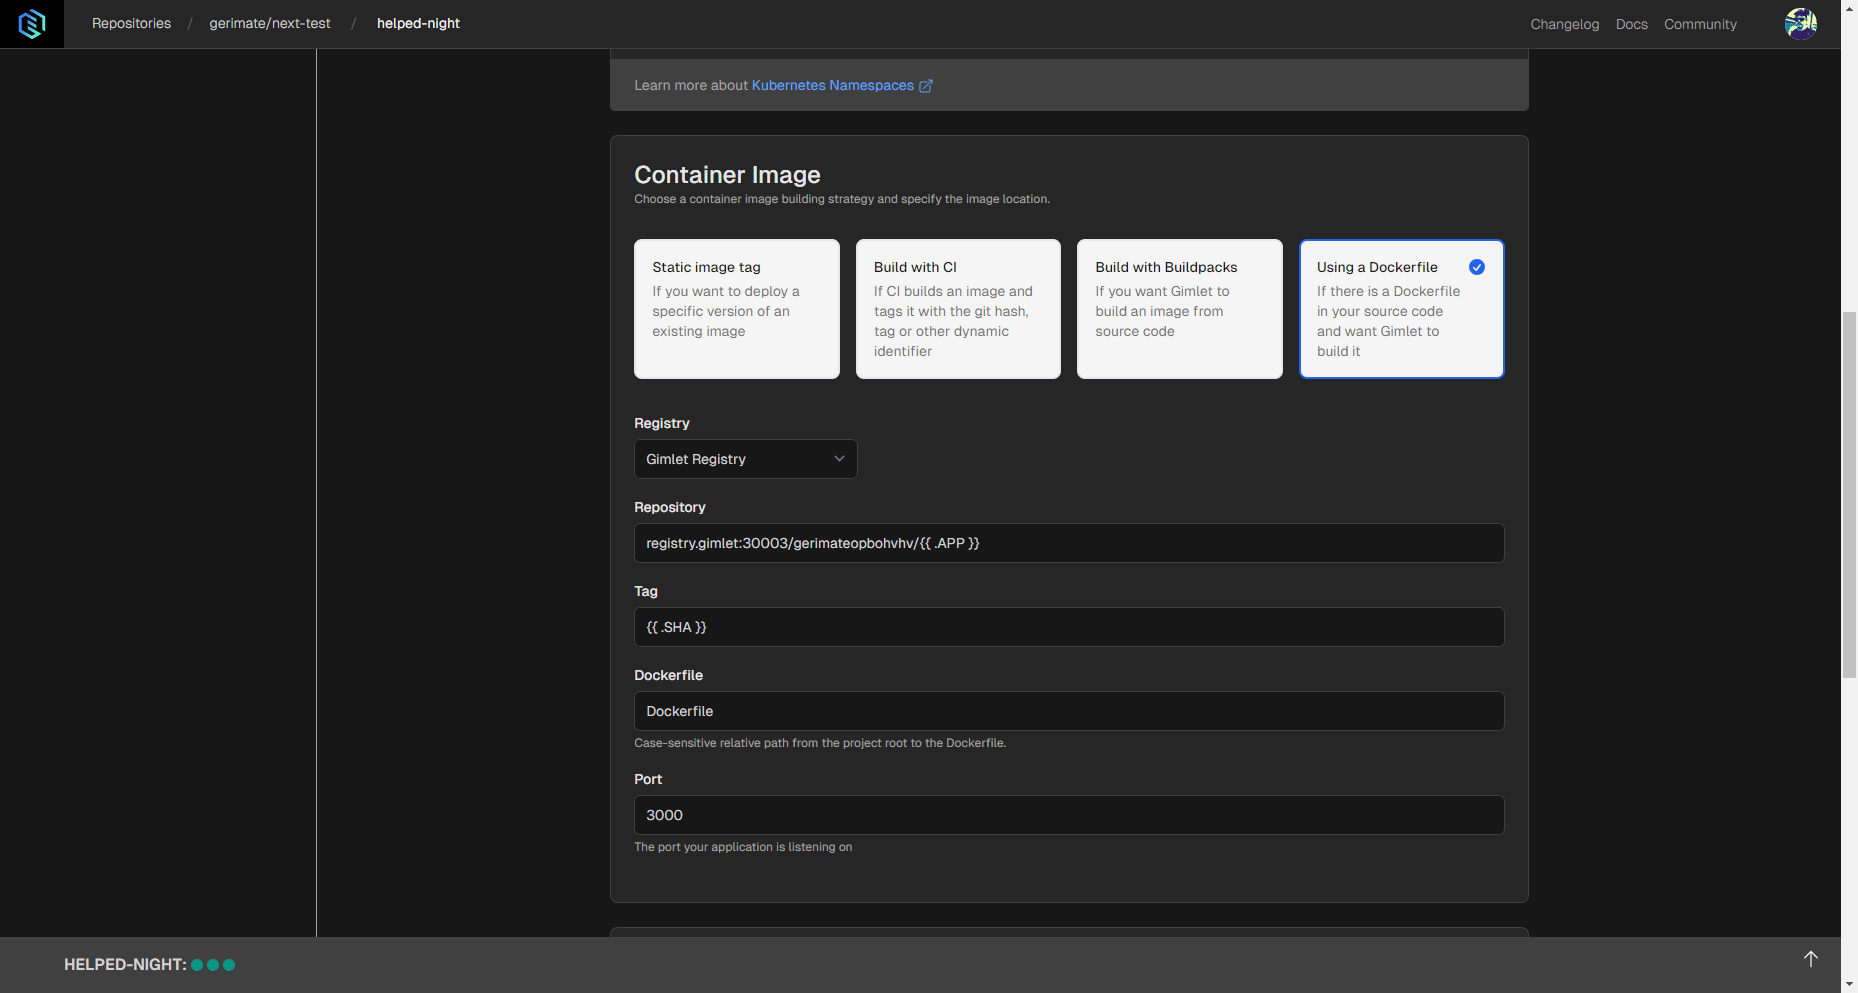
You can deploy the Next.js frontend as a Web Application Template, and you'll need to select Using a Dockerfile container image option. If you don't have a Dockerfile, you can get this Dockerfile from GitHub.
Select the Gimlet Registry option in the Registry section.
Make sure that your next.config.js file has output: 'standalone' set, and that the exposed port matches the value specified in the Dockerfile.
Step 3: Deploy the Next.js Frontend
When you're finished making the changes in the deployment settings, you can click the Deploy button. As the process begins, you should see build logs and the application should be deployed soon.
Step 4: Check out Your Next.js Frontend
When container status turns Running, confetti will rain in your browser window and a clickable link of the URL will appear where you'll be able to check out the Next.js frontend.
Use Cases
Deploying Next.js applications with Gimlet holds several advantages:
- Social login: Easy-to-add social authentication and HTTPS certification.
- Branch previews: Test and share changes with preview deployments.
- Advanced deployment capabilities: Roll back to previous versions and ship changes with automated deployments.