Frontend Tutorials
Static Site Deployments
You can deploy any static site with Gimlet by following the steps described below.
Requirements
- A build command that generates a static website with index.html as entry point and with all its dependencies.
Step 1: Getting Started with Gimlet
Log in to Gimlet by connecting your GitHub or GitLab account. You should see your repositories listed, but if you can't find the repo where your static site is located, you can use the search bar to find it.
Click the Import button to add the repository to Gimlet, then click the I am done importing button to save added repositories.
Step 2: Deploy Static Site
Click on the repository's card to select the repo. Click the New deployment button.
To deploy a static site, just select Static Site Template. Below you can see the build script for the demo app.
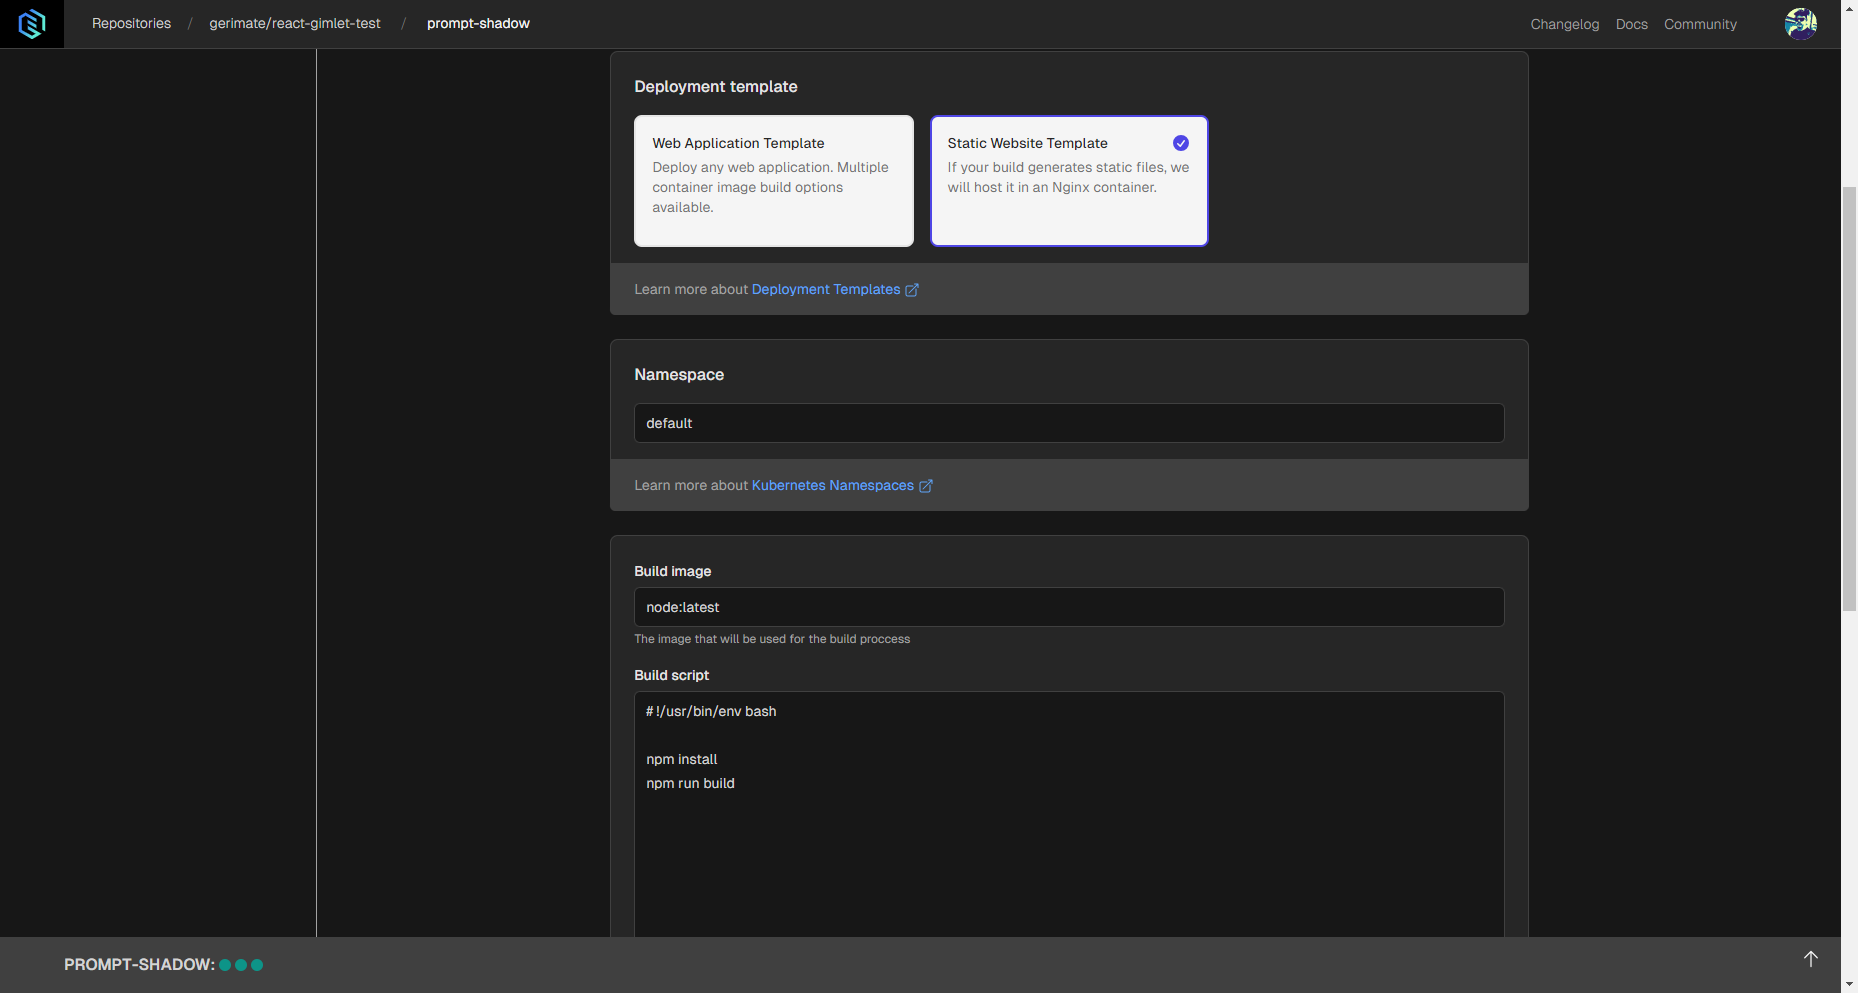
You can find out more about build settings in the Container Image Settings documentation.
If everything looks alright, click the Deploy button. Gimlet will build the application and run it in an Nginx container.
Step 3: Check Out Your Static Site
After a successful deployment, a clickable link should appear next to deployment status. Click it to open it in your browser.
Deploying From a Private Git Repository
Private static sites can also be deployed with Gimlet using a GitHub personal access token.
First, you'll need to create a fine-grained personal access token (PAT). The scope should be for Content with Read-only access. Save the token in a secure way, as you'll need it when you configure the deployment. Refer to GitHub's documentation for exact description of token creation.
In Gimlet, set up the deployment in a similar way as described above.
Set up the Git Clone URL. By default, it's a GitHub URL, but when you use a personal access token, you need to add $PAT@ in the format below:
https://[email protected]/[user]/[repository-name].git
After that, you need to add the personal access token as a secret in the Encrypted secrets section. Click the plus button you can see below.

Rename the newKey variable that appears to PAT, and paste the token next to it into the empty input field. Click Encrypt.
If every other setting is ready, you can click Deploy to set up your private static site.