Backend Tutorials
Deployments of Laravel Applications
You can learn from this tutorial how to deploy a Laravel application with Gimlet.
Requirements
- A Laravel app to deploy. If you don't have a Laravel application, fork this repository to be able to try this tutorial.
Step 1: Get Started with Gimlet
Log in to Gimlet by connecting your account to your GitHub or GitLab.
After successful connection, you should see repositories listed, which you can import. If you can't find the Laravel project's repository, use the search bar, then click the Import button next to it.
You can add multiple repositories, click I am done importing to save the added repos.
Step 2: Deployment Settings for Laravel
To get started with the deployment process, navigate to the deployment settings by clicking the repo's card in the repository list. Click New deployment.
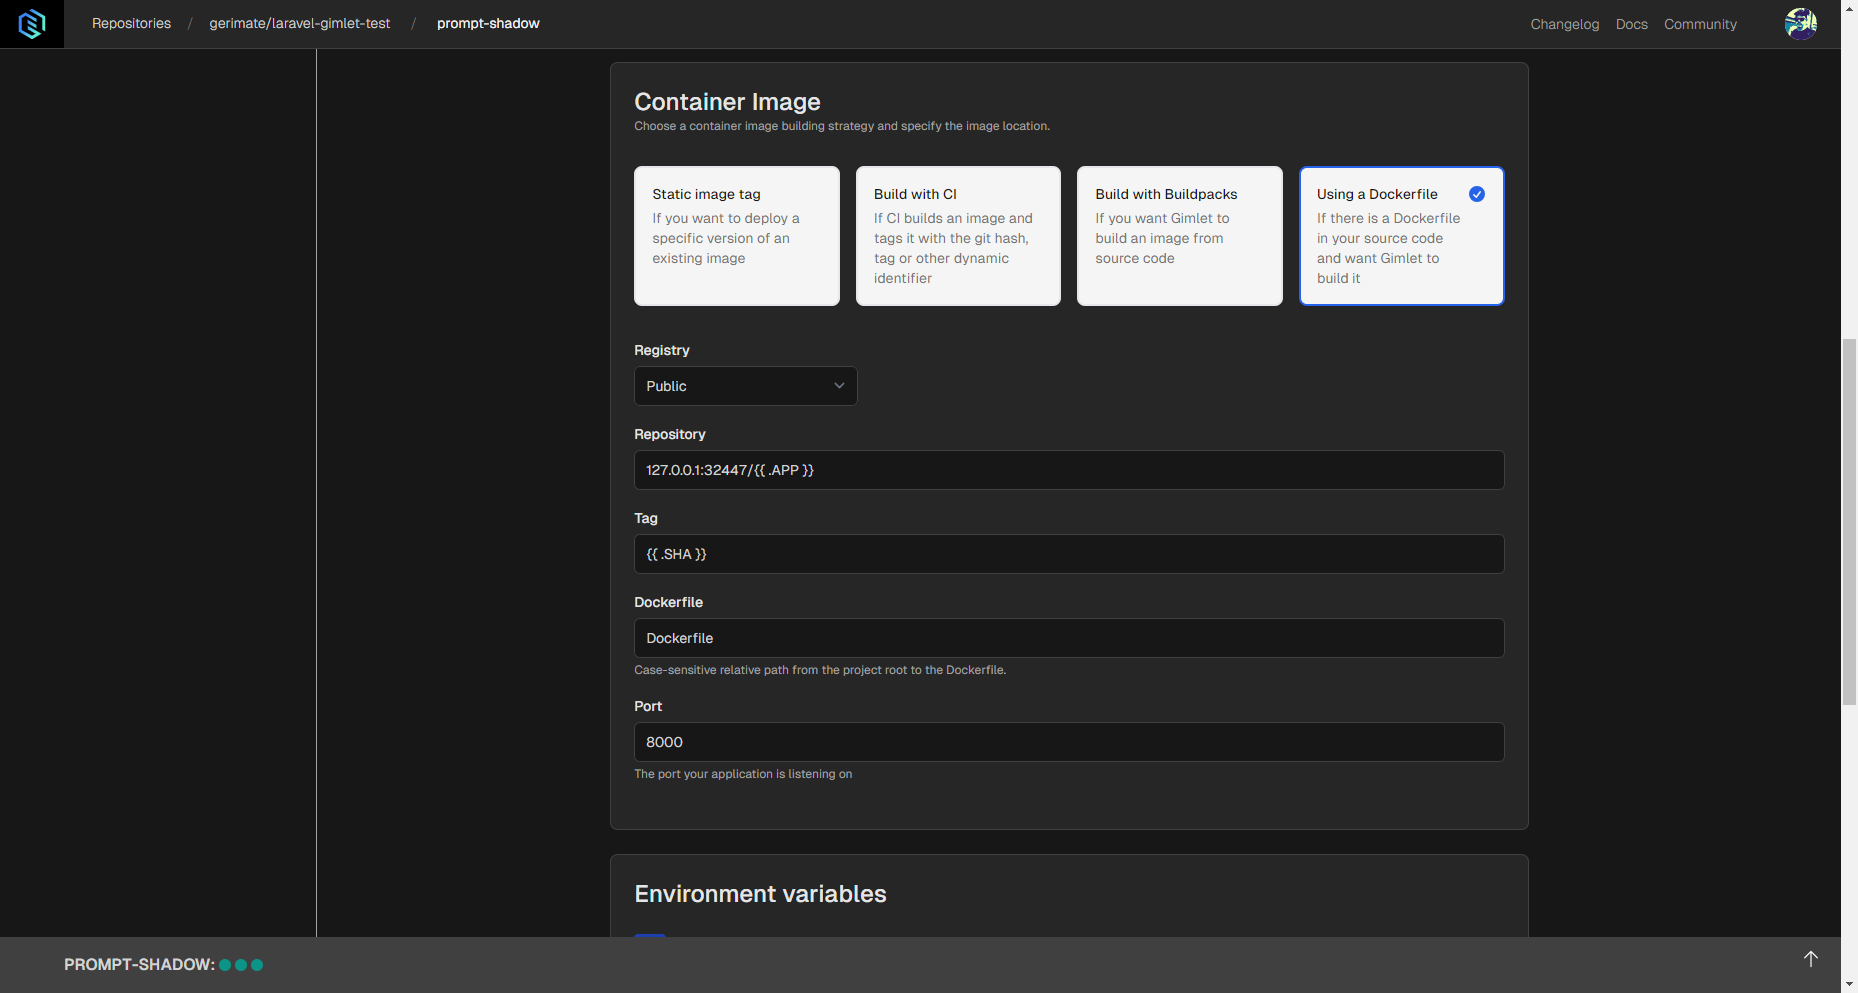
Select the Web Application Template, and then the Using a Dockerfile container image option. Under the Registry options, select the Gimlet registry setting.

This method requires a Dockerfile located in your repository. If you don't have one, you can use the one below.
Note: The Dockerfile below is suitable for development and testing purposes, since it requires an .env file with an empty APP_KEY variable. If you know any production ready solution, feel free to open a pull request in the repository.
FROM php:8.2.19-alpine
WORKDIR /var/www/html

RUN apk update
RUN curl -sS https://getcomposer.org/installer | php -- --version=2.4.3 --install-dir=/usr/local/bin --filename=composer

COPY . .
RUN composer install

RUN php artisan key:generate
RUN php artisan config:cache

CMD ["php","artisan","serve","--host=0.0.0.0"]
Define the port where you'd like to access the app, like 8000 for example.
Step 3: Deploy and Check Your Laravel App
When all the setting changes are made, you can click the Deploy button. Build and deployment logs should appear, and when container status turns running, you can use the clickable link next to it to see if the app is up and running without errors.