AI Deployment Tutorials
Deployment of Flowise
Flowise is a drag & drop style AI workflow builder. Here's how you can deploy it.
Requirements
- Flowise forked on GitHub.
Step 1: Get Started with Gimlet
Log in to Gimlet by connecting your GitHub or GitLab account. You should see your repositories listed. Use the search bar if the repository with Flowise won't appear.
You can fork Flowise from the official repository on GitHub.
After connecting your account, the repositories available should be listed in Gimlet. If you can't find the repo with Flowise in it, you can use the search bar to find it.
Click the Import button next to the repository. You can add multiple repos the same way. When all the repositories are selected, click I am done importing to save the added repos.
Step 2: Deployment Settings for Flowise
Click on the repo's card to navigate to deployment settings. Click New deployment.
For Flowise's deployment, you can select the Web Application Template, and then pick the Using a Dockerfile container image option. In case you don't have a Dockerfile, you can use Flowise' official one, as seen below, or fork the GitHub repository.
# Build local monorepo image
# docker build --no-cache -t  flowise .

# Run image
# docker run -d -p 3000:3000 flowise

FROM node:20-alpine
RUN apk add --update libc6-compat python3 make g++
# needed for pdfjs-dist
RUN apk add --no-cache build-base cairo-dev pango-dev

# Install Chromium
RUN apk add --no-cache chromium

#install PNPM globaly
RUN npm install -g pnpm

ENV PUPPETEER_SKIP_DOWNLOAD=true
ENV PUPPETEER_EXECUTABLE_PATH=/usr/bin/chromium-browser

WORKDIR /usr/src

# Copy app source
COPY . .

RUN pnpm install

RUN pnpm build

EXPOSE 3000

CMD [ "pnpm", "start" ]
In Gimlet, now select the Gimlet Registry option under Registry settings, and set Port value to 3000. See config settings in the screenshot below:
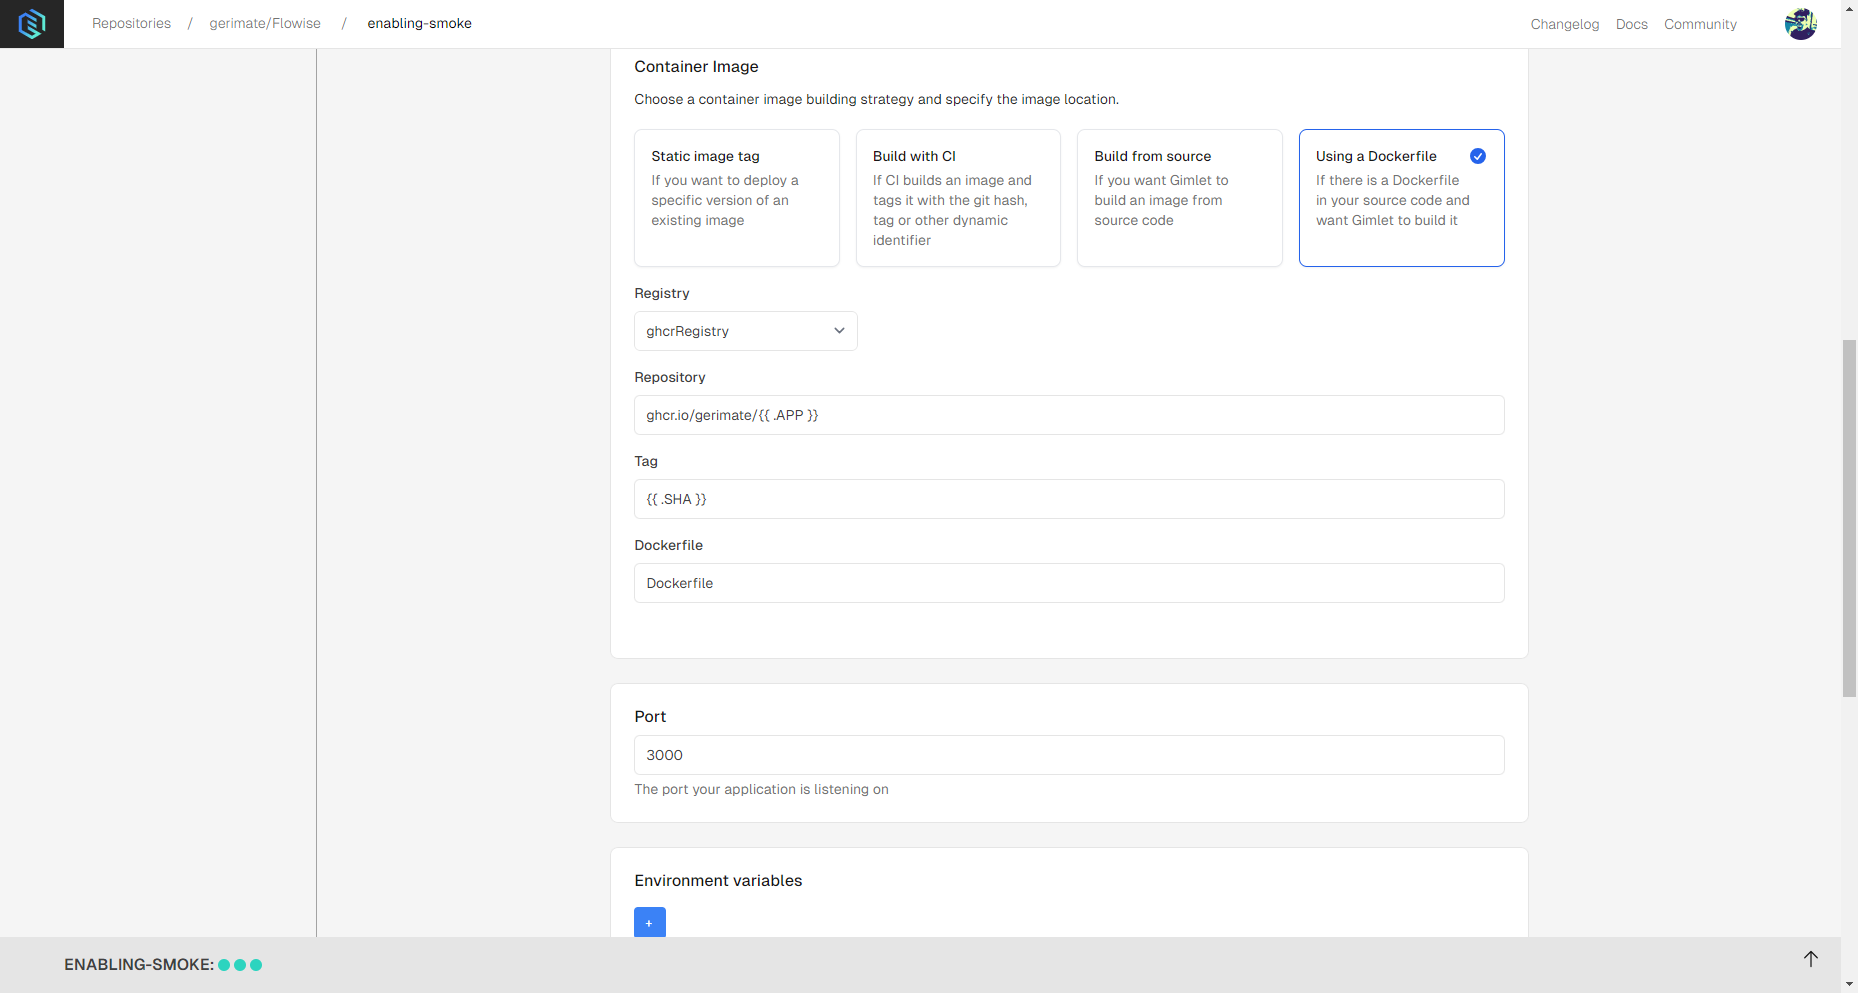
Note: Variables defined in Gimlet are case sensitive, make sure it's corresponding with the Dockerfile name that can be found in the repository.
Step 3: Deploy Flowise
After all the settings are specified, click the Deploy button. Logs should appear rightaway, and when the deployment is successful, confetti will rain in your browser window.
Keep in mind that Flowise is a fairly large container, so it'll take a few minutes to launch it with Gimlet.
Step 4: Try Flowise in Your Browser
You can give Flowise a look after container status turned Running. Just use the link next to the status.

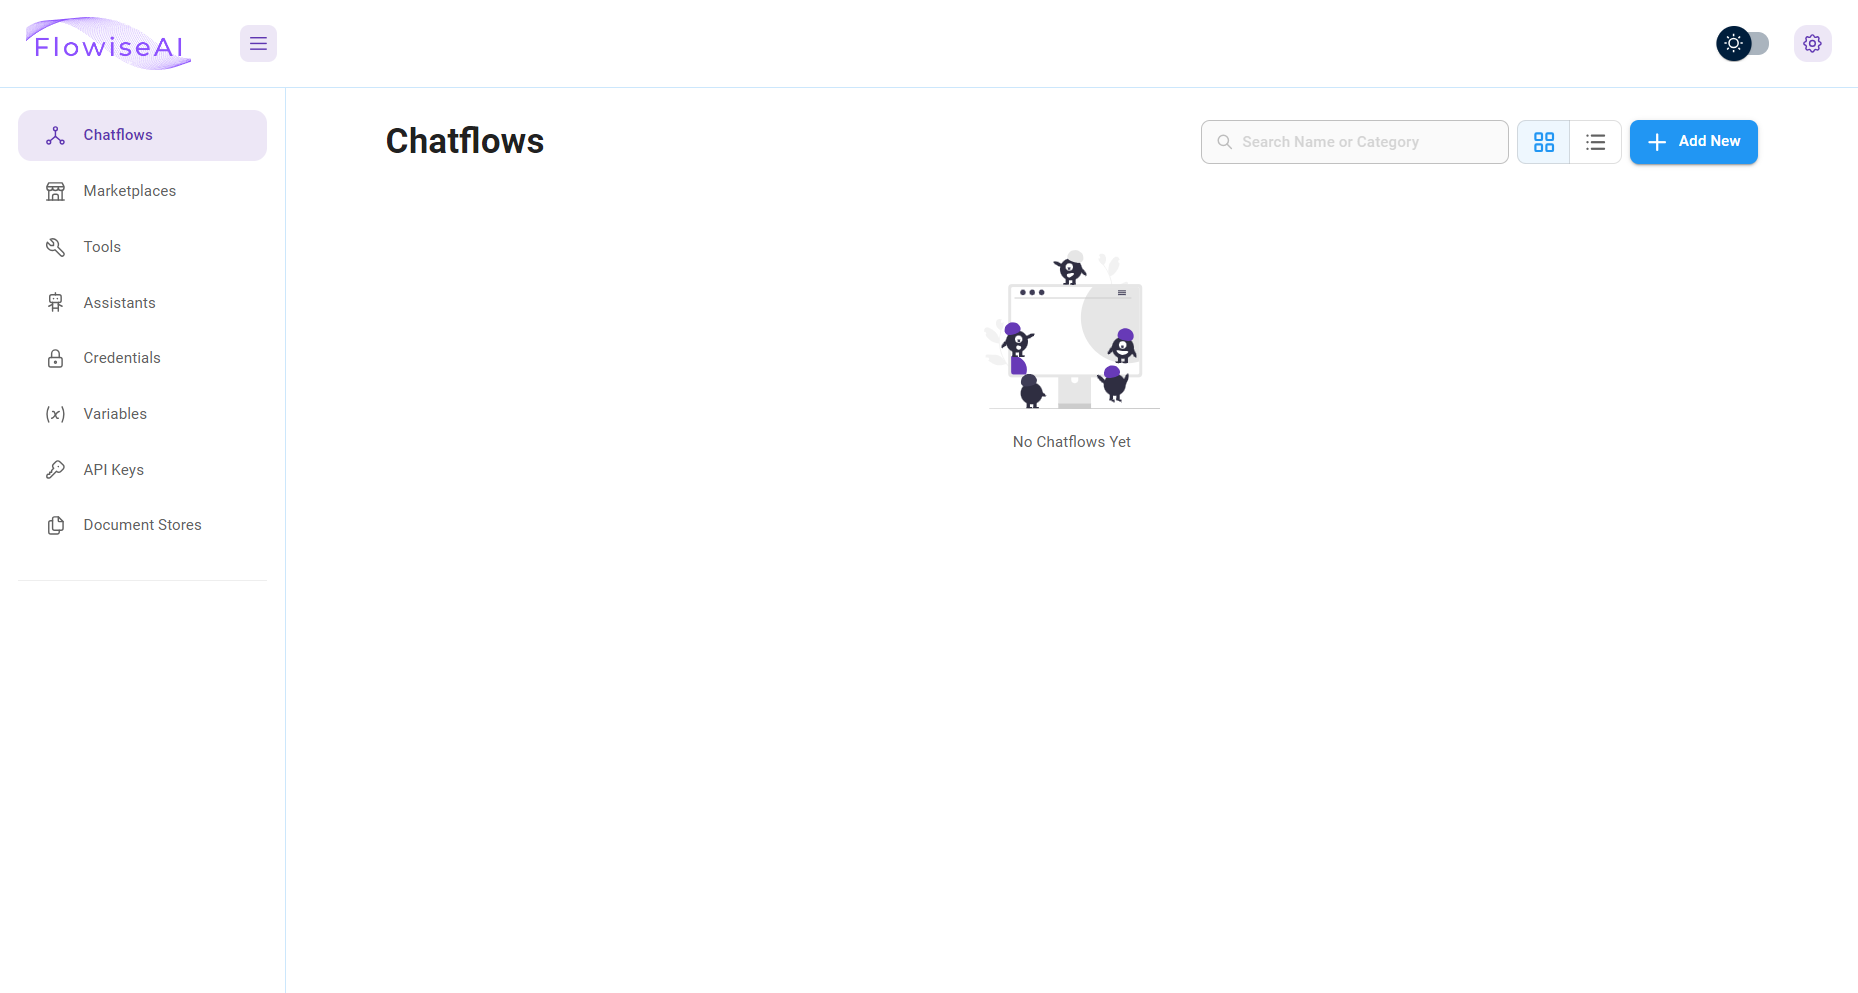
Here's how Flowise should look in your browser:
Use Cases
Gimlet offers different advantages when you use Flowise to create AI workflows.
- Remote CUDA Resources: If you don't have access to Nvidia GPUs locally, you can still utilize CUDA on the cloud.
- File Syncing: Keep code consistent across your team and their machines.
- Easily Share Flowise: Add social authentication and set up HTTPS connection between your Flowise and your teammates.