AI Deployment Tutorials
Dockerfile Deployment with Gimlet
Dockerfile deployment is the most common use case for deploying AI projects with Gimlet. As long as there's a functioning Dockerfile in the git repository you'd like to deploy, Gimlet can build and launch it in your cluster.
Step 1: Get Started with Gimlet
Connect your GitHub or GitLab account with Gimlet. The repositories you have access to will be listed. In case you don't see the repository you'd like to deploy, use the search bar.
Click the Import button next to the repository that you'd like to deploy, then save it with I am done importing.
Select the repository by clicking its card, then click New deployment.
Step 2: Deployment Settings
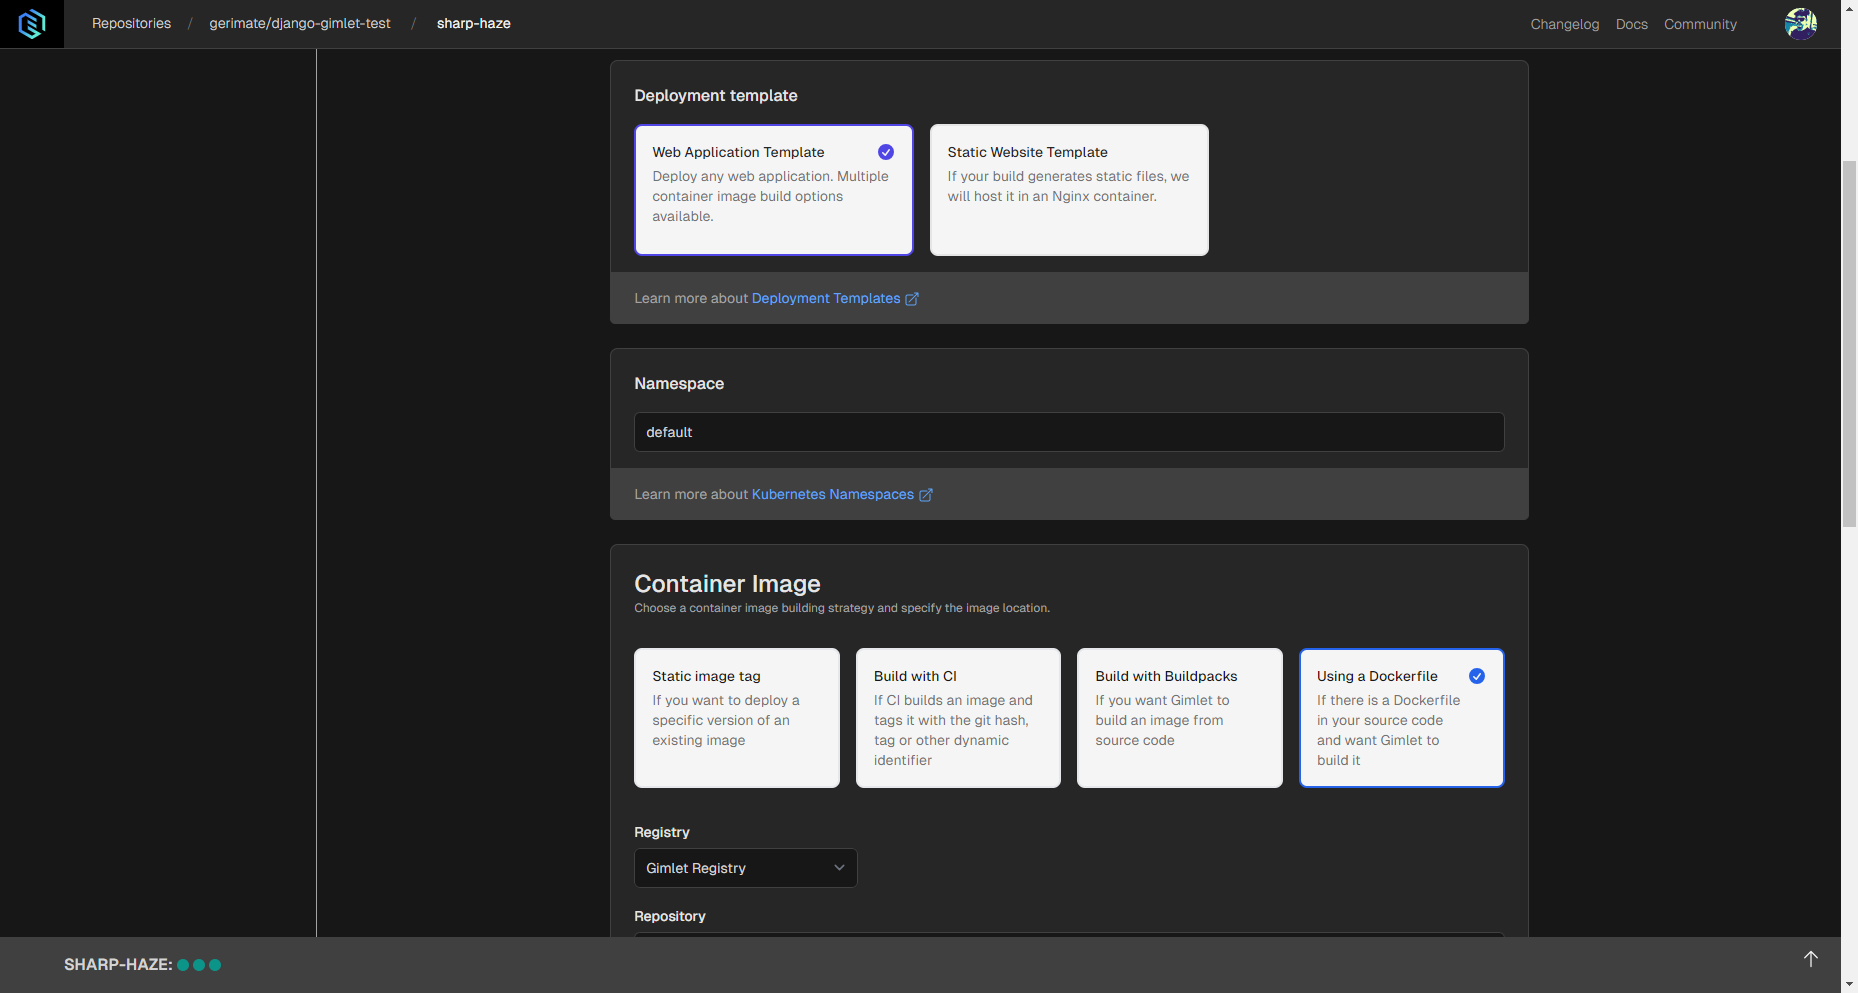
In order to be able to deploy Dockerfiles, you'll need to select the Web Application Template, and then the Using a Dockerfile container image setting.
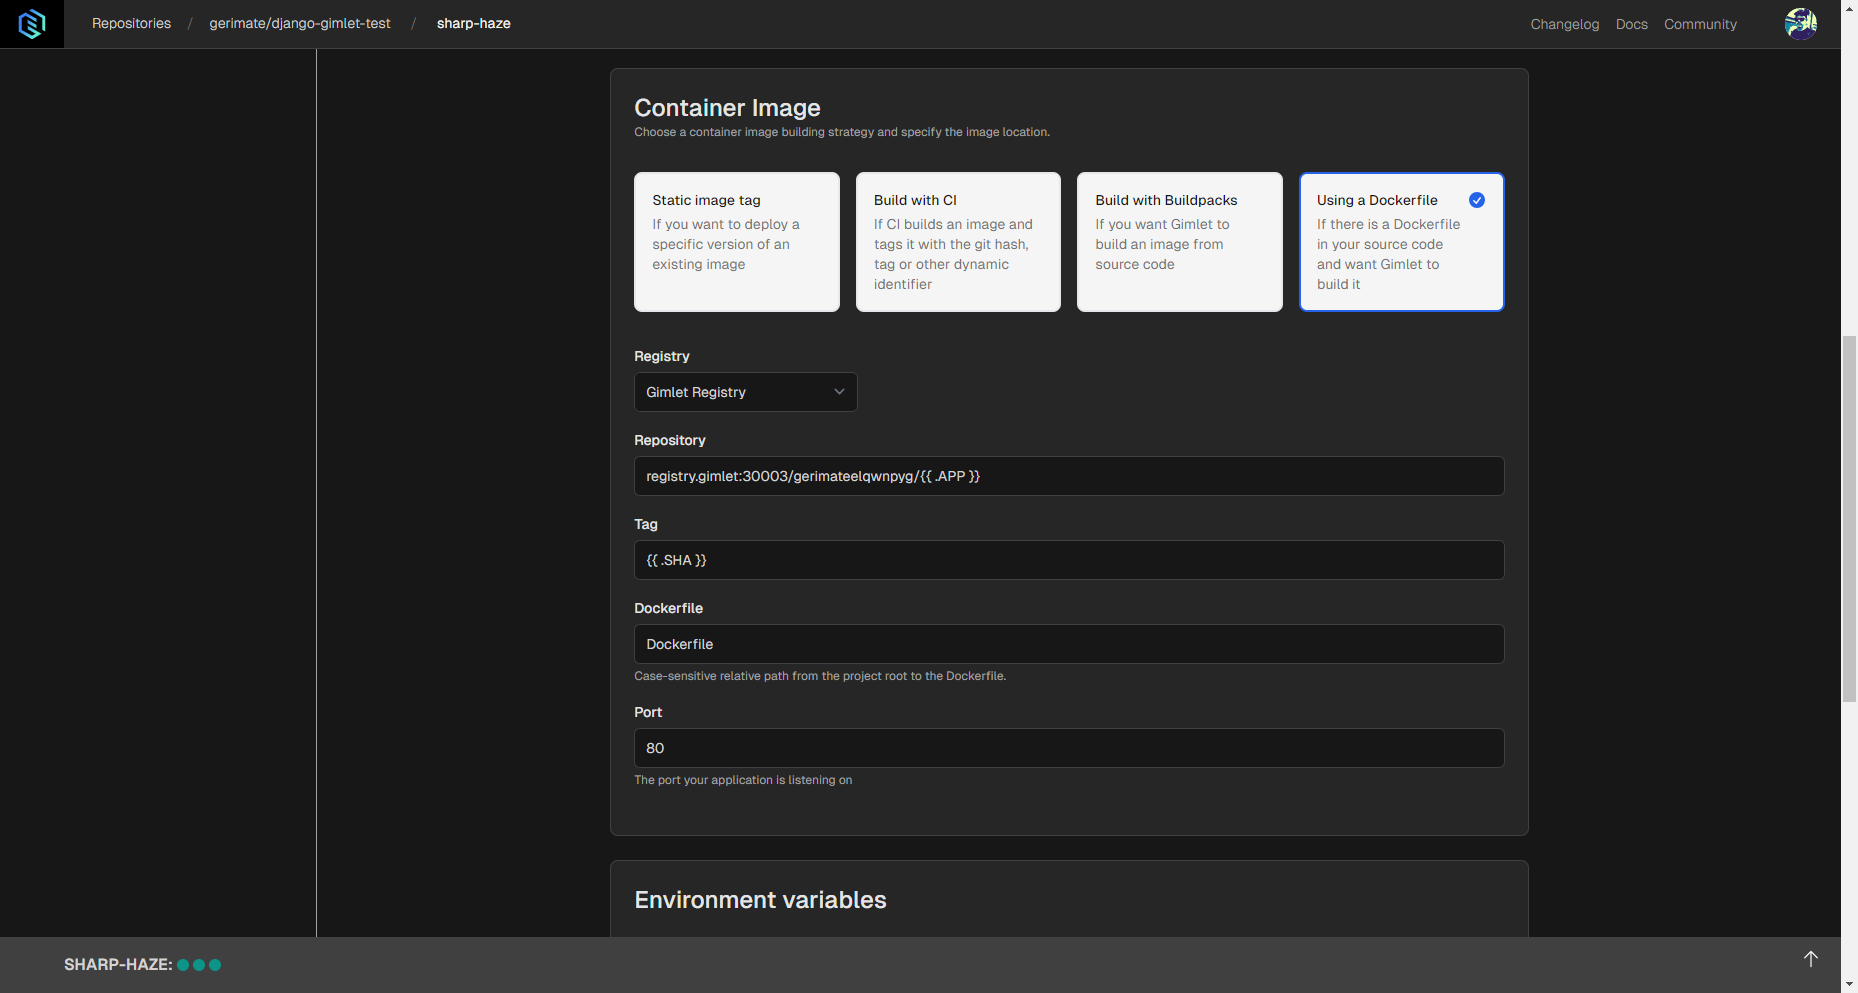
Then select Gimlet Registry option under Registry settings if you use GitHub. This way Gimlet will be able to use the Dockerfile to build the deployable application.

Several settings can be configured, but if there's an exposed port in the Dockerfile, it needs to be specified in Gimlet, as well.

Step 3: Deploy With the Dockerfile
When deployment configuration is set, you can click the Deploy button. When you do that, logs should appear and build will start right away. Depending on the size of your image and the hardware you use, the container should start in a few moments.
When the application is deployed, container status will turn Running.
Step 4: Try the Application
After successful deployment, you can check out the app in your browser with the link that appears next to container status.
Use Cases
Besides easy Dockerfile deployment, there are several use cases of using Gimlet to set up your AI project.
- Remote GPUs: Set up your project using CUDA-capable Nvidia GPUs.
- File Syncing: Sync code across the machines used by your team.
- Share with Social Auth: Set up social login and HTTPS certification easily for secure sharing with your teammates.