Deployment settings
Social Authentication
You can add social authentication to your application to secure and restrict access to your app.
To be able to add social authentication, you need to do two things:
- Create a GitHub OAuth application,
- Configure OAuth2Proxy in Gimlet.
Create OAuth Application on GitHub
If you'd like to set up social authentication for your applications, you'll have to create an OAuth application on Gimlet by following GitHub's documentation.
Once the app is created, generate a Client Secret, and save the secret alongside the Client ID.
One note to add to the official GitHub docs is that you’ll need to add a Homepage URL and a Callback URL. Follow these instructions:
- Homepage URL: If you don’t use a custom domain, you should use the domain generated by Gimlet for you in this format:
https://auth-[prefix generated by Gimlet].gimlet.app/. - Callback URL: This is partially the same as the Homepage URL, except it’s
https://auth-[prefix generated by Gimlet].gimlet.app/oauth2/callback.
Some data about the GitHub OAuth application will be needed. Namely these:
- Client ID
- Client Secret
When you create the new GitHub OAuth app copy and store these because you’ll need to add these in Gimlet.
Configure OAuth2Proxy in Gimlet
When the application is ready you can configure the OAuth Proxy settings in the environment settings.
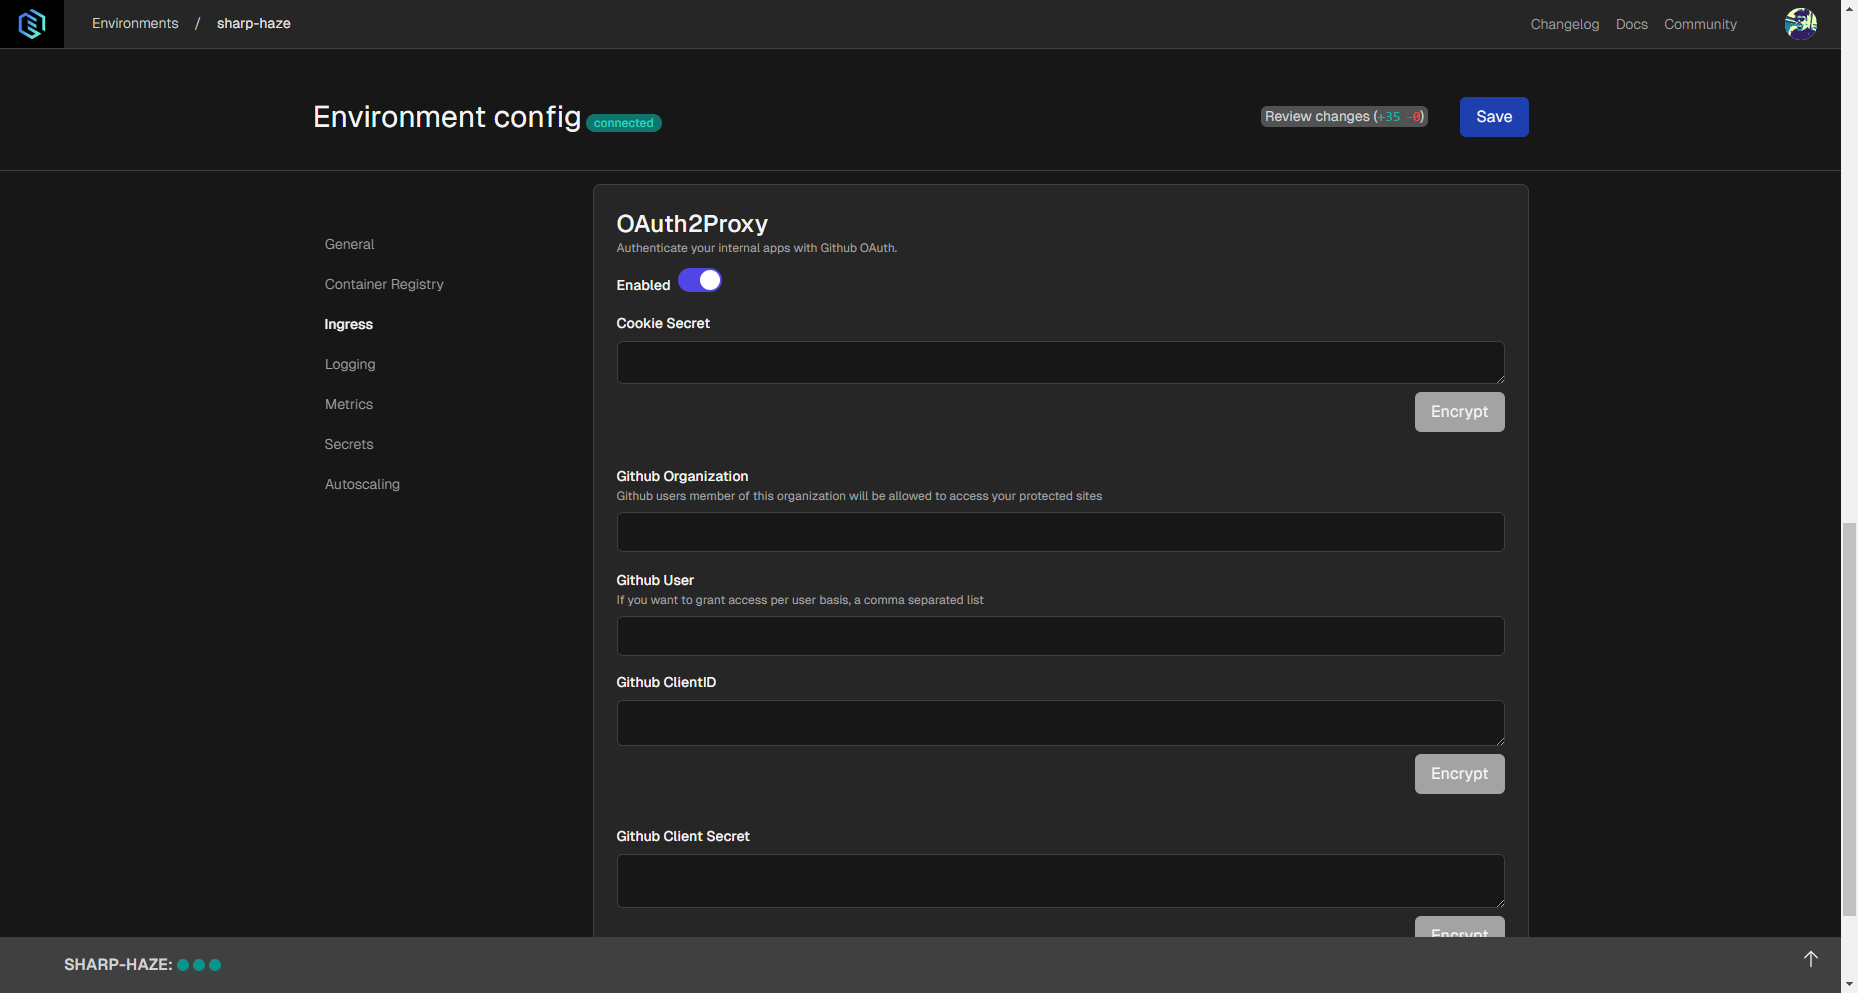
You can access environment settings by selecting the Environments option in the menu on top, and then selecting the environment for which you'd like to configure social authentication by clicking on its card.
In the environment settings, select the Ingress settings in the menu on the left side, and scroll down to find Oauth2Proxy settings.
Enable it using the toggle, and you can enter the following settings.
- Cookie Secret: This secret can be generated in a shell you use by running
openssl rand -hex 16. Copy and paste it here from the terminal. - GitHub Organization: You can specify a GitHub organization here if you'd like to restrict access to the application to the members of an organization. Not required setting.
- GitHub User: You can specify GitHub users who can access your application. You're able to list any number of users. Separate usernames with commas. Not required setting.
- GitHub Client ID: This Client ID is generated by the GitHub OAuth App you created. Paste it here.
- GitHub Client Secret: You can generate this secret on GitHub where the Client ID is available.
Authentication status
You can check your login state on the following URL:
https://auth-[prefix generated by Gimlet].gimlet.app/oauth2/userinfo/
Sign out on the following URL
https://auth-[prefix generated by Gimlet].gimlet.app/oauth2/sign_out/
Please note that you may still be logged in with the authentication provider and may automatically re-login when accessing the application the next time.
To sign out from Github OAuth, either sign out from Github (not practical), or revoke the OAuth grant on the https://github.com/settings/applications page.
Other Auth providers
OAuthProxy supports numerous authentication providers. See the list and their configuration options in their documentation. You can have custom configurations by altering the proxy config in Gimlet's -infra gitops repository. Like we've done in this video: