Frontend Tutorials
Deployments of Svelte Frontends
You can learn from this tutorial how to deploy a Svelte frontend with Gimlet.
Requirements
- A Svelte application on GitHub. If you don't have one, you can fork one from this repository.
Step 1: Getting Started with Gimlet
Log in to Gimlet by connecting your GitHub or GitLab account. You should see your repositories listed, but if you can't find the repo where your Svelte app is located, you can use the search bar to find it.
Click the Import button to add the repository to Gimlet, then click the I am done importing button to save added repositories.
Step 2: Deploy Svelte app
Click on the repository's card to select the repo. Click the New deployment button.
To deploy a Svelte frontend, just select Static Site Template. Below you can see the build script for the demo app.

And also in Build assets section, change directory from build/ to dist/
You can find out more about build settings in the Container Image Settings documentation.
If everything looks alright, click the Deploy button. Gimlet will build the application and run it in an Nginx container.
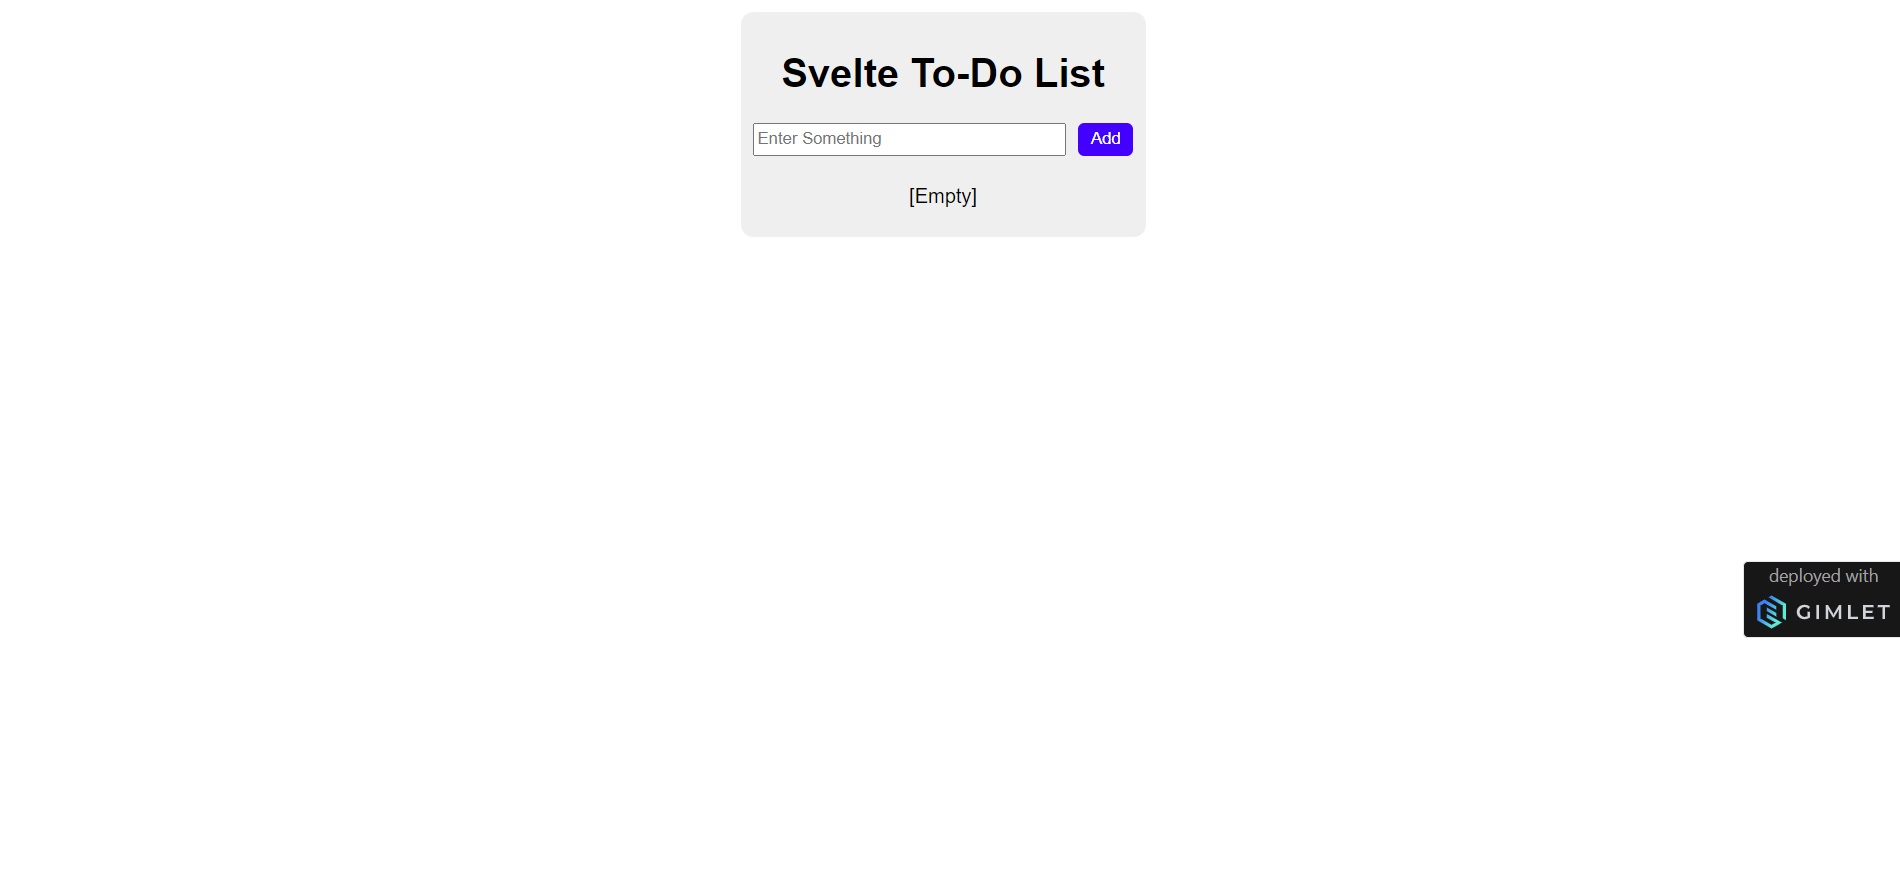
Step 3: Check Out Your Svelte App
After a successful deployment, a clickable link should appear next to deployment status. Click it to open it in your browser. It will look like this for given sample repo example :
Use Cases
Here are a few examples of why you should host your Svelte frontend with Gimlet:
- Social Login: Share your Svelte application with social login and HTTPS certification added.
- Branch previews: Test and share changes in your frontend with preview deployments.
- Advanced deployment capabilities: Roll backs and automated deployments of new changes.