CI Integration Reference
Gimlet assumes the gitops deployment tasks from your CI pipeline and runs them in a centralized service.
CI Integration
Gimlet is able to perform the gitops deployment tasks centrally, as once you added the Gimlet deploy step in your CI workflow, CI passes a large chunk of metadata (called the Gimlet artifact) to the Gimlet API, so Gimlet knows everything about the commit to deploy it.
There are two modes of operation in Gimlet's CI integration:
- you can use it as a deploy API. You can keep organizing your CI pipelines as you desire and call Gimlet's deploy API whenever you need to perform a gitops operation.
- or you can use Gimlet as a release manager. This mode of operation you use CI only to build your software, then delegate deploy actions to Gimlet's policy engine.
The default is using Gimlet as a deploy API.
Using Gimlet as a deploy API
CI pipelines lint, test, build and then deploy applications.
Gimlet assumes the gitops deployment tasks from your CI pipeline and runs them centralized. CI pipelines can call the Gimlet API to deploy, no need to script the deploy in CI.
Integrate Github Actions
In order to integrate Github Actions with Gimlet, you need to add the Gimlet Github Action in your CI pipeline to deploy your application.
You typically add this after your docker image build step, where you would normally place the deploy step in your pipeline.
Gimlet doesn't take control of your CI workflow, you can keep organizing your CI pipelines as you desire and call Gimlet's API whenever you need to perform a gitops operation.
name: Build
on:
  push:
    branches:
      - '*'
jobs:
  build:
    name: 👷 Build
    runs-on: ubuntu-latest
    steps:
      - name: ⬇️ Check out
        uses: actions/checkout@v1
        with:
          fetch-depth: 1
      - name: 🐋 Set up Docker Buildx
        uses: docker/setup-buildx-action@v1
      - name: Login to GitHub Container Registry
        uses: docker/login-action@v1
        with:
          registry: ghcr.io
          username: ${{ github.repository_owner }}
          password: ${{ secrets.PAT }}
      - name: 🐋 Build and push docker image
        uses: docker/build-push-action@v2
        with:
          context: .
          file: Dockerfile
          platforms: linux/amd64
          push: true
          tags: |
            ghcr.io/gimlet-io/demo-app:${{ github.sha }}
      - name: 🚀 Deploy / Staging
        uses: gimlet-io/gimlet-artifact-shipper-action@v0.8.0
        with:
          DEPLOY: 'true'
          ENV: 'staging'
          APP: 'demo-app'
        env:
          GIMLET_SERVER: ${{ secrets.GIMLET_SERVER }}
          GIMLET_TOKEN: ${{ secrets.GIMLET_TOKEN }}
Integrate CircleCI
In order to integrate with CircleCI, you need to add the Gimlet CircleCI Orb in your CI pipeline to deploy your application.
You typically add this after your docker image build step, where you would normally place the deploy step in your pipeline.
Gimlet doesn't take control of your CI workflow, you can keep organizing your CI pipelines as you desire and call Gimlet's API whenever you need to perform a gitops operation.
version: 2.1
orbs:
  gimlet: gimlet-io/circleci-orb@4.0.0

workflows:
  master-build:
    jobs:
      - test: {}
      - build_docker:
          requires:
            - test
      - gimlet/gimlet-artifact-push:
          name: 🚀 Deploy / Staging
          context:
            - Gimlet
          deploy: 'true'
          env: 'staging'
          app: 'demo-app'
          requires:
            - build_docker
The Gimlet Context holds two environment variables in this example: GIMLET_SERVER and GIMLET_TOKEN.
Obtain Gimlet API credentials
For the CI deploy steps to work, you need to provide access to the Gimlet API. You need to set two secrets GIMLET_SERVER and GIMLET_TOKEN.
- Set
GIMLET_SERVERto https://gimletd.<<yourcompany.com>> - Set
GIMLET_TOKENto a Gimlet API key
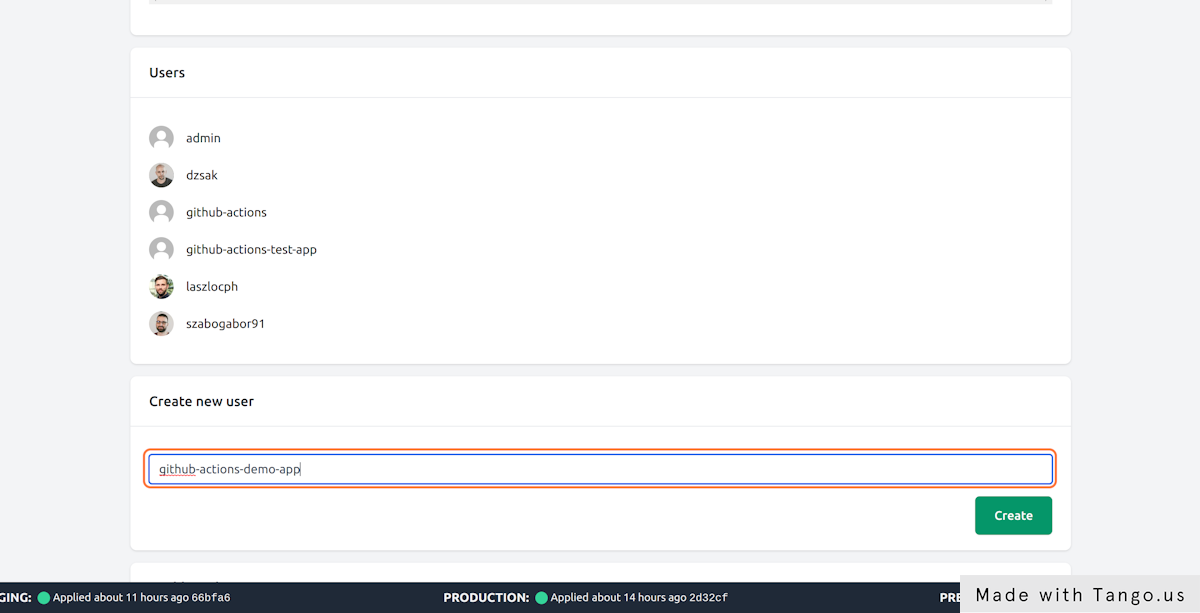
To create a Gimlet API key navigate to Profile > Create a new user in Gimlet and add a user for this integration.
Make a dummy commit to see it deploy
Push a dummy commit once you made the changes to your CI pipeline.
CI will call the Gimlet API, and Gimlet will make a gitops based deployment of your application. You can track the CI step output for details.
Deploying..
Deployment ID is: ff11eb64-2f94-49c3-ac07-e9274735096c
👉 Request (ff11eb64-2f94-49c3-ac07-e9274735096c) is new
	⏳ The release is not processed yet...
👉 Request (ff11eb64-2f94-49c3-ac07-e9274735096c) is processed
	📖 demo-app -> staging, gitops hash 176da9babbd7647fc68f3c5268a86a1d5fc6669a, status is NotReconciled
👉 Request (ff11eb64-2f94-49c3-ac07-e9274735096c) is processed
	📖 demo-app -> staging, gitops hash 176da9babbd7647fc68f3c5268a86a1d5fc6669a, status is DependencyNotReady
👉 Request (ff11eb64-2f94-49c3-ac07-e9274735096c) is processed
	📖 demo-app -> staging, gitops hash 176da9babbd7647fc68f3c5268a86a1d5fc6669a, status is ReconciliationSucceeded
Gimlet processed the deploy request and generated a gitops commit with hash 176da9babbd7647fc68f3c5268a86a1d5fc6669a. Then the CI step waited until the gitops commit was applied on the cluster by Flux:
You should see the deployed resources in Kubernetes, and you can also cross-reference the generated gitops commit (With hash 176da9babbd7647fc68f3c5268a86a1d5fc6669a in the logs above) in the gitops repository.
Can't see the deployed application?
You can debug the gitops automation to see what went wrong.
Using Gimlet as a release manager
Once you added the Gimlet deploy step in your CI workflow, every commit becomes deployable in Gimlet - given that CI has built the commit and the workflow reached the Gimlet step.
This is possible as in the Gimlet step, CI passes a large chunk of metadata (called the Gimlet artifact) to the Gimlet API, and Gimlet knows everything about the commit to deploy it.
With this mechanism, you can configure the CI integration in a way that it only ships the Gimlet artifact, to let Gimlet know that there is a releasable software version available, and let Gimlet decide what to do with it.
Gimlet has release policies that are triggered on certain conditions to automatically release to a target environment once Gimlet becomes aware of a new artifact.
Shipping the artifact only in CI
To configure the Gimlet step in CI to ship a Gimlet artifact but not to trigger a deploy, you can use the regular Gimlet CI plugins just make sure to not provide any deploy parameters to it:
    - name: 🚢 Gimlet artifact
      uses: gimlet-io/gimlet-artifact-shipper-action@v0.8.0
      env:
        GIMLET_SERVER: ${{ secrets.GIMLET_SERVER }}
        GIMLET_TOKEN: ${{ secrets.GIMLET_TOKEN }}
With the above config, Gimlet becomes aware of a new releasable software version, and can act on release policies.
Set release policies in the Gimlet environment file
You can control environment configuration with the Gimlet manifest files in the .gimlet/ folder in your application source code repository. It pins down the release configuration to a target environment.
As a recap, here is an example configuration for an application's staging environment.
It pins down the Helm chart to use, its version, and the configuration variables for the staging environment.
# .gimlet/staging.yaml
app: frontend
env: staging
namespace: my-team
chart:
  repository: https://chart.onechart.dev
  name: onechart
  version: 0.32.0
values:
  replicas: 2
  image:
    repository: myapp
    tag: 1.1.0
  ingress:
    host: myapp.staging.mycompany.com
    tlsEnabled: true
Gimletd processes each new artifact and matches against the defined policies. The following example configures a release policy that automatically releases every git push on the main branch to the staging environment.
The image tag was also changed, following the projects image tagging policy: tagging each image with the full git hash.
# .gimlet/staging.yaml
app: frontend
env: staging
namespace: my-team
+deploy:
+  branch: main
+  event: push
chart:
  repository: https://chart.onechart.dev
  name: onechart
  version: 0.32.0
values:
  replicas: 2
  image:
    repository: myapp
-    tag: 1.1.0
+    tag:  "{{ .SHA }}"
  ingress:
    host: myapp.staging.mycompany.com
    tlsEnabled: true
Full set of supported policies
For a full set of supported policies, head over to the Gimlet manifest reference page.
Full set of supported variables
For a full set of supported variables, head over to the Gimlet manifest reference page.