Appendix
Stack authoring
So you want to share your favorite stack and best practices with others? If you want to become a stack curator, this page is for you.
You will learn how to create a stack template from scratch and how your users can use it.
Prerequisites
To complete this tutorial, make sure you understood the end-user flows of Gimlet Stack, and you understand the concepts thoroughly.
An empty public git repository
What defines a stack
- a stack lives in a dedicated git repository
- a stack is a mix of Kubernetes resources, configmaps, HelmRelease resources placed in the git repo's root
- the resources are Golang templates, and can resolve variables that are defined in the stack.yaml by the end-user
- a stack has a
stack-definition.yamlin the git repository root- that contains the stack meta data
- component metadata, name, version, and a one-pager per component that helps the user getting started with the component
- component schema that is a subset of the component's Helm Chart's
values.schema.json - the ui-schema, that is a helm-ui.json schema file described in this blog post: https://gimlet.io/blog/helm-react-ui-a-react-component-to-render-ui-for-helm-charts/#the-helm-ui.jso
Gimlet Stack maintains a reference stack implementation in the https://github.com/gimlet-io/gimlet-stack-reference repository.
Prepare your first stack
Let's start with creating a minimal stack that we can use to experience the stack authoring process.
Fork the https://github.com/gimlet-io/gimlet-stack-minimal git repository and clone it.
git clone git@github.com:gimlet-io/gimlet-stack-minimal.git
cd gimlet-stack-minimal
This repository holds a minimal stack with a single Nginx component:
- stack-definition.yaml to hold the stack schema and UI information
helm-releasesfolder to hold the Nginx HelmRelease filehelm-repositoriesfolder to hold the HelmRepository for the Nginx Helm chartmanifestsfolder to hold a plain manifest with the Kubernetes namespace definition.sourceignorefile to ignore deploying certain files from the gitops repo. Sincestack.yamlis stored there, Flux needs to know to disregard it.stackignorefile to ignore files from getting to to the gitops repo duringgimlet stack generate. You typically want to ignore README.md and other documentation files
➜  gimlet-stack-minimal git:(main) tree
.
├── helm-releases
│   └── ingress-nginx.yaml
├── helm-repositories
│   └── ingress-nginx.yaml
├── manifests
│   └── namespace.yaml
├── README.md
├── .sourceignore
├── stack-definition.yaml
└── .stackignore

3 directories, 7 files

Stack files are Golang templates
The values end-users specify in the stack.yaml file are available in the stack template to drive rendering.
The bellow example shows that the ingress-nginx HelmRelease only rendered if .nginx.enabled is set to true, and it also adds the .nginx.host variable as an annotation.
# helm-releases/ingress-nginx.yaml
{{ if .nginx.enabled -}}
---
apiVersion: helm.toolkit.fluxcd.io/v2beta1
kind: HelmRelease
metadata:
  name: ingress-nginx
  namespace: infrastructure
spec:
...
  values:
    controller:
      annotations:
        service.beta.kubernetes.io/do-loadbalancer-enable-proxy-protocol: "true"
        service.beta.kubernetes.io/do-loadbalancer-hostname: "{{ .nginx.host }}"
      config:
        use-proxy-protocol: "true"
{{- end }}
What variables are available for a stack is stored in the stack-definiton.yaml file.
The stack definition
The stack-definition.yaml holds all stack components, their description and all possible configuration options.
# stack-definition.yaml
---
name: Gimlet Stack Minimal
description: A minimal stack that we can use to experience the stack authoring process
categories:
  - name: '⬅️Ingress'
    id: ingress
components:
  - name: Nginx
    variable: nginx
    category: ingress
    logo: https://raw.githubusercontent.com/gimlet-io/gimlet-stack-reference/main/assets/nginx.png
    description: ''
    onePager:
      An Nginx proxy server that routes traffic to your applications based on
      the host name or path.
    schema: |-
      ...
    uiSchema: |-
      ...
The components are
- organized in
categories - they have a
name,logoand other meta information - and they define a JSON
schemafor their values - and a
uiSchemafor thegimlet stack configureGUI
Let's see how you can add a new component to this minimal stack.
Let's extend the stack now
Let's add Grafana Loki now as a new component to the stack:
- we extended the categories list
- and added the Loki component
# stack-definition.yaml
---
name: Gimlet Stack Minimal
description: A minimal stack that we can use to experience the stack authoring process
categories:
  - name: "⬅️Ingress"
    id: ingress
+  - name: "📑 Logging"
+    id: logging
components:
  - name: Nginx
    variable: nginx
    category: ingress
    logo: https://raw.githubusercontent.com/gimlet-io/gimlet-stack-reference/main/assets/nginx.png
    description: ''
    onePager: An Nginx proxy server that routes traffic to your applications based on
      the host name or path.
    schema: |-
      ...
    uiSchema: |-
      ...
+  - name: Loki
+    variable: loki
+    category: logging
+    logo: https://raw.githubusercontent.com/gimlet-io/gimlet-stack-reference/main/assets/loki.png
+    description: ''
+    onePager: ''
+    schema: |-
+      ...
+    uiSchema: |-
+      ...
Now that we extended the stack definition, let's add the Kubernetes manifests to the stack template
Adding the Loki manifests to the stack template
We add two files, the HelmRepository and a HelmRelease resources for Loki.
If you are not familiar with the mentioned resource types, they are from the Flux project. You can add any regular Kubernetes manifest, we add now these custom resources as they achieve the installation of a Helm chart in a very concise way.
# helm-repositories/grafana.yaml
{{ if or .loki.enabled-}}
---
apiVersion: source.toolkit.fluxcd.io/v1beta1
kind: HelmRepository
metadata:
  name: grafana
  namespace: infrastructure
spec:
  interval: 60m
  url: https://grafana.github.io/helm-charts
{{- end }}

# helm-releases/loki.yaml
{{ if .loki.enabled -}}
---
apiVersion: helm.toolkit.fluxcd.io/v2beta1
kind: HelmRelease
metadata:
  name: loki
  namespace: infrastructure
spec:
  interval: 60m
  releaseName: loki
  chart:
    spec:
      chart: loki-stack
      version: 2.3.1
      sourceRef:
        kind: HelmRepository
        name: grafana
      interval: 10m
  values:
    grafana:
      enabled: false
    prometheus:
      enabled: false
{{- end }}
The above yaml can be arbitrary, whatever files your stack needs. The only requirement is that Kubernetes should understand the rendered template.
In this example we have one template variable: .loki.enabled. Let's see now how this can be captured in the stack-definition.yaml
Explaining the schema and uiSchema fields
Every component in the stack-definition.yaml needs to define its variable schema and the UI schema, so it can be properly rendered on the gimlet stack configure UI.
  - name: Loki
    variable: loki
    category: logging
    logo: https://raw.githubusercontent.com/gimlet-io/gimlet-stack-reference/main/assets/loki.png
    description: ''
    onePager: ''
    schema: |-
+      {
+        "$schema": "http://json-schema.org/draft-07/schema",
+        "$id": "http://example.com/example.json",
+        "type": "object",
+        "title": "The root schema",
+        "description": "The root schema comprises the entire JSON document.",
+        "properties": {
+          "enabled": {
+            "$id": "#/properties/enabled",
+            "type": "boolean",
+            "title": "Enabled"
+          }
+        }
+      }
    uiSchema: |-
+      [
+        {
+          "schemaIDs": [
+            "#/properties/enabled"
+          ],
+          "uiSchema": {},
+          "metaData": {}
+        }
+      ]
schema is a regular JSON schema definition. While it is verbose and cumbersome to maintain, you can edit small schemas by hand. This tutorial doesn't try to explain JSON schemas, instead we recommend that you get inspired with the possibilities from the reference stack.
For Loki, we defined a single boolean field, and the required boilerplate.
uiSchema is a Gimlet specific format that drives the UI rendering for stack-configure. The format was introduced on the blog, and for Loki all we did is that we told the UI to render the enabled property that we defined in the JSON schema. For more feature examples check out the UI schema of the OneChart Helm chart.
Testing the extended stack
In order to test the extended stack, make a commit and push the stack to git.
Then you can verify the generated UI with, just make sure you point it to your git repository
gimlet stack configure \
  --stack-repo git@github.com:gimlet-io/gimlet-stack-minimal.git
And you can verify the rendered template with:
gimlet stack generate
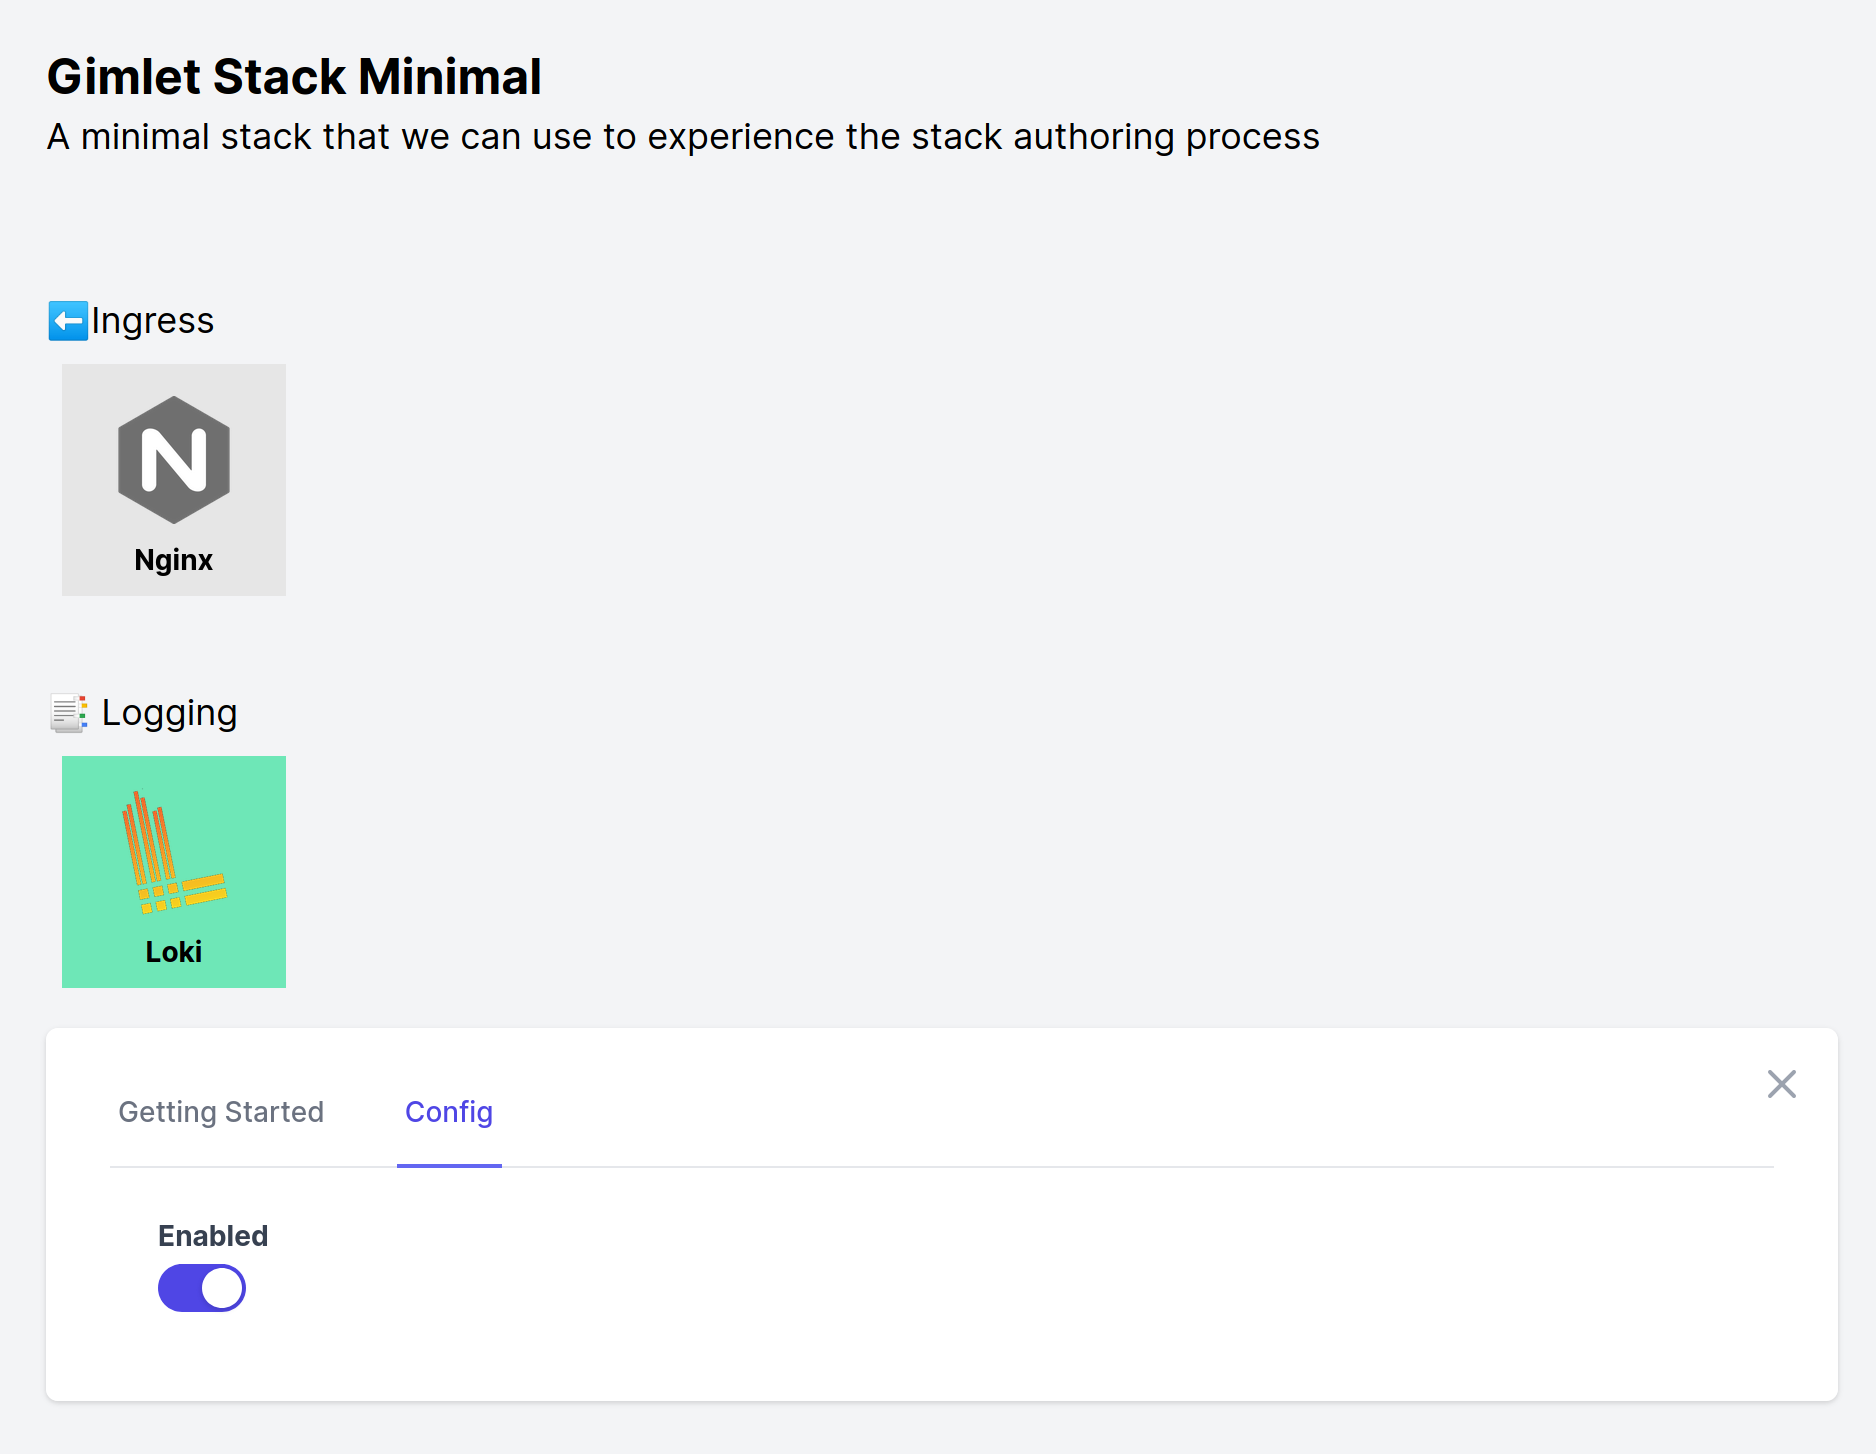
You should see the following UI:
You can find the extended stack on the authoring-your-first-stack branch, and you can also render it straight from that branch - if you want to verify your work:
gimlet stack configure \
  --stack-repo "git@github.com:gimlet-io/gimlet-stack-minimal.git?branch=authoring-your-first-stack"