Bootstrap gitops automation with Gimlet CLI
In this tutorial you will use the Gimlet CLI to bootstrap the gitops automation. You will also write application manifests to the gitops repository and see them deploy.
Bootstrapping on the Gimlet dashboard
Gitops bootstrapping happens automatically on the Gimlet dashboard during environment creation. You can still read this tutorial to know what goes under the hood.
Prerequisites
- it is imporant that you read the The SANE Gitops guide
- an empty Kubernetes cluster. Use k3d, if you don't have one. Use the
k3d cluster create first-cluster --k3s-arg "--disable=traefik@server:0"command to not install the default ingress controller
Bootstrapping gitops
The gitops controller is a small piece of software running in your Kubernetes cluster. It monitors your gitops git repository for changes and applies them on the cluster.
To bootstrap the gitops controller
- first create a new git repository and check it out locally
- then use the
gimlet gitops bootstrapcommand to put the controller's deploy manifests in the gitops repository - finally, apply the just created manifests on the cluster to kickstart the automation
Any further changes to the GitOps repository will be automatically applied to the cluster. This is GitOps.🙌
Gimlet gitops bootstrap
First, create a new git repository and check it out locally. Then Navigate to the checked out folder and run:
gimlet gitops bootstrap \
  --single-env \
  --gitops-repo-url git@github.com:<user>/<repo>.git
Follow the steps from the command output to bootstrap the gitops loop:
⏳ Generating manifests
✔️ GitOps configuration written to /home/laszlo/projects/deleteme/flux

👉 1) Inspect the configuration files, then commit and push the configuration to git
👉 2) Add the following deploy key to your Git provider

ssh-ed25519 AAAAC3NzaC1lZDI1NTE5AAAAIElqBEqyfqomY3Yzzg8o8CkaEzHvy+7zkH3x3HuVxNF0

👉 3) Apply the gitops manifests on the cluster to start the gitops loop:

kubectl apply -f /home/laszlo/projects/deleteme/flux/flux.yaml
kubectl apply -f /home/laszlo/projects/deleteme/flux/deploy-key-gimlet-io-tutorial-gitops-repo.yaml
kubectl wait --for condition=established --timeout=60s crd/gitrepositories.source.toolkit.fluxcd.io
kubectl wait --for condition=established --timeout=60s crd/kustomizations.kustomize.toolkit.fluxcd.io
kubectl apply -f /home/laszlo/projects/deleteme/flux/gitops-repo-gimlet-io-tutorial-gitops-repo.yaml

         Happy Gitopsing🎊
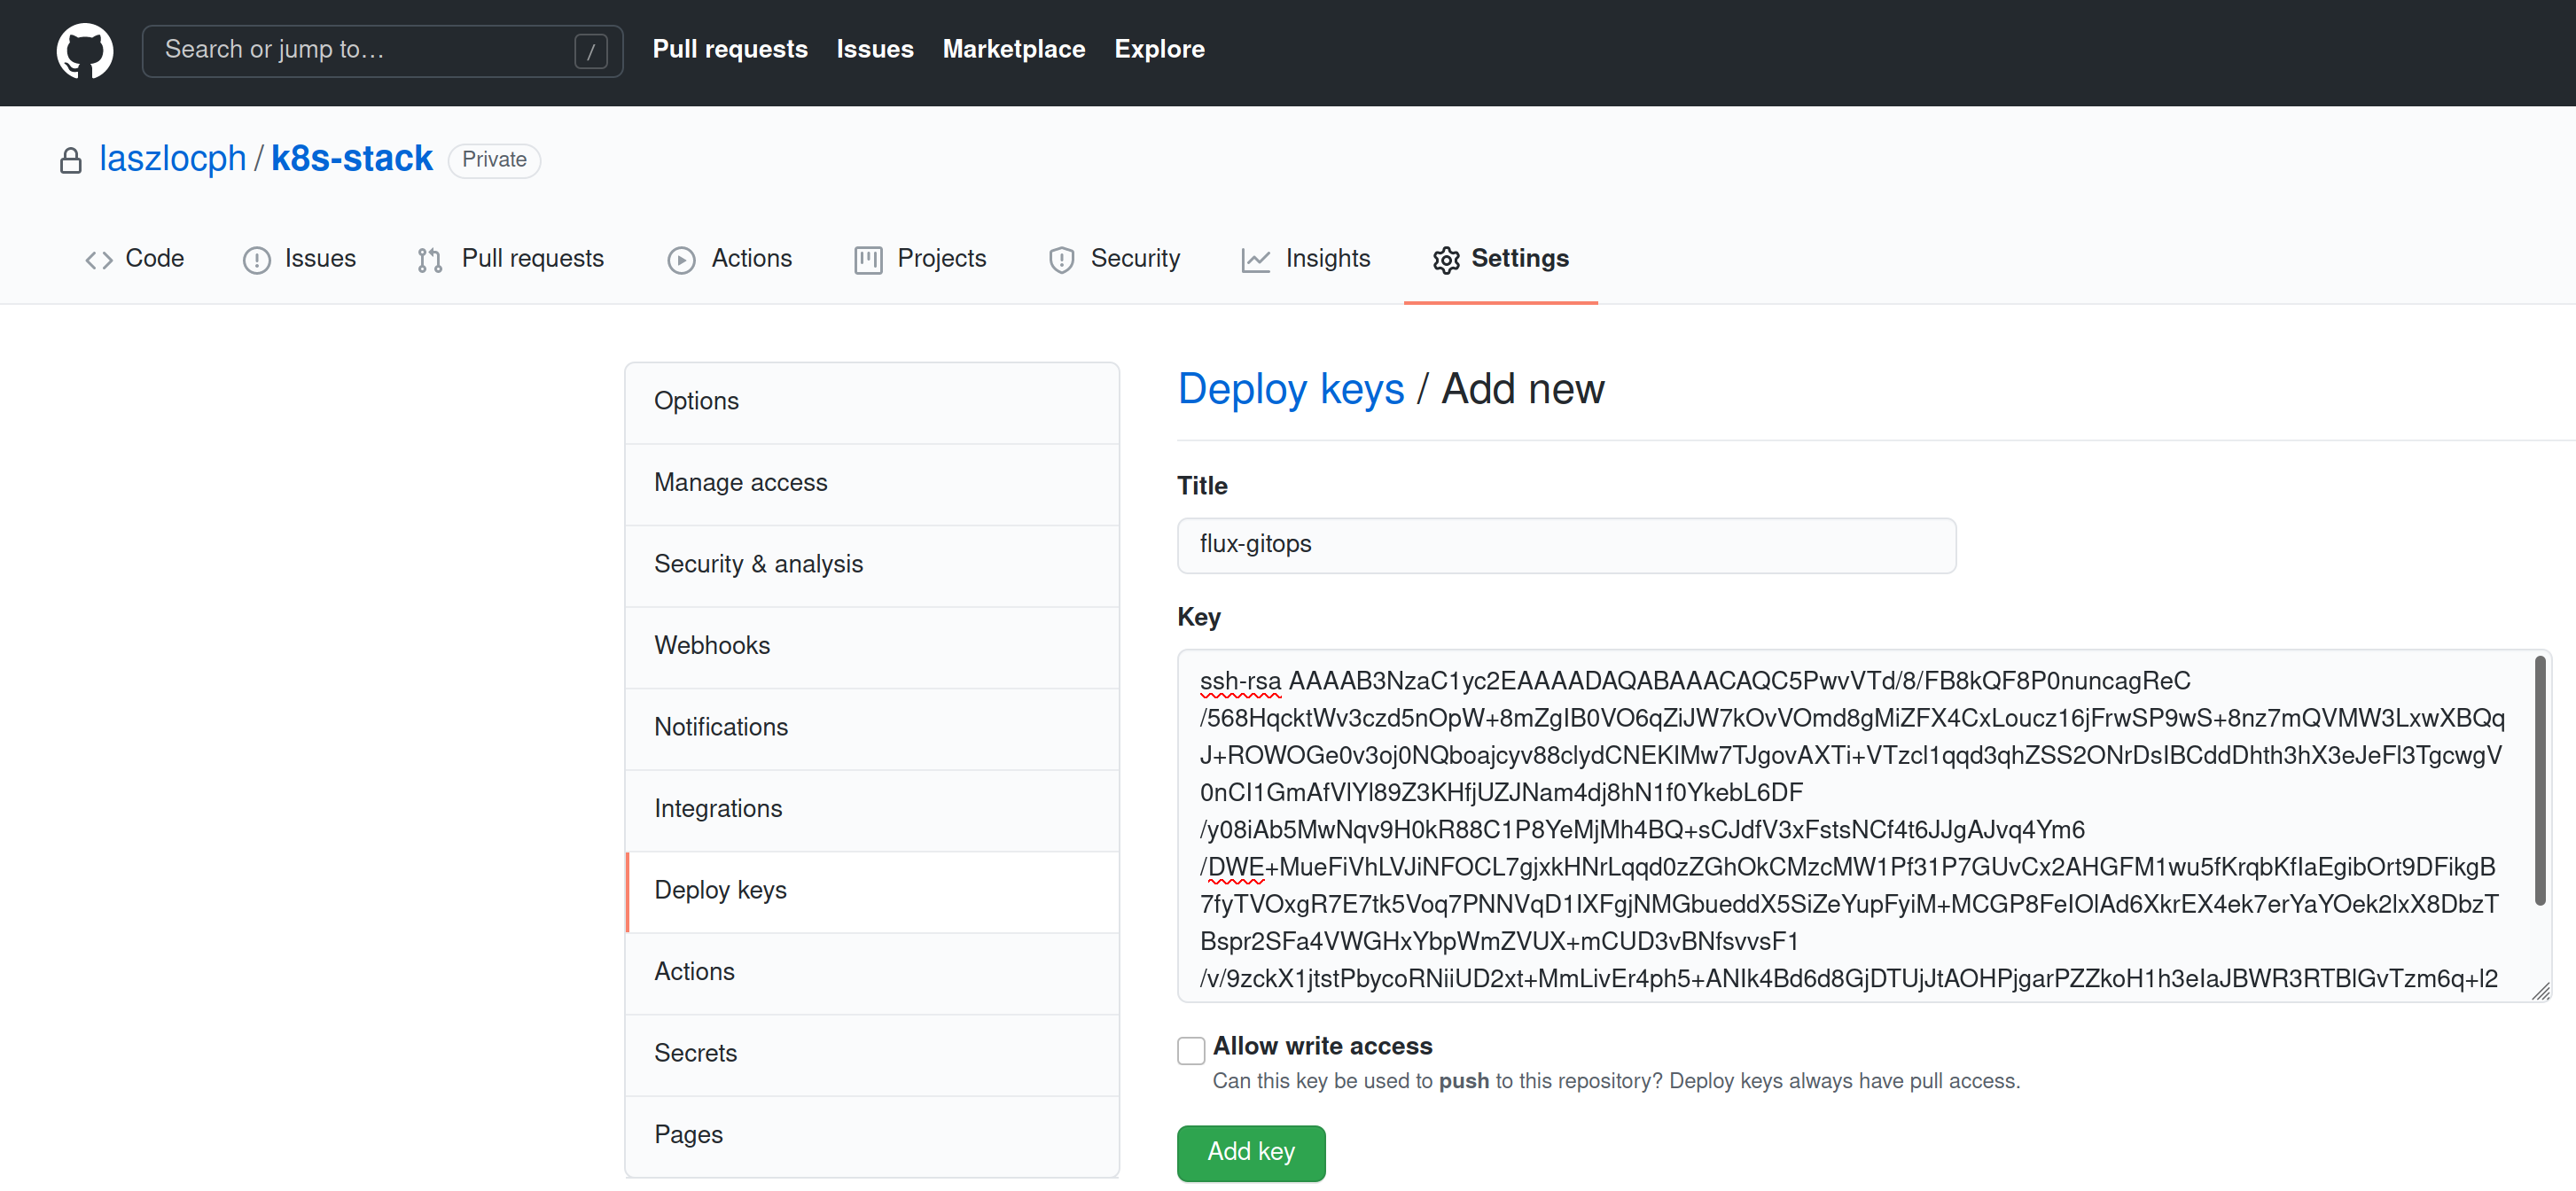
Not sure how to add a deploy key?
You need to authorize Flux to fetch the contents from Github by creating a read-only deploy key in your gitops repository.
- Open GitHub, navigate to your repository, and under Settings > Deploy keys click on Add deploy key
- Paste the ssh-rsa key from step 2) of the
gimlet gitops bootstrapoutput as a key.flux-gitopscan be an appropriate name for it - Make sure to leave the Allow write access checkbox unchecked
Verify the gitops automation
Check Flux's custom resources on the cluster to verify the gitops automation.
Flux uses the gitrepository custom resource to point to git repository locations and credentials. Flux's source controller periodically checks the content of the git repositories, and you can validate their status as follows:
➜ kubectl get gitrepositories -A
NAMESPACE     NAME                                                    URL                                                              AGE    READY   STATUS
flux-system   gitops-repo-gimlet-bootstraping-tutorial   ssh://git@github.com/gimlet/gimlet-bootstraping-tutorial   125m   True    stored artifact for revision 'main/f4a2a676bbcc04f38120b24463ca1c66cc099ab4'
If the git repositories are in ready state, validate the kustomization custom resources. These resources point to a path in a git repository to apply yamls from. If they are in ready state, you can be sure the Flux applied your latest manifests.
➜  kubectl get kustomizations -A
NAMESPACE     NAME                                                                 AGE    READY   STATUS
flux-system   gitops-repo-gimlet-bootstraping-tutorial                127m   True    Applied revision: main/f4a2a676bbcc04f38120b24463ca1c66cc099ab4
flux-system   gitops-repo-gimlet-bootstraping-tutorial-dependencies   127m   True    Applied revision: main/f4a2a676bbcc04f38120b24463ca1c66cc099ab4
Now that the gitops automation is in place, every manifest you put in the gitops repositories will be applied on the cluster by the gitops controller.
Need to debug Flux?
If kustomizations or gitrepositories are not in ready state, you get an error message in their status.
If you need to further debug their behavior, you can check Flux logs in the flux-system namespace.
kubectl logs -f deploy/kustomize-controller -n flux-system
kubectl logs -f deploy/source-controller -n flux-system
Deploy your app with gitops
Now let's deploy a dummy application now with gitops. To do that, you need to place application manifests in the gitops repository and push your commit.
A dummy app
First you need a dummy yaml to deploy an Nginx container.
apiVersion: apps/v1
kind: Deployment
metadata:
  name: dummy-app
  namespace: default
spec:
  replicas: 3
  strategy:
    type: RollingUpdate
  selector:
    matchLabels:
      application: dummy-app
  template:
    metadata:
      labels:
        application: dummy-app
    spec:
      containers:
      - name: dummy-app
        image: nginx
        ports:
          - containerPort: 80
Commit and push the file to the gitops repo under dummy-app a new folder called dummy-app.
Gitops in action
With the push, the gitops controller modifies the cluster state according to the git state, so it will deploy the git changes and the dummy application will pop up in the cluster.
Follow along with the kubectl get pods -A -w command.
Gitops bootstrapping reference
For all the gitops bootstrapping options, check out the Gitops bootstrapping reference.