Getting started
Deploying a static site to Kubernetes
In this tutorial, you will deploy a static site to Kubernetes and access it on a port-forward.
Prerequisites
- You have finished the installation tutorial, thus you see your git repositories in Gimlet and you have connected a cluster.
Step 1 - Fork an example repository
Fork this ReactJS example application.
Step 2 - Locate and open the example repository
Once you forked the repository, you need to refresh the repository list on the "Repositories" view.
Click "Refresh repositories".
Step 3 - Create the application configuration
Click "Add deployment configuration".
On the deployment configuration screen:
- Pick "Static site" from the deployment templates.
- Change the application name to
static-site - Inspect the build commands:
- It takes a build script and an output folder to configure the build
- Modify the "Build script" by adding "echo hello" as the last line.
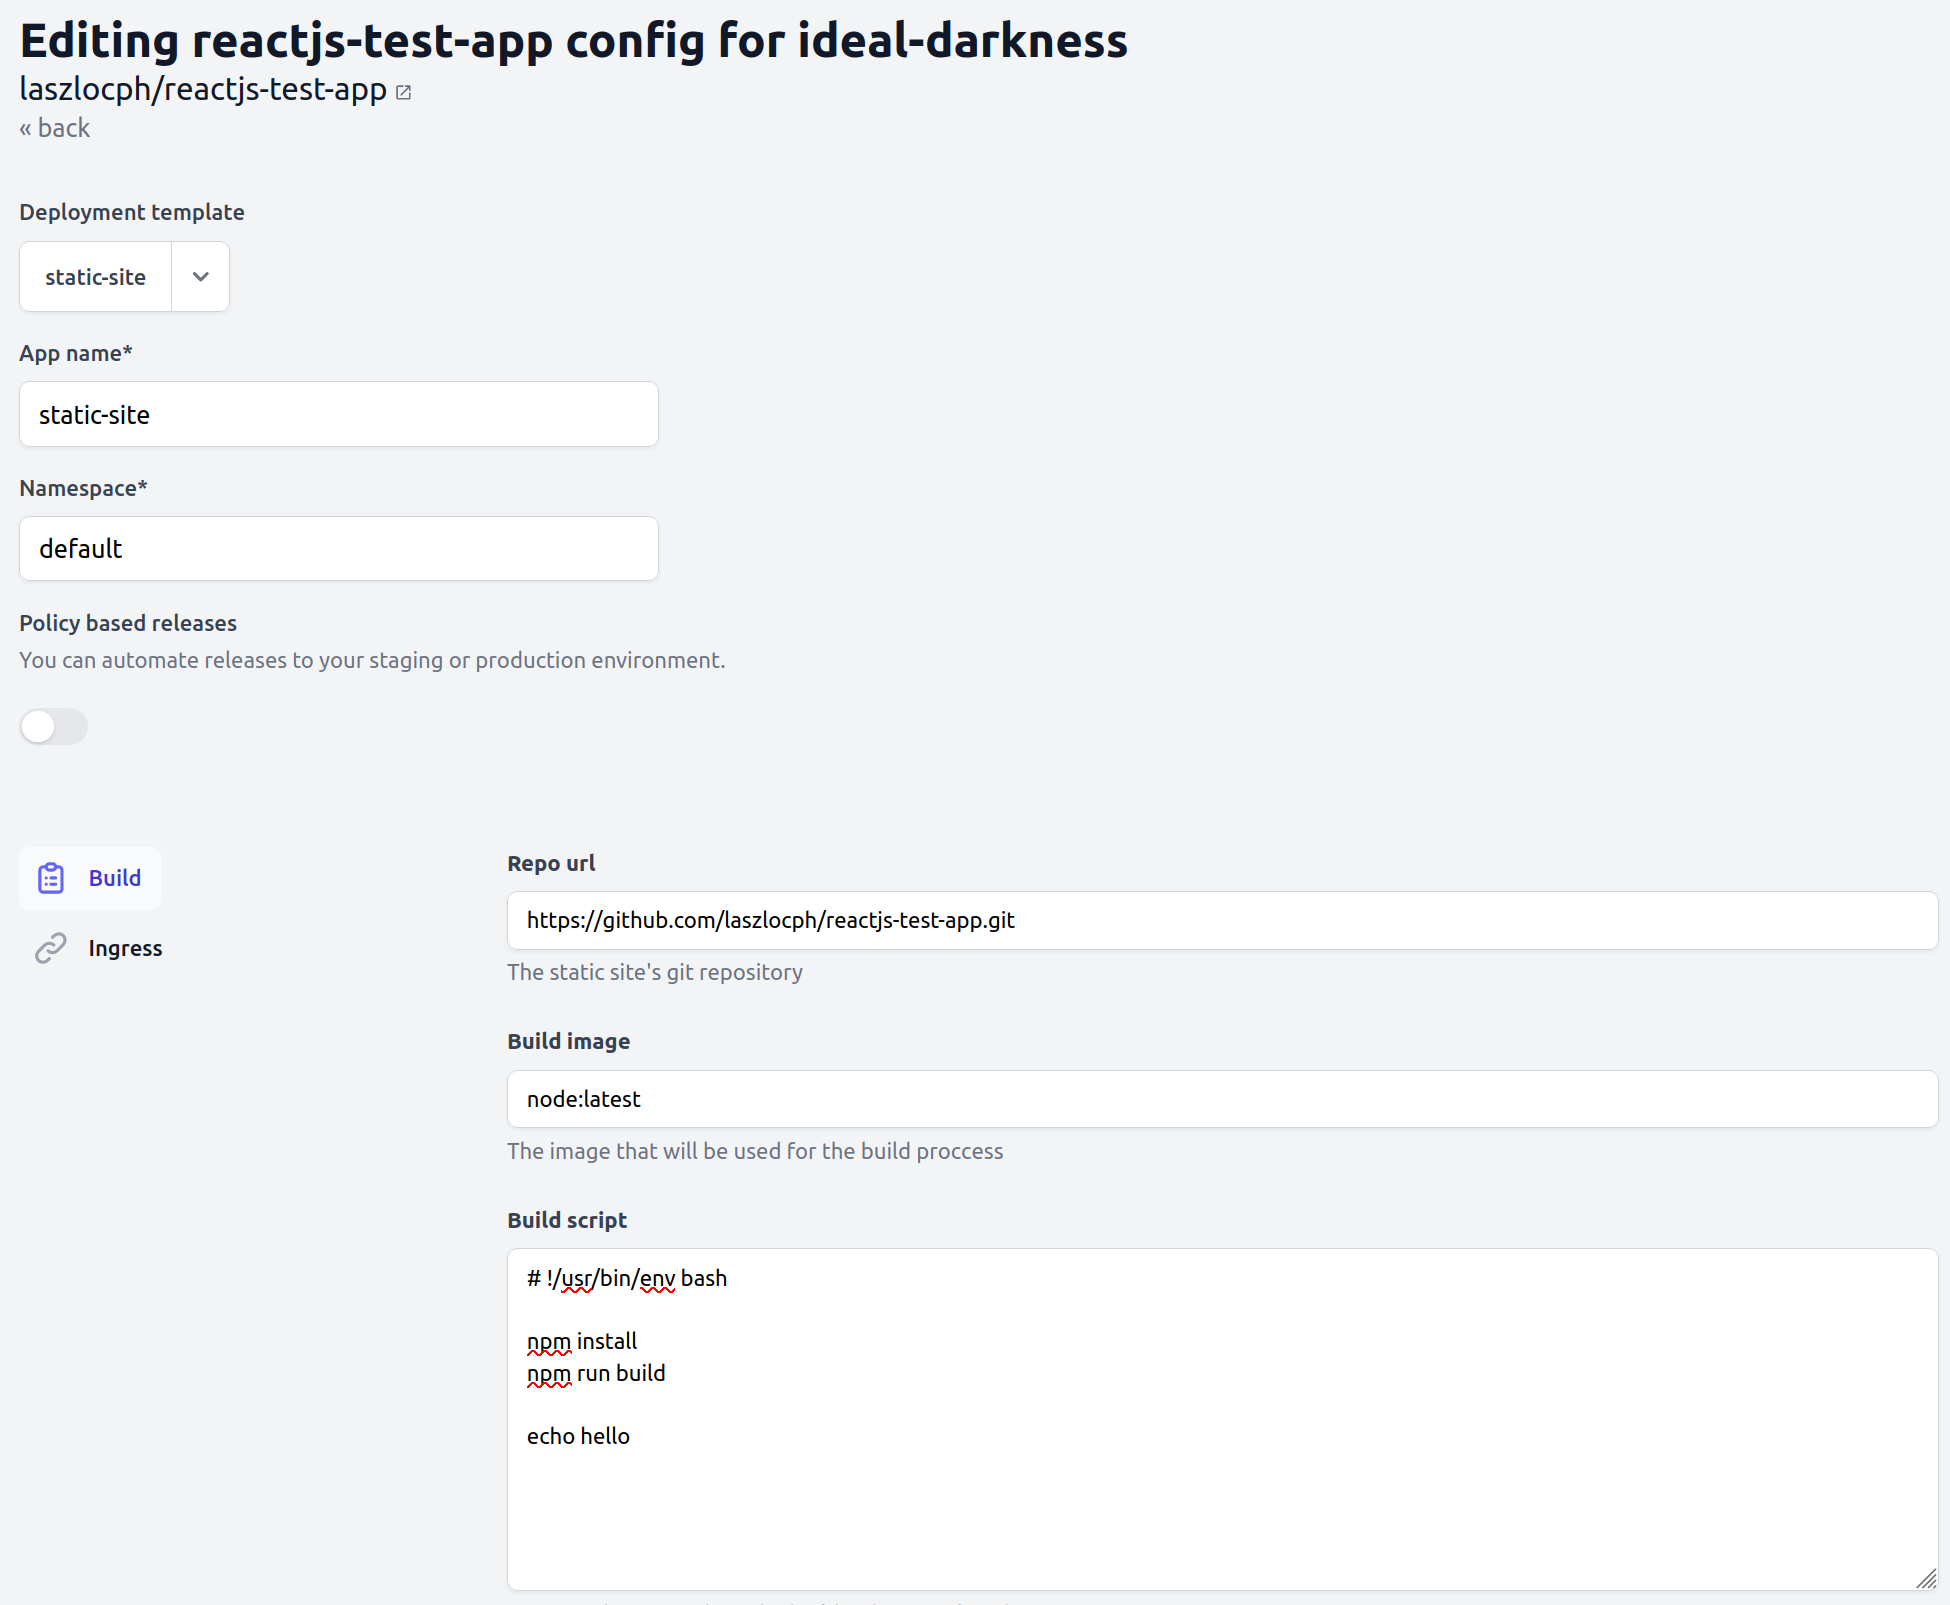
Click Save at the bottom of the screen.
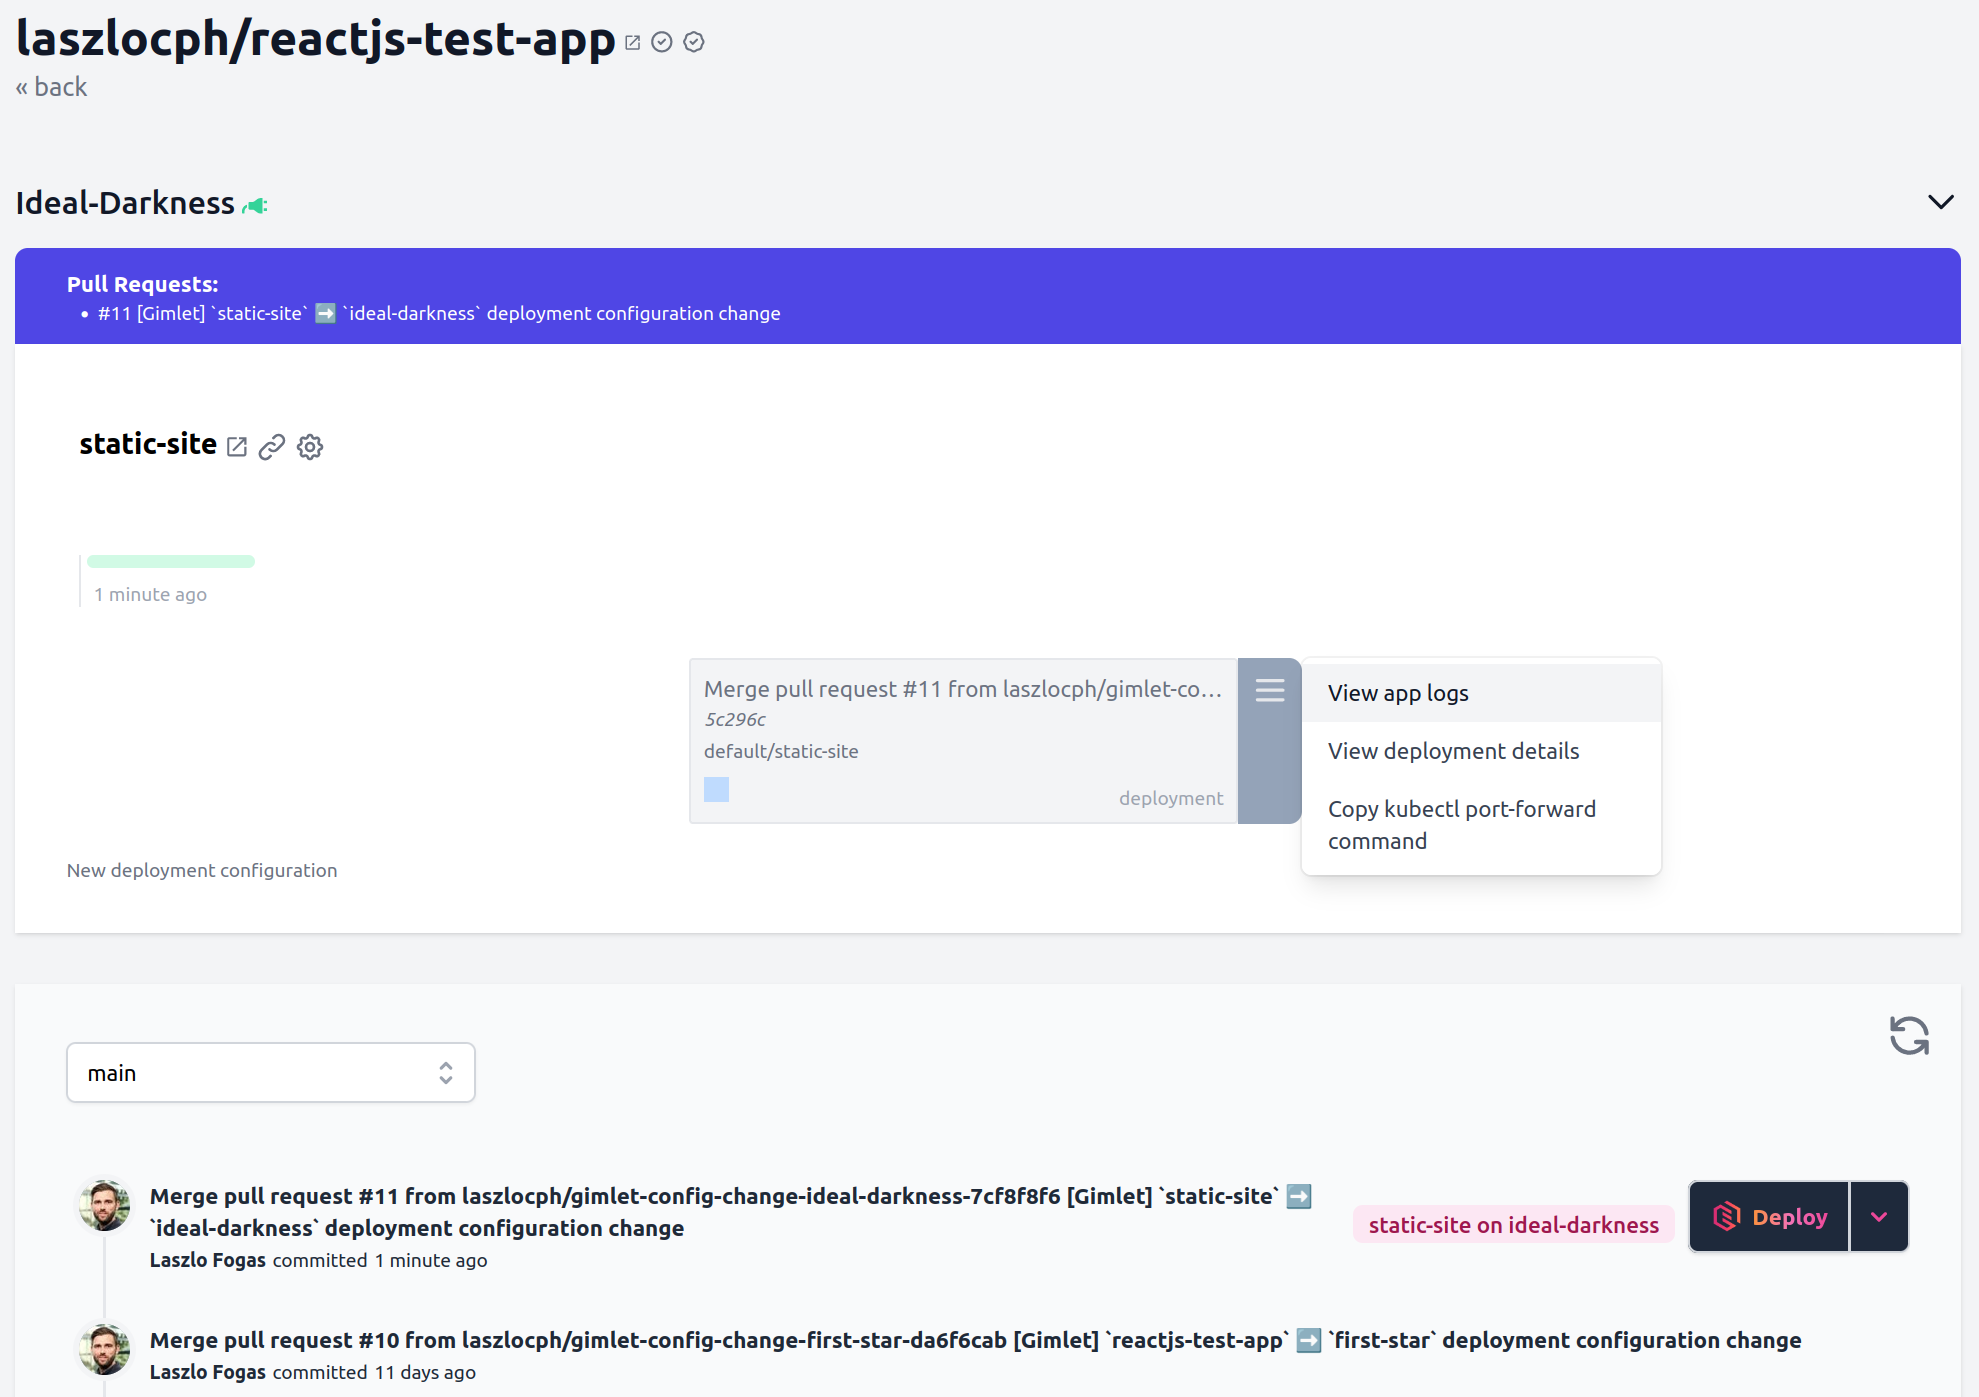
Step 4 - Deploy the application
Once you reviewed and merged the application configuration pull request, you will see that a "Deploy" button appears next to the latest commit. Since you are testing on localhost where there are no webhooks from Github, you may need to push the refresh button above the commits.
Push the "Deploy" button now and select the application configuration to deploy.
This will open the deploy panel where you can follow the deploy process:
- Kubernetes manifests are generated and written
- then synchronized to the cluster.
- A deployment shows up on Gimlet's screen.
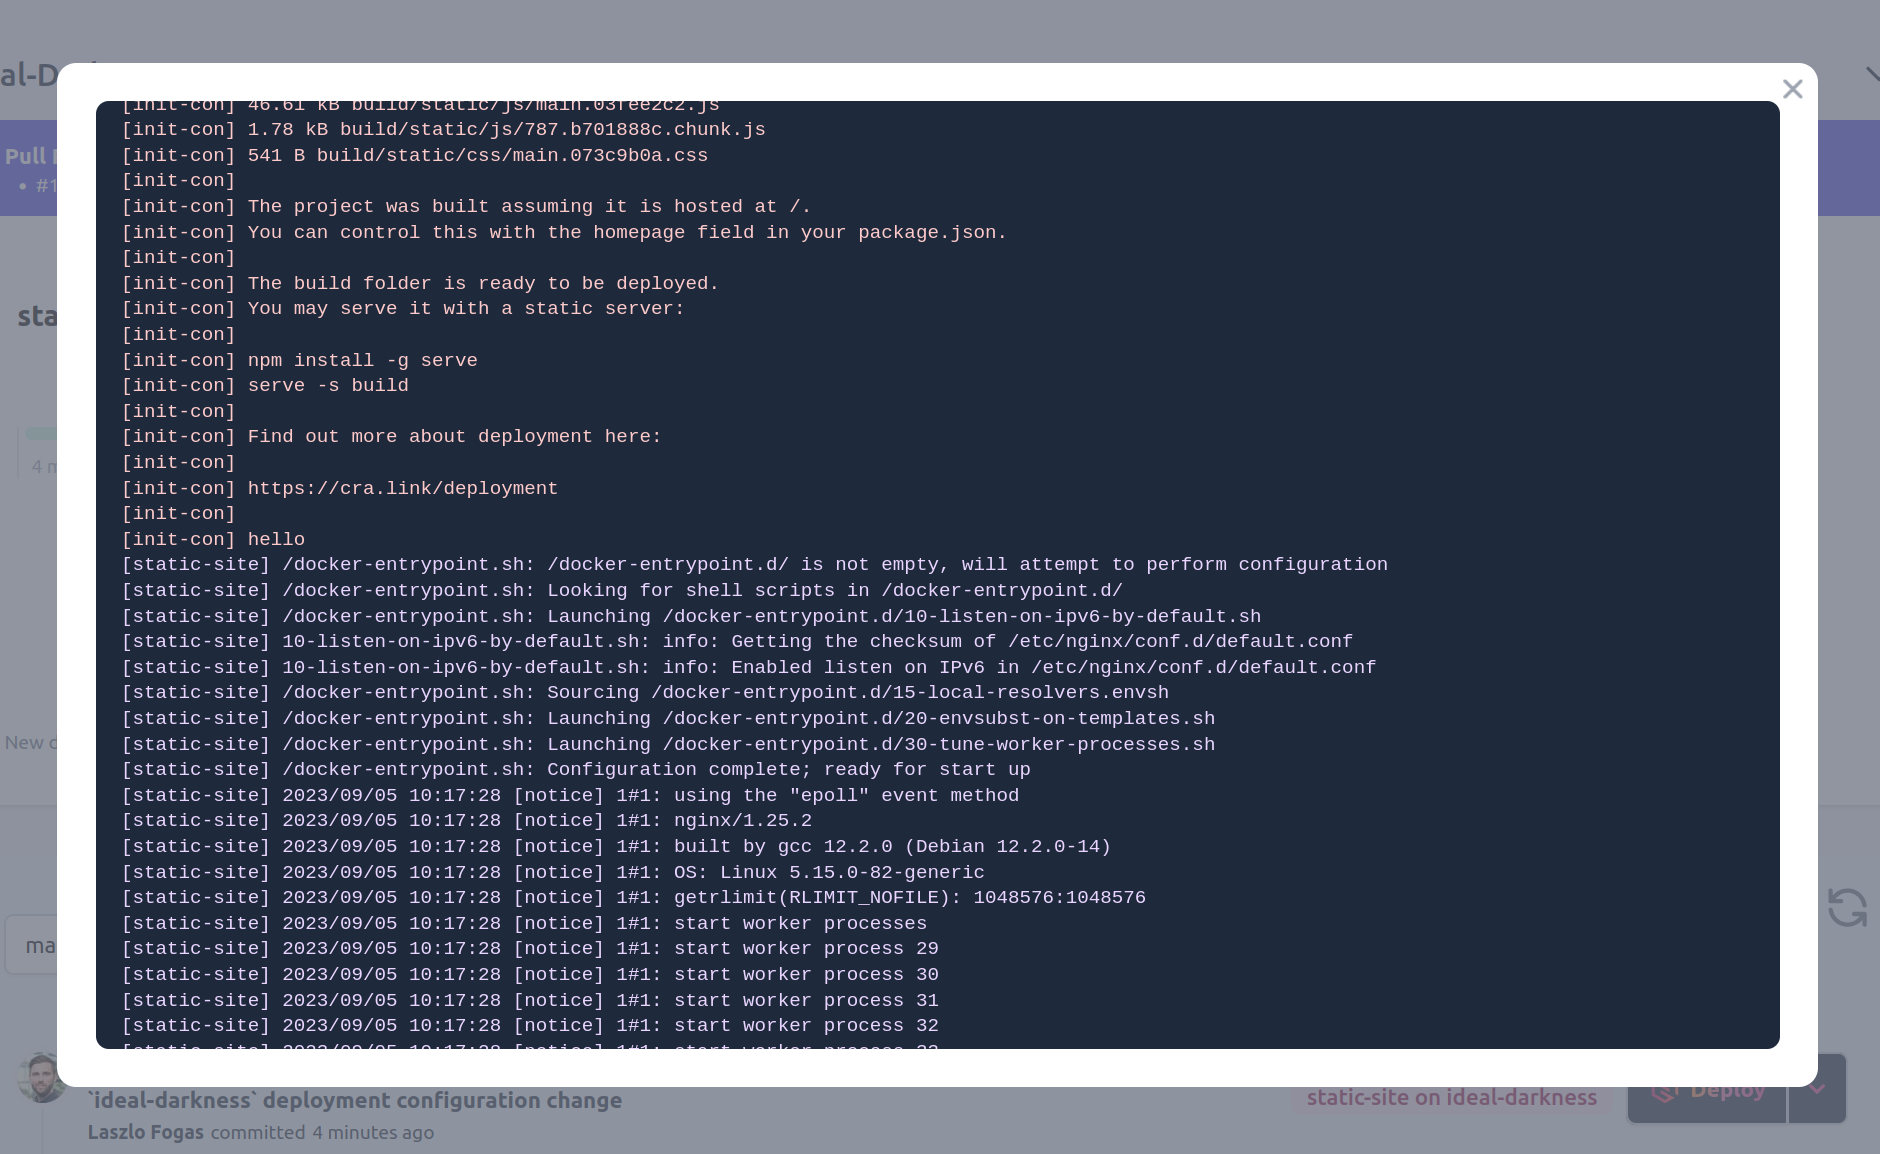
Step 5 - Build logs
Deploying static sites with this approach builds on Kubernetes's features. You may noticed that you did not need to build the project, only provide the build script. Now you can verify the build: builds take place on application startup, in an init container.
Open the deployment menu as it is shown on the screenshot above and click "View app logs".
You can follow the build and runtime logs of the deployed static site.
Step 6 - Access with port-forward
Applications running on Kubernetes are only accessible on the internal container network by default.
To bridge this gap and to quickly validate your running application, you can forward your application's port to your laptop:
$ kubectl port-forward deploy/first-app 10081:80

Forwarding from 127.0.0.1:10081 -> 80
Forwarding from [::1]:10081 -> 80
Where first-app is your application name, and 80 is the port your application is listening on.
Once forwarded, visit your application on http://127.0.0.1:10081 🎉