Guides
How to manage deployment configs
Storing configs for multiple environments
You store Gimlet manifest files under the .gimlet folder of your application source code repository. One file per environment.
The following example shows two files, one for staging, and one for production.
They only differ in the replica count. However, you can have a completely unique set of configs in your envs. The manifest files control it all.
# .gimlet/staging.yaml
app: myapp
env: staging
namespace: my-team
chart:
  repository: https://chart.onechart.dev
  name: onechart
  version: 0.32.0
values:
  replicas: 1
  image:
    repository: myapp
    tag: 1.1.0
  ingress:
    host: myapp.staging.mycompany.com
    tlsEnabled: true
# .gimlet/production.yaml
app: myapp
env: production
namespace: my-team
chart:
  repository: https://chart.onechart.dev
  name: onechart
  version: 0.32.0
values:
  replicas: 2
  image:
    repository: myapp
    tag: 1.1.0
  ingress:
    host: myapp.mycompany.com
    tlsEnabled: true
Editing deployment configs
On the dashboard
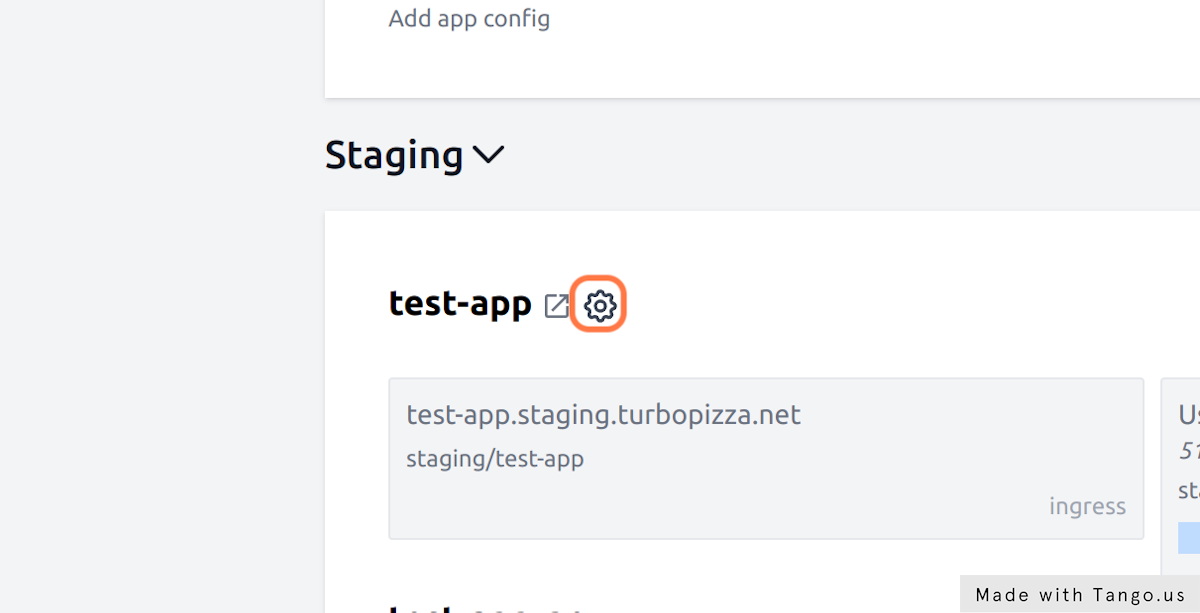
The Repository view shows a single repository. You can see the list of git commits at the bottom of the screen and the list of your deployment environments on the top of the screen.
Pick the environment config you want to edit, and click the cog wheel icon.
When you hit save, the changes you made are backed by a git commit. This is ClickOps 🙌
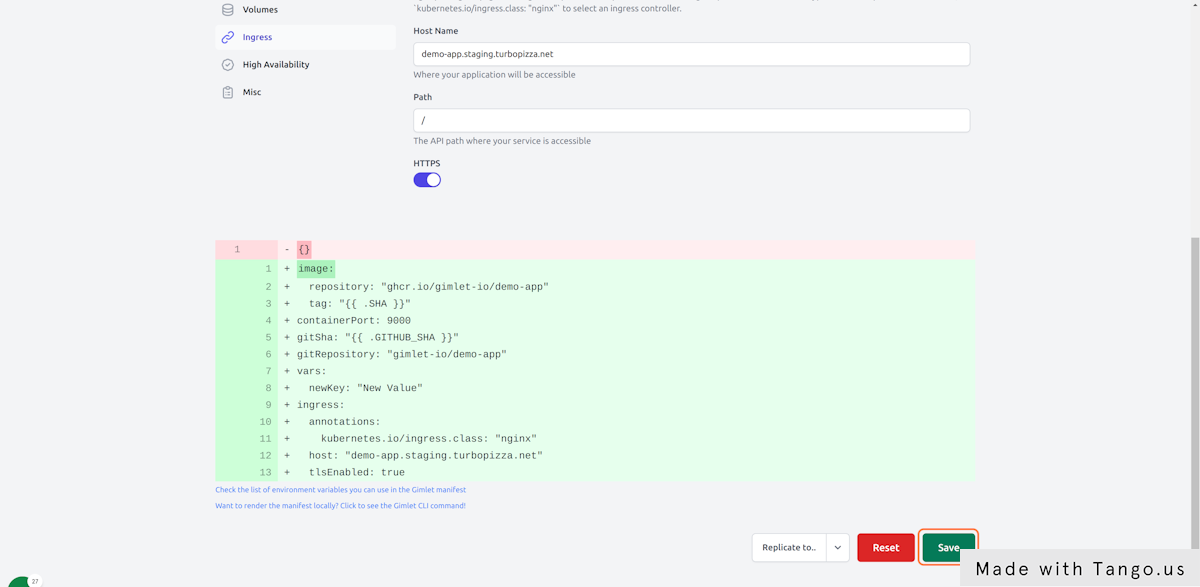
You can inspect the diff
Every time you save the configuration, you can inspect the diff of the environment configuration file in Gimlet.
With Gimlet CLI
Gimlet defaults to the OneChart Helm chart for web application deployment. It captures the most common use cases of web applications, so you don't have to maintain your own Helm chart.
To tailor the deployment configuration of your application, you can manually edit the environment file's values section as it is really nothing more than the values.yaml file for Helm charts, but for convenience, Gimlet starts a configuration page with the following command:
gimlet manifest configure -f .gimlet/staging-demo-app.yaml
👩💻 Configure on http://127.0.0.1:24349
👩💻 Close the browser when you are done
When you are done configuring, close the browser tab, and the values you set are written in the .gimlet/staging-demo-app.yaml file.
Inspect the file, commit and push it to git.
Want to know more about Helm?
Check out our SANE Helm guide.
Editing manually
To tailor the deployment configuration of your application, you can manually edit the environment file's values section as it is nothing more than the values.yaml file for Helm charts.
For a full reference of configuration options, check the OneChart reference.
Rendering manifests on your laptop
Short feedback loops are great, you don't have to push your manifest to git to see what it renders to.
The gimlet manifest template command renders the Kubernetes manifests from your Gimlet manifest.
gimlet manifest template
NAME:
   gimlet manifest template - Templates a Gimlet manifest

USAGE:
   gimlet manifest template \
    -f .gimlet/staging.yaml \
    -o manifests.yaml \
    --vars ci.env

OPTIONS:
   --file value, -f value    Gimlet manifest file to template, or "-" for stdin
   --vars value, -v value    an .env file for template variables
   --output value, -o value  output file
   --help, -h                show help (default: false)
How-to delete an environment configuration
If you have been experimenting, it is inevitable that you want to delete an already released application.
- The first step is to remove the Gimlet manifest file, so you will not deploy new versions of it
- then use the
gimlet release deleteCLI command
This will delete it from the gitops repository, and Flux will clean it up from the cluster.