Make Kubernetes an application platform
You can't do much with an empty Kubernetes cluster. In this guide you will equip Kubernetes with the must have components to make it a real application platform.
You will install
- an ingress controller with SSL support
- a log aggregator
- a metrics collector
You will use the Gimlet dashboard for this task.
If you prefer the command line
You can also perform this tutorial using the Gimlet CLI. It has the same power as the Gimlet dashboard.
Prerequisites
- A running Gimlet installation. If you are the cluster administrator, install Gimlet here.
- An empty Kubernetes cluster to host a new environment that you are about to create.
- Admin access to your DNS provider.
Create a new environment
Gimlet works with logical environments that can be mapped to clusters or namespaces within clusters.
With the Gimlet Installer, you already created an environment, possibly a testing or your production environment. To fully understand how to create and manage environments, in this tutorial you will create a dummy environment, install essential tools on it, and you will clean it up as the last step.
Now let's create an environment under Environments > Create new environment and call it deleteme.

Bootstrap the gitops automation
Now the deleteme environment is created, but it is nothing more at this point than an entry in Gimlet's database.
To bootstrap the gitops automation, you need to decide where are you going to keep the manifests of this environment. Let's enable the Separate environments by git repositories toggle, and leave the repository names unchanged to follow Gimlet's conventions.
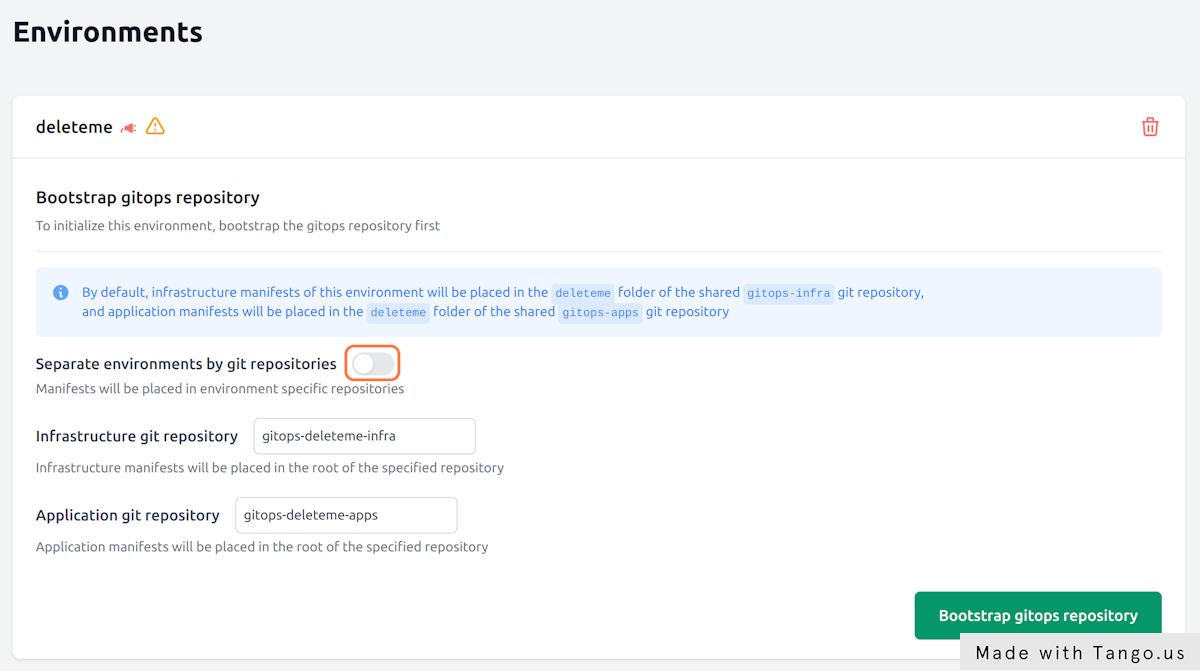
When you hit the Bootstrap gitops repository button, Gimlet creates two repositories and configures Flux to sync the repository contents on the target cluster.
The two repositories will be
- your-org/gitops-deleteme-infra
- your-org/gitops-deleteme-apps
to store infrastructure components and your custom applications respectively.
Hit Bootstrap gitops repository now.
Finalize gitops bootstrapping
To finalize gitops bootstrapping, let's follow the steps Gimlet displays under your environment.
In the steps you will
- clone the gitops repositories
- grant access for Flux to pull changes from git
- and apply the Flux manifests on an empty Kubernetes cluster to kickstart the automation
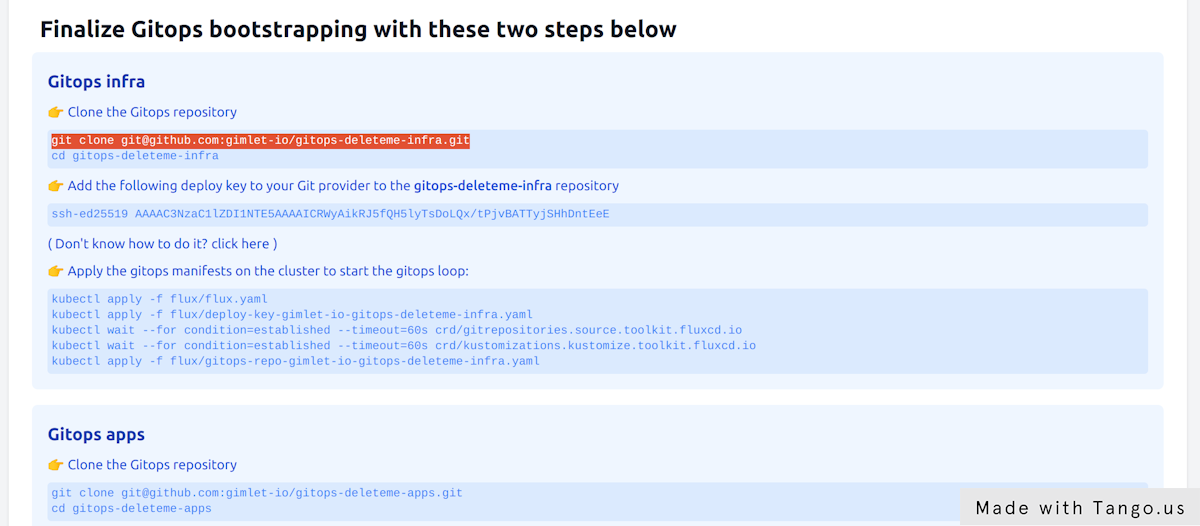
You need to complete the steps for both repositories
Remember you have one repository for infrastructure components and an other one for apps.
Verify the gitops automation
Check Flux's custom resources on the cluster to verify the gitops automation.
Flux uses the gitrepository custom resource to point to git repository locations and credentials. Flux's source controller periodically checks the content of the git repositories, and you can validate their status as follows:
➜ kubectl get gitrepositories -A
NAMESPACE     NAME                                         URL                                                   AGE   READY   STATUS
flux-system   gitops-repo-gimlet-io-gitops-deleteme-apps    ssh://git@github.com/gimlet-io/gitops-deleteme-apps    60s   True    stored artifact for revision 'main/bb32202a9968cc290ff757f2a75bb17863d46e6e'
flux-system   gitops-repo-gimlet-io-gitops-deleteme-infra   ssh://git@github.com/gimlet-io/gitops-deleteme-infra   60s   True    stored artifact for revision 'main/c29545f11e677479a44cfad85549b3b92af0a3c2'
If the git repositories are in ready state, validate the kustomization custom resources. These resources point to a path in a git repository to apply yamls from. If they are in ready state, you can be sure the Flux applied your latest manifests.
➜  kubectl get kustomizations -A
NAMESPACE     NAME                                                      AGE   READY   STATUS
flux-system   gitops-repo-gimlet-io-gitops-deleteme-apps                 60s   True    Applied revision: main/bb32202a9968cc290ff757f2a75bb17863d46e6e
flux-system   gitops-repo-gimlet-io-gitops-deleteme-apps-dependencies    60s   True    Applied revision: main/bb32202a9968cc290ff757f2a75bb17863d46e6e
flux-system   gitops-repo-gimlet-io-gitops-deleteme-infra                60s   True    Applied revision: main/c29545f11e677479a44cfad85549b3b92af0a3c2
flux-system   gitops-repo-gimlet-io-gitops-deleteme-infra-dependencies   60s   True    Applied revision: main/c29545f11e677479a44cfad85549b3b92af0a3c2
Now that the gitops automation is in place, every manifest you put in the gitops repositories will be applied on the cluster by the gitops controller.
Need to debug Flux?
If kustomizations or gitrepositories are not in ready state, you get an error message in their status.
If you need to further debug their behavior, you can check Flux logs in the flux-system namespace.
kubectl logs -f deploy/kustomize-controller -n flux-system
kubectl logs -f deploy/source-controller -n flux-system
Install the Nginx ingress controller
Navigate to Environments > deleteme > Infrastructure components and locate Nginx among the components.
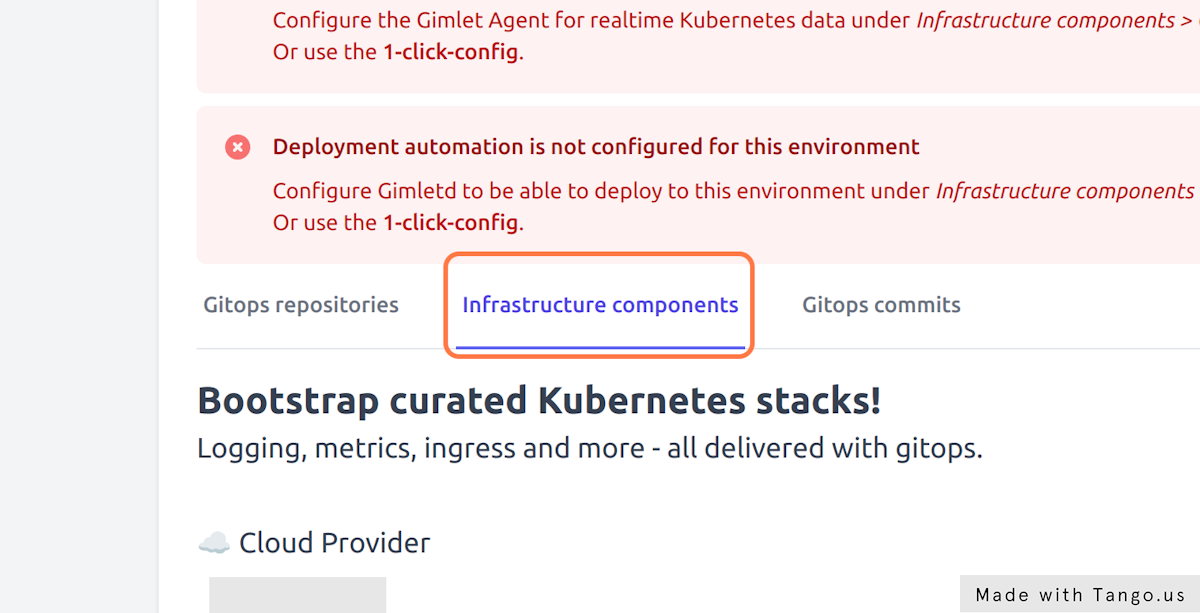
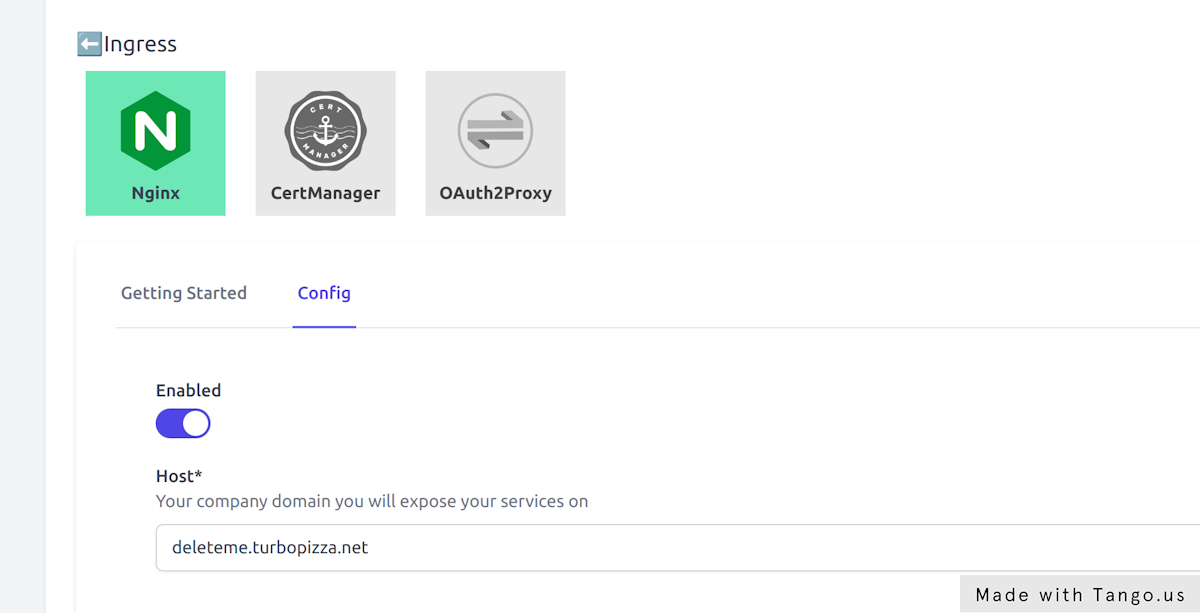
On the Config tab enable Nginx and provide the domain this environment will receive traffic on. Gimlet works with a wildcard DNS entry and puts all applications under the specified domain. Set deleteme.yourcompany.com as the domain name.
Hit Save components and inspect the gitops commit Gimlet made in the your-org/gitops-deleteme-infra repository.
You can monitor the ingress-nginx pod as it comes up with the following command:
$ kubectl get pods -n infrastructure -w
NAME                                             READY   STATUS    RESTARTS      AGE
ingress-nginx-controller-66455d768d-v8pgh        1/1     Running   0             8s
Set a wildcard DNS entry
Once the ingress-nginx pod running a Kubernetes service of type LoadBalancer is also placed on your cluster.
This service is exposing the ingress-nginx pod on an external IP address. This IP address is going to serve as the entry point to your cluster, and the ingress cluster will be the one that routes traffic to the specific ingress resources.
$ kubectl get svc -n infrastructure
NAME                                 TYPE           CLUSTER-IP      EXTERNAL-IP     PORT(S)                                                                                                             AGE
ingress-nginx-controller             LoadBalancer   10.100.70.254   34.141.219.81   80:30318/TCP,443:30102/TCP                                                                                          61d
To be able to access the ingress controller on a domain name, you have to place an A record in your DNS provider. Point *.deleteme.yourcompany.com to the IP address that you've seen in the kubectl get svc output.
Your external IP is pending?
It takes a couple of minutes for your cloud provider to allocate a load balancer and a public IP address for you.
If however your external IP remains in Pending state, you should join our community discord to get further help.
Install Grafana Loki, Prometheus and CertManager
Now that you have the ingress infrastructure in place, let's switch gears and enable several components at once.
At the end of this chapter you will have Grafana running on https://grafana.deleteme.yourcompany.com with logs and metrics coming from your cluster.
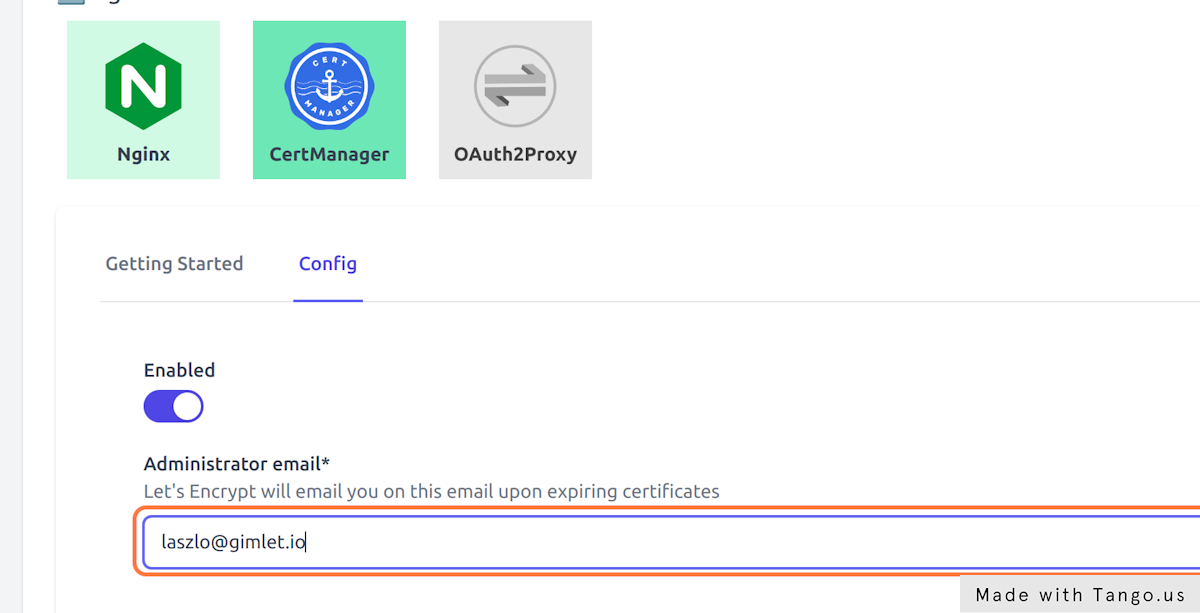
- Enable Cert Manager in Environments > deleteme > Cert Manager > Config
- Provide an email address that will be used to inform you about expiring certificates
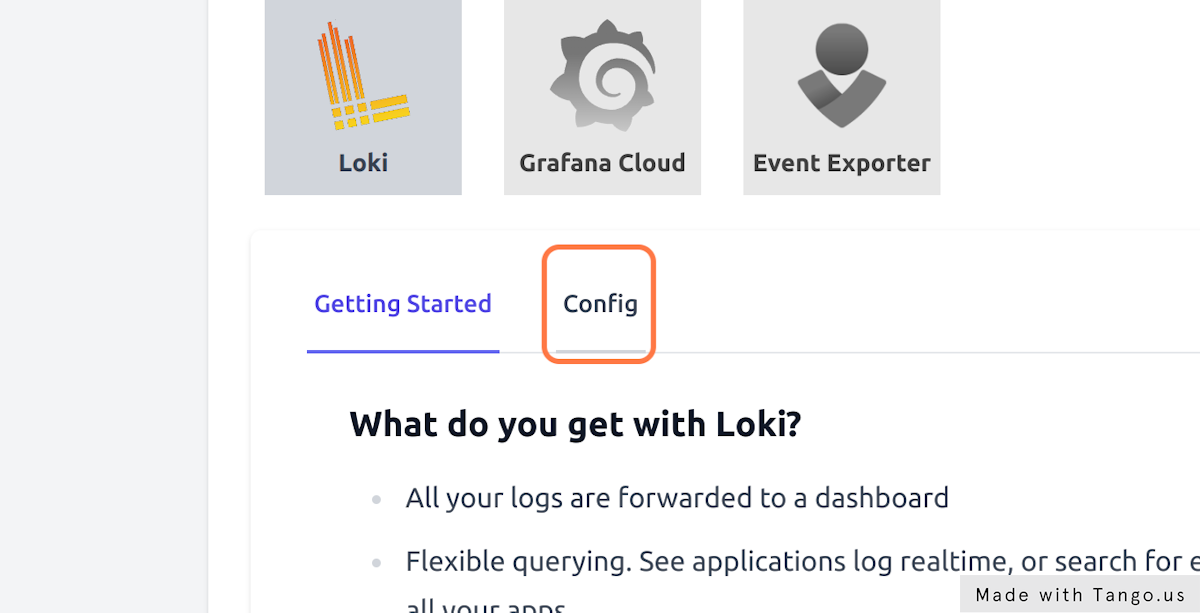
- Enable Loki in Environments > deleteme > Loki > Config to gather all cluster logs
- Set Loki's retention days to 10
- And finally, enable Prometheus in Environments > deleteme > Prometheus > Config to gather all cluster metrics
Hit Save components and inspect the gitops commit Gimlet made in the your-org/gitops-deleteme-infra repository.
You can monitor the pods as they come up:
$ kubectl get pods -n infrastructure -w
Verify metrics in Grafana
You can start using the built-in Grafana dashboards on the https://grafana.deleteme.yourcompany.com address.
The log in information is stored in a kubernetes secret, and you can get it if you follow the one-pager in Gimlet under Environments > deleteme > Loki > Getting Started
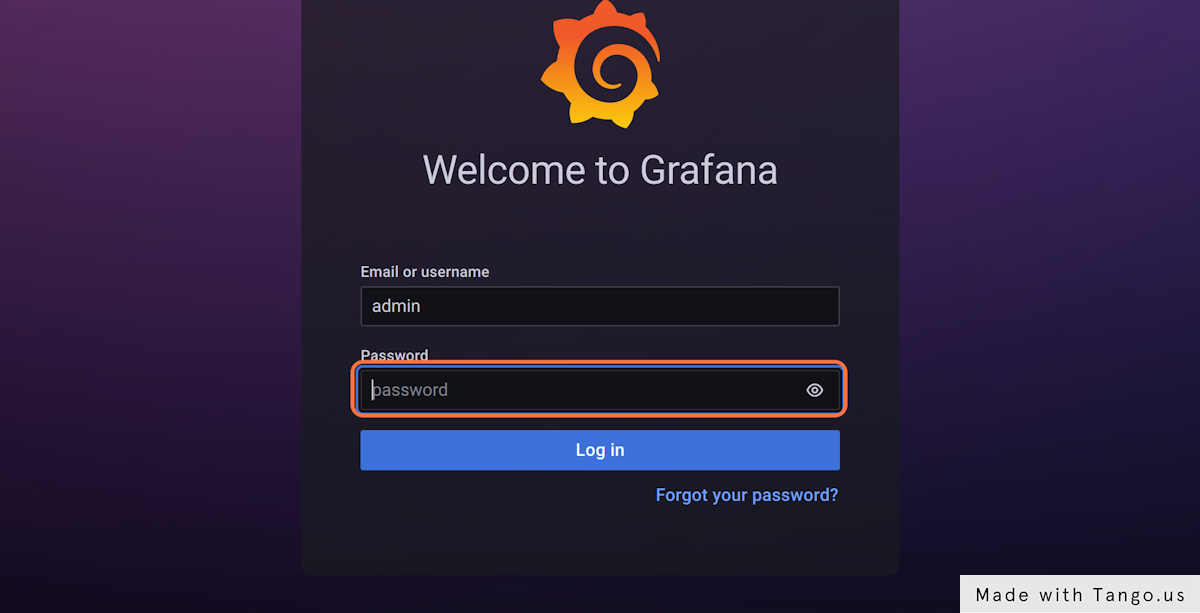
Use the username admin and get the password with this one-liner:
kubectl get secret grafana --namespace infrastructure --template='{{ index .data "admin-password"}}' | base64 -d
Cleanup
Congratulations, now you've learnt
- how to create a new Gimlet environment
- how to install and manage cluster components
- and you have great tooling to operate your applications.
Once you are confident in your knowledge, you can delete the dummy environment you created in this tutorial and start applying your knowledge in managing your testing and production environments.
To clean up
- delete your dummy cluster
- delete your
your-org/gitops-deleteme-infragit repository - delete your
your-org/gitops-deleteme-appsgit repository - delete the wildcard DNS entry
*.deleteme.yourcompany.com