Deploy Streamlit Applications with Gimlet

Laszlo Fogas
Streamlit Community Cloud is on par with the simplicity of the popular framework itself. It’s awesome to have a hosting solution dedicated to it. This comes with some limitations, however, which we aim to overcome with Gimlet’s upcoming 1.0 version.
Streamlit is an amazing framework for data scientists and people who work with language models. It has little to no learning curve, just like Streamlit Community Cloud.
Gimlet 1.0 release is around the corner. It comes with several hosting related capabilities that’s useful for data scientists working with Streamlit applications every day.
Deployment of Streamlit Apps with Gimlet
Deploying a Streamlit application can be done in two steps:
- importing the repository,
- and configuring the deployment.
Import the Streamlit Repository
You can get started with Gimlet by connecting your GitHub account. After that, add the repository that has your Streamlit application by clicking the Import button next to it. Save the added repo by clicking the I am done importing button. If you can’t find the repository on the top of the list, use the search bar.
Configure the Deployment
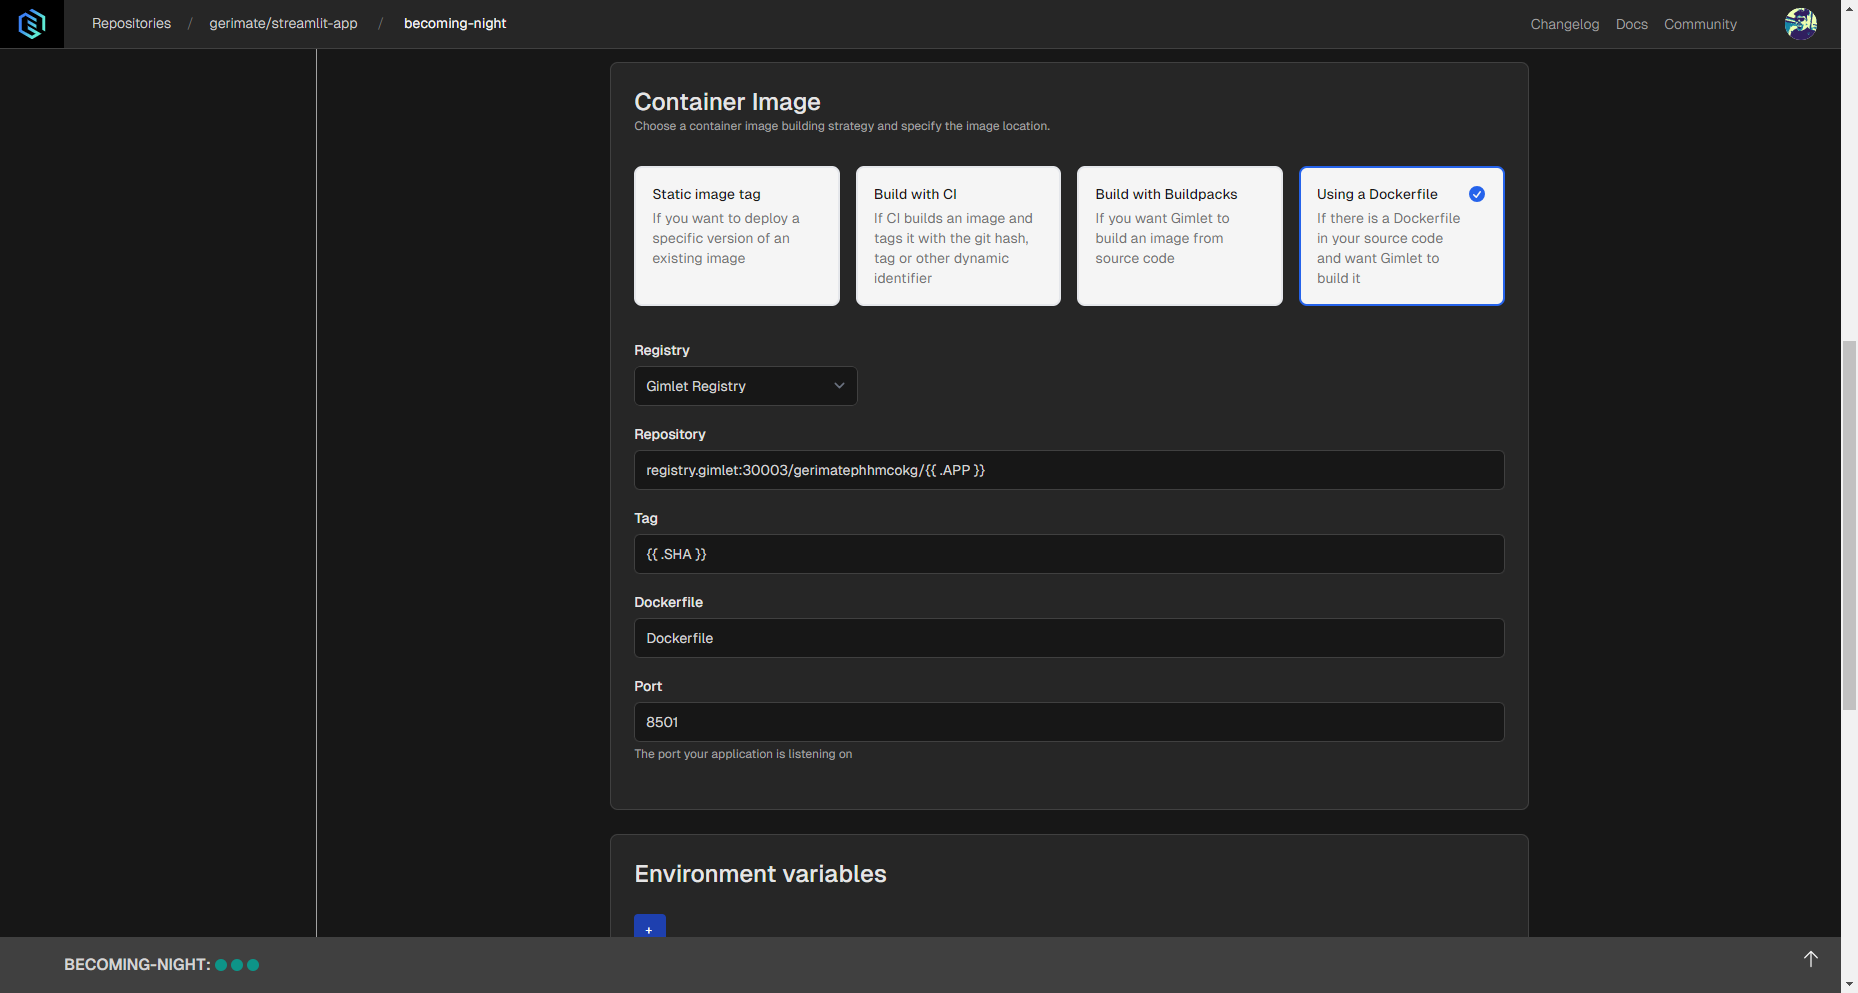
Navigate to the deployment setup screen by clicking on the card of your Streamlit application, and then the New Deployment button. Set up the deployment in the following way:
- Deployment template: Web Application. This will allow you to select the Dockerfile container image build setting.
- Container Image: Using a Dockerfile. This method requires a Dockerfile. If you don’t have one, the example below can be tailored to your app or used without changes. If you’re not familiar with Dockerfiles, read the comments.
# app/Dockerfile

# This Dockerfile uses python:3.9-slim, which is a lightweight implementation of the Python image. This’ll reduce image size.
FROM python:3.9-slim

# Sets the working directory inside the container to `/app`. It’s unlikely that you’ll need to adjust this.
WORKDIR /app

# Installs several packages and cleans up the apt cache. In some cases some of these packages might not be needed to run a Streamlit container.
RUN apt-get update && apt-get install -y \
    build-essential \
    curl \
    software-properties-common \
    git \
    && rm -rf /var/lib/apt/lists/*

# Copies everything from the project's root directory to the working directory of the container.
# Make sure there's a .dockerignore file in your root folder that lists all files that contains credentials, like a .env file.
COPY . .

# Installs Python packages listed in the requirements.txt.
RUN pip3 install -r requirements.txt

# Exposes port 8501 for external access. This is typical for Streamlit applications.
EXPOSE 8501

# Checks the health of the Streamlit server.
HEALTHCHECK CMD curl --fail http://localhost:8501/_stcore/health

# Defines how to start the application. In this case the Streamlit application’s filename is st.py, so feel free to adjust it to your app’s name.
ENTRYPOINT ["streamlit", "run", "st.py", "--server.port=8501", "--server.address=0.0.0.0"]
- Registry: Gimlet Registry. This is made by Gimlet for you by default.
- Port:
8501. This is the default exposed port for Streamlit apps.
When all the setting changes are made as seen above, you can click the Deploy button.
After that, logs will appear and your app will be set up soon. When deployment status turns Running, you can check out the app in your browser by clicking on the link next to the status.
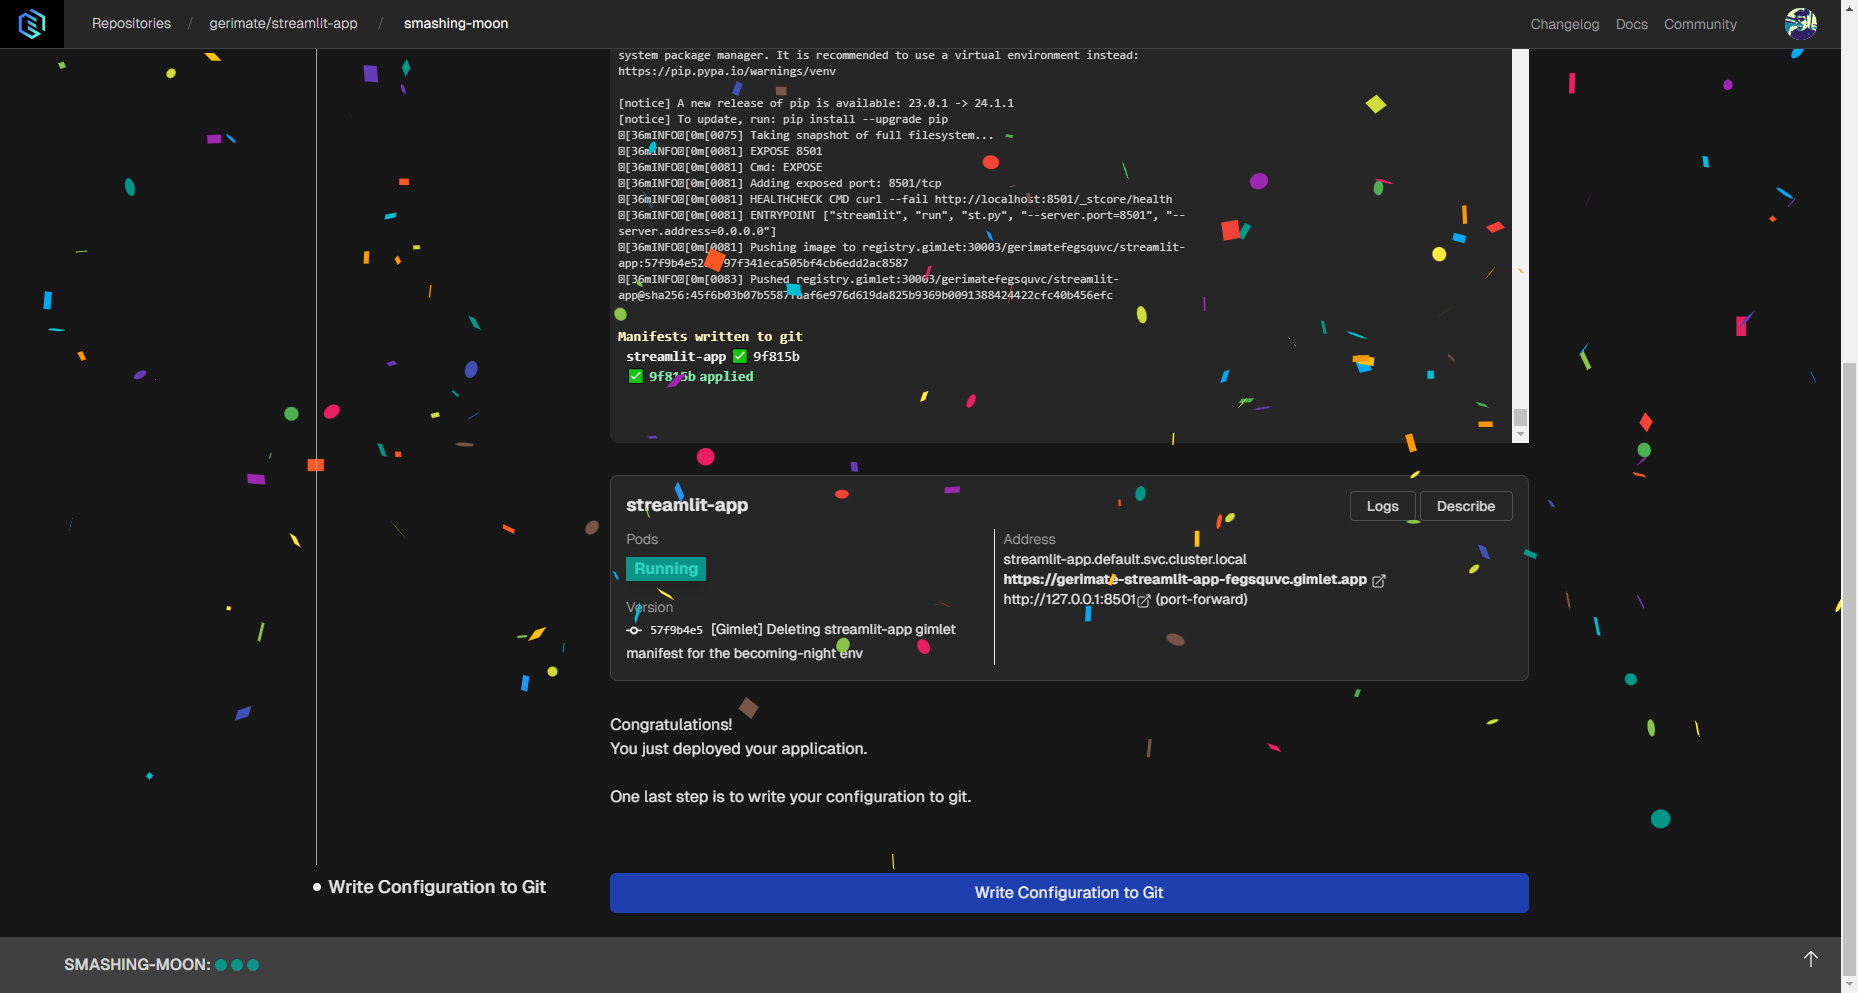
Click Write configuration to Git to save the deployed application and to be able to edit its settings later.
Fancy Things for your Streamlit App
You can configure additional settings for your deployed Streamlit app, such as social authentication.
HTTPS is enabled by default, therefore you don't need to configure anything to secure your application. Behind the scenes Let's Encrypt issues the certificate using the cert-manager project.
Social Authentication
You can configure social authentication for GitHub organizations and users. Streamlit Community Cloud has a similar mechanism that allows you to restrict usage to users with the email addresses specified by you. But in Community Cloud, you can only do it with one application.
Here's a brief intro to social authentication capabilities with Gimlet:
To be able to add social authentication, you need to do two things:
- Create a GitHub OAuth application,
- Configure OAuth2Proxy in Gimlet.
Create a GitHub OAuth Application
After your app is deployed, create the GitHub OAuth application by following GitHub’s documentation.
One note to add to the official GitHub docs is that you’ll need to add a Homepage URL and a Callback URL. Follow these instructions:
- Homepage URL: If you don’t use a custom domain, you should use the domain generated by Gimlet for you in this format:
https://auth-[prefix generated by Gimlet].gimlet.app/. - Callback URL: This is partially the same as the Homepage URL, except it’s
https://auth-[prefix generated by Gimlet].gimlet.app/oauth2/callback/.
Some data about the GitHub OAuth application will be needed. Namely these:
- Client ID
- Client Secret
When you create the new GitHub OAuth app copy and store these because you’ll need to add these in Gimlet.
Configure OAuth2Proxy in Gimlet
When the OAuth app is ready, navigate to environment settings in Gimlet.
To do that, click Environments in the menu on top and click on your environment’s card. When you first see the environment settings, you have to create gitops repositories, which you can do with a single click.
When the repositories are ready, click Ingress in the options on the left, and look for OAuth2Proxy settings. When you find it, just use the toggle to enable it.
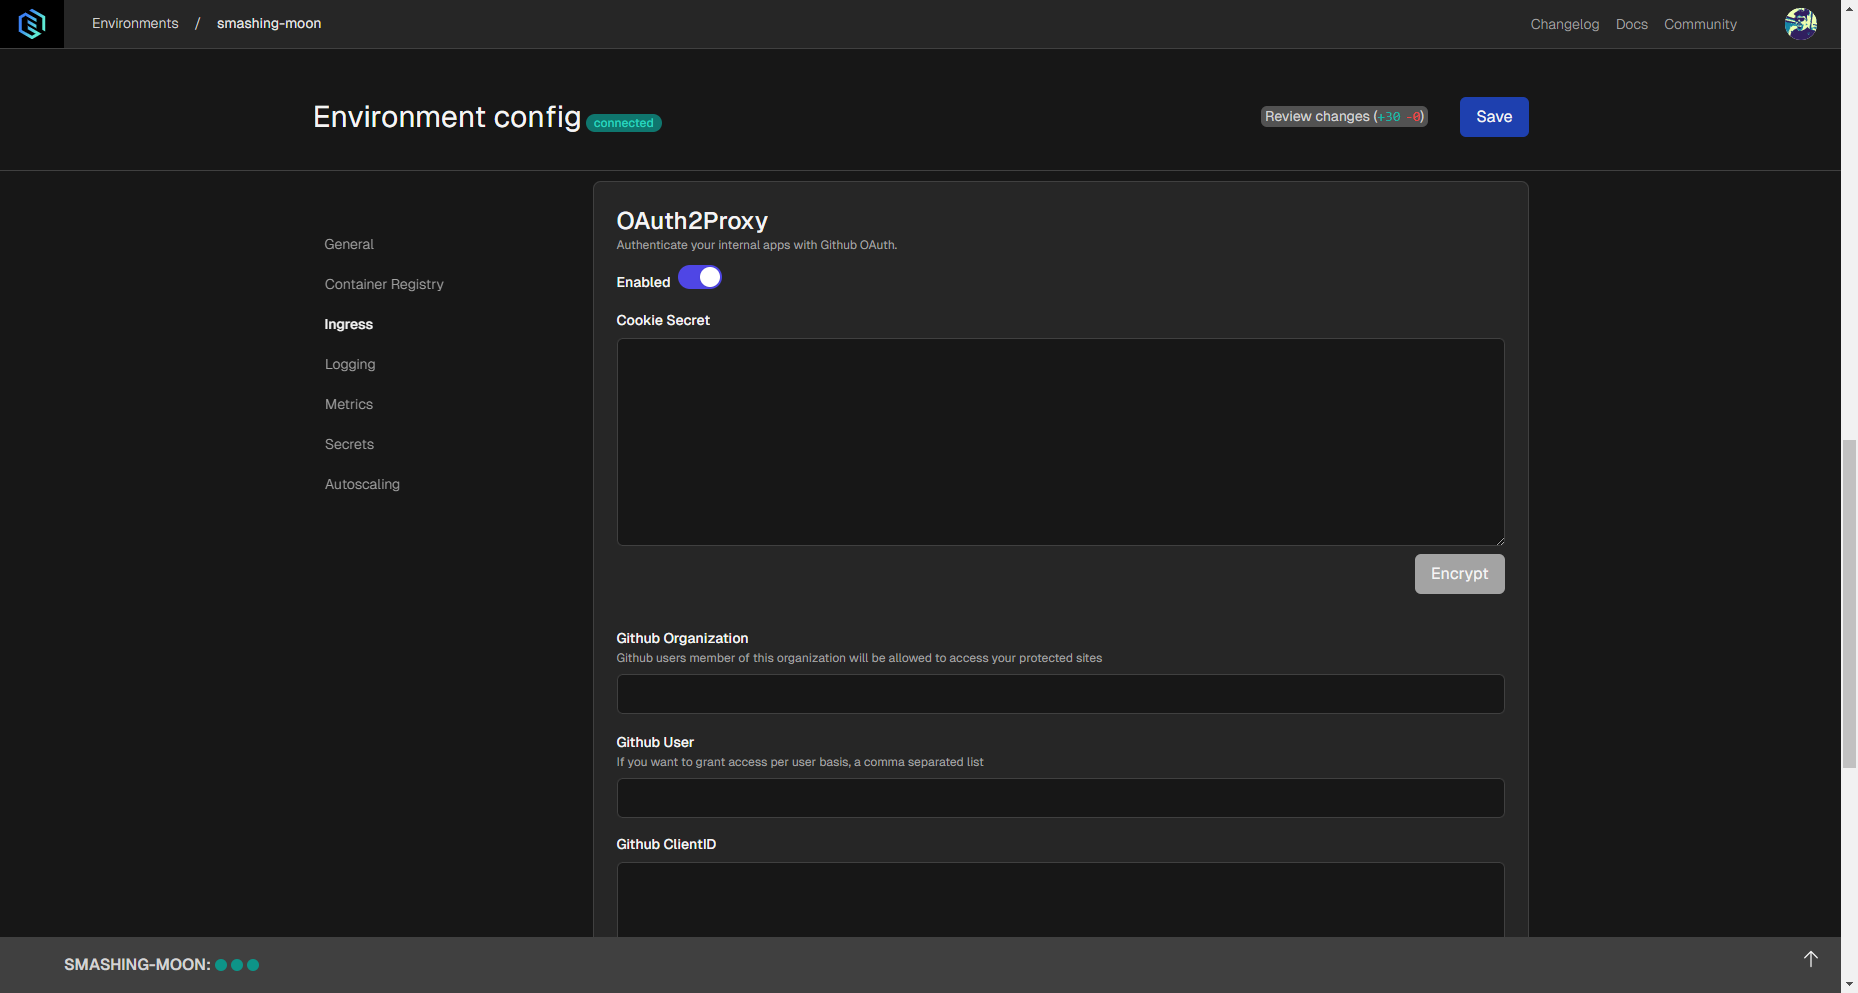
Navigate to Ingress settings of the deployment settings. Enable OAuth2Proxy and enter the corresponding variables in the following fields:
- Cookie Secret: This is a 32 characters long string you can generate with
openssl rand -hex 16in a shell that you use. - GitHub Organization and/or GitHub User: Use these if you’d like to restrict access to an application based on organization(s) or user(s).
- Client ID: The client ID of the GitHub OAuth application you created.
- Client Secret: The client secret you generated when you created the GitHub OAuth application.
Try Gimlet for More Customization
If you'd like to give Gimlet a try, reach out to us on one of our social channels and we'll set you up.
You can connect any Kubernetes cluster to Gimlet, whether you are using the big cloud providers, or one of the small ones with considerably easier learning curve. Watch this space for Kubernetes hosting guides as the sole reason our company exists is to bring Kubernetes closer to everyone. It does not have to be difficult and overcomplicated anymore.
The upside of using Kubernetes is that you can host as many public or private apps as you'd like to. All of this comes without resource limitations compared to Streamlit Community Cloud's constraints.
You can connect new clusters for free for individual and non-profit use. For commercial use you can only connect new clusters with a Gimlet license. Our revised pricing policy is yet to be published, but it will follow Basecamp's ONCE philosophy: with one reasonable price you can cover your Streamlit deployment needs.